
E-121: DIY:Installing a Type-S Aspec rear lip on a base TL bumper.
 02-12-2009, 07:53 PM
#1
200,000 mile club
Thread Starter
Join Date: Jul 2007
Location: Charlotte, NC
Age: 48
Posts: 1,774
Likes: 0
Received 35 Likes
on
15 Posts
E-121: DIY:Installing a Type-S Aspec rear lip on a base TL bumper.
Hey guys, as some of you know, I was able to get my hands on a type-s exhaust. I knew that I needed to either get a new bumper or replace my Aspec skirt with a Type-S one. I chose to replace the skirt.
I know some guys on here love the look of the Type-S skirt over the A-spec skirt so here is what needs to be done if you want to mount it on your base bumper.
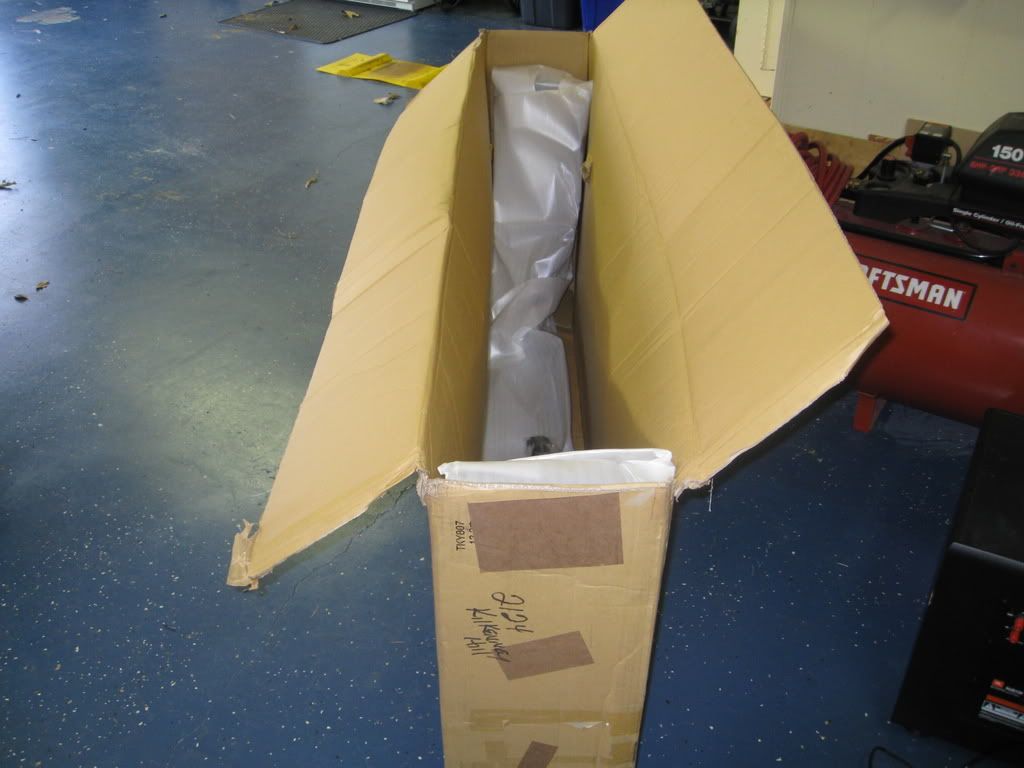
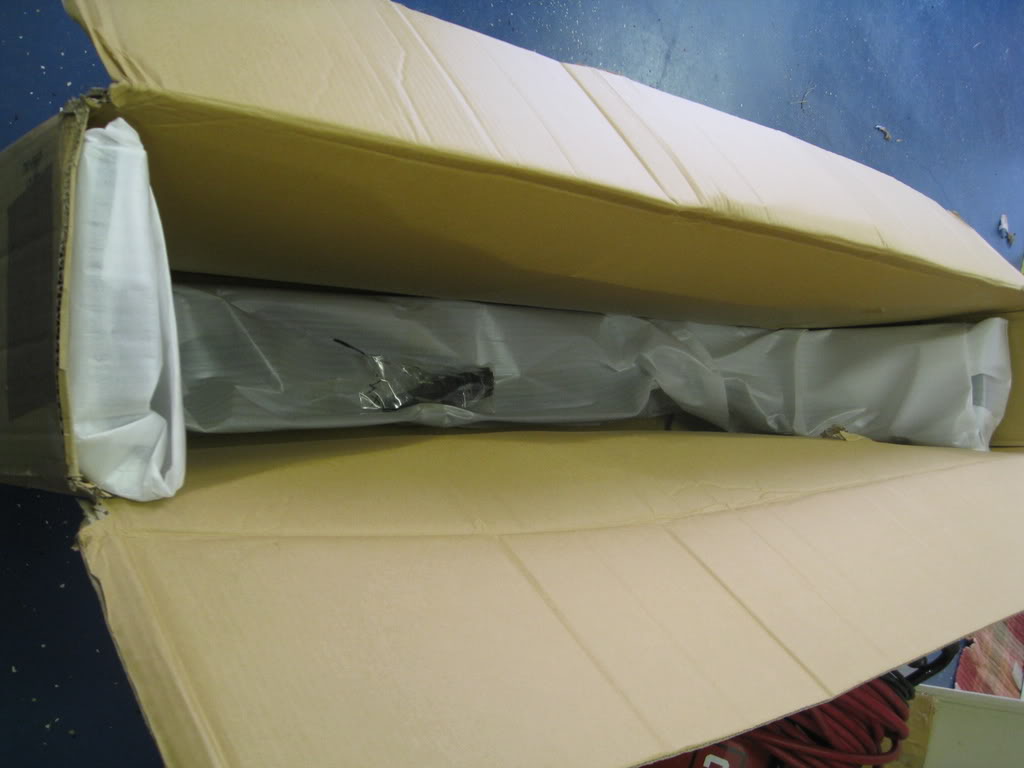
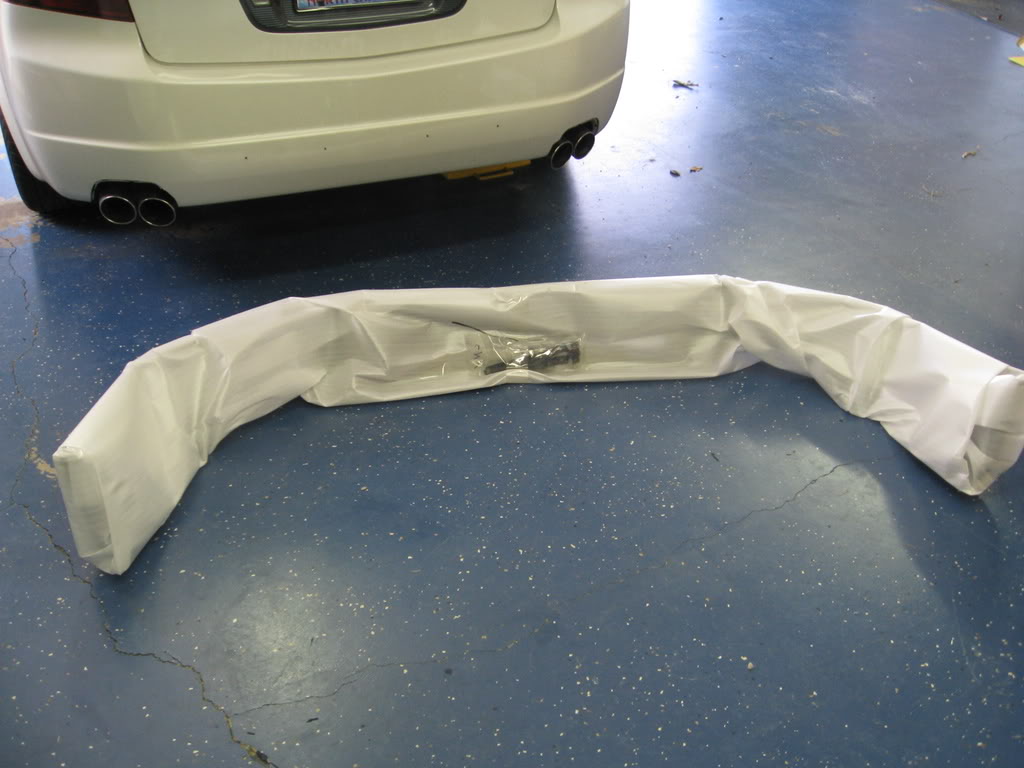
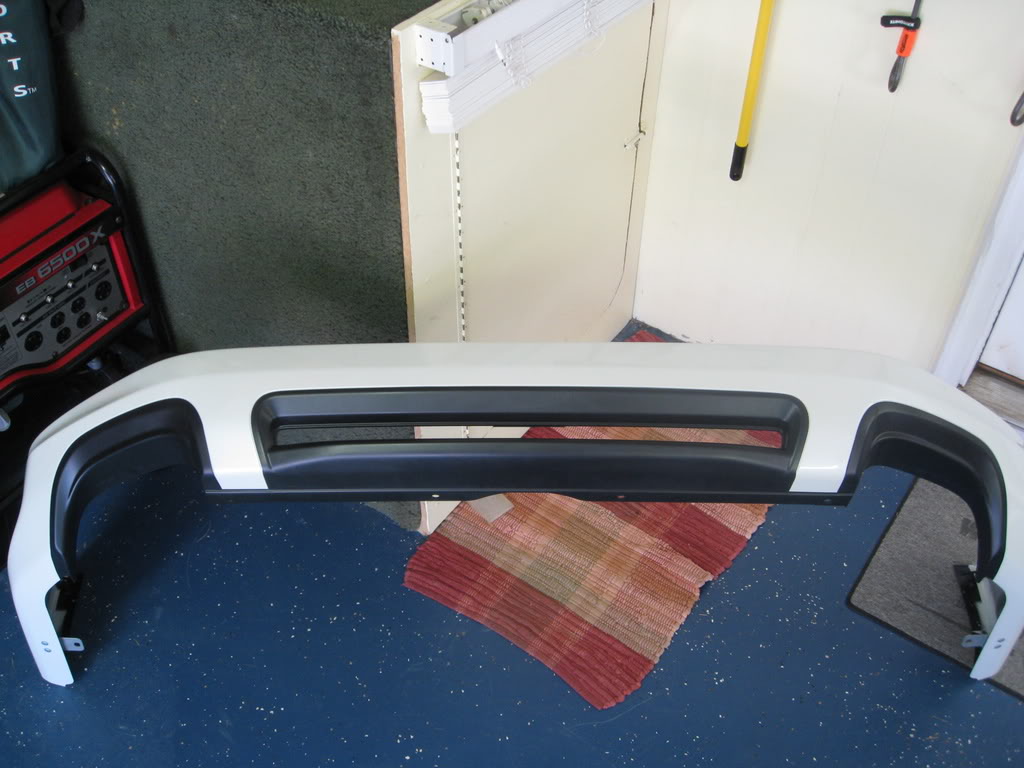
1 Order your skirt. Choose who you would like to go with but I got mine from a fellow vendor hondaacuraworld.com Tim is a great guy and I was able to get it for 283 shipped. Yes that is painted as I know a lot of you ask.
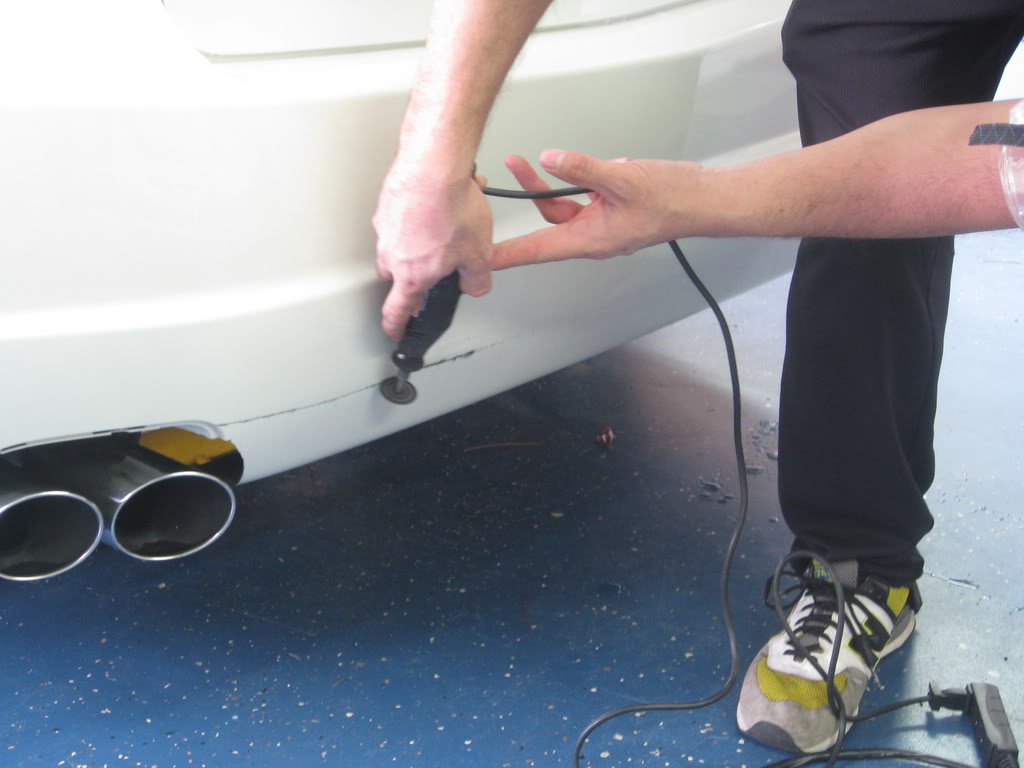
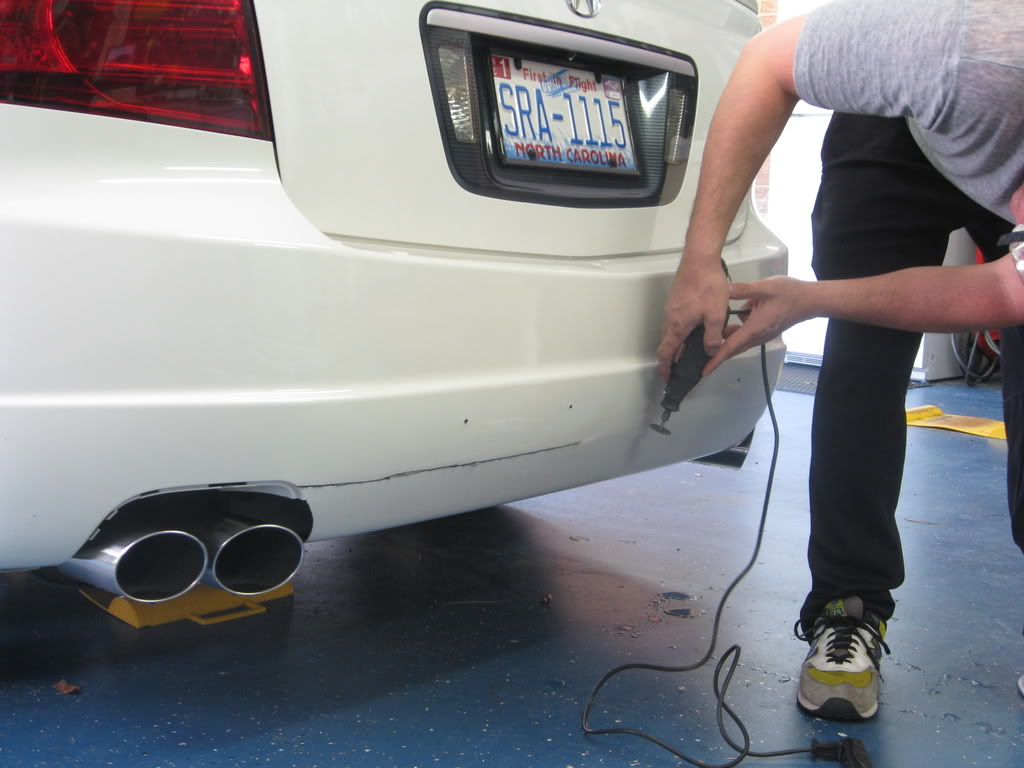
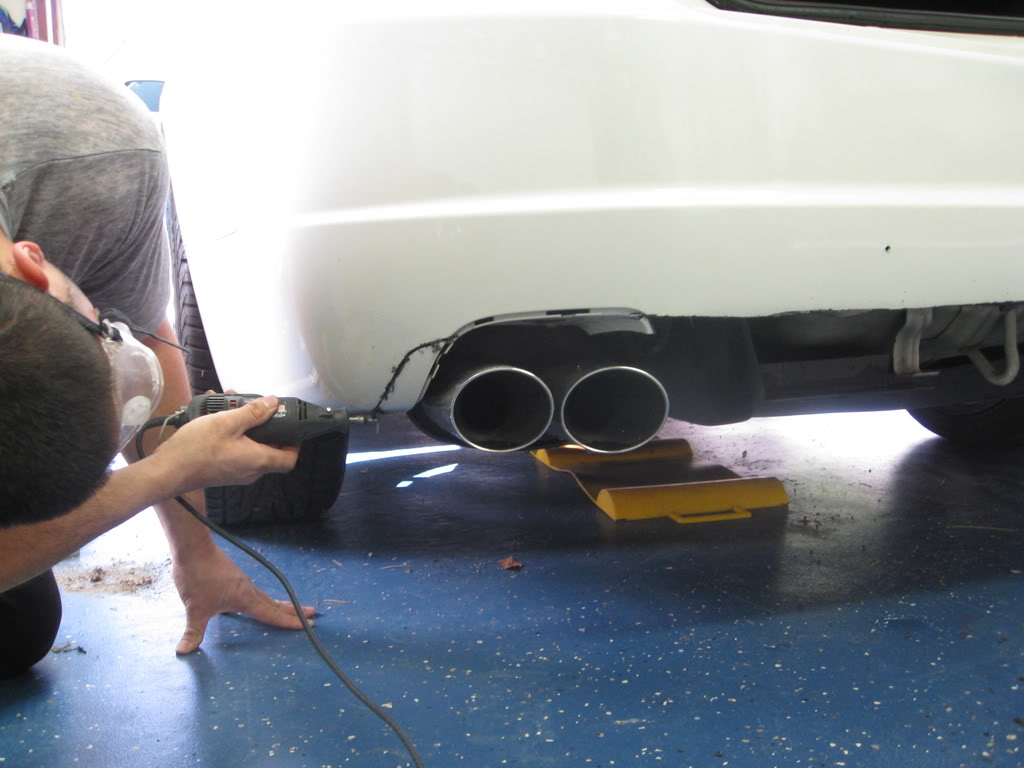
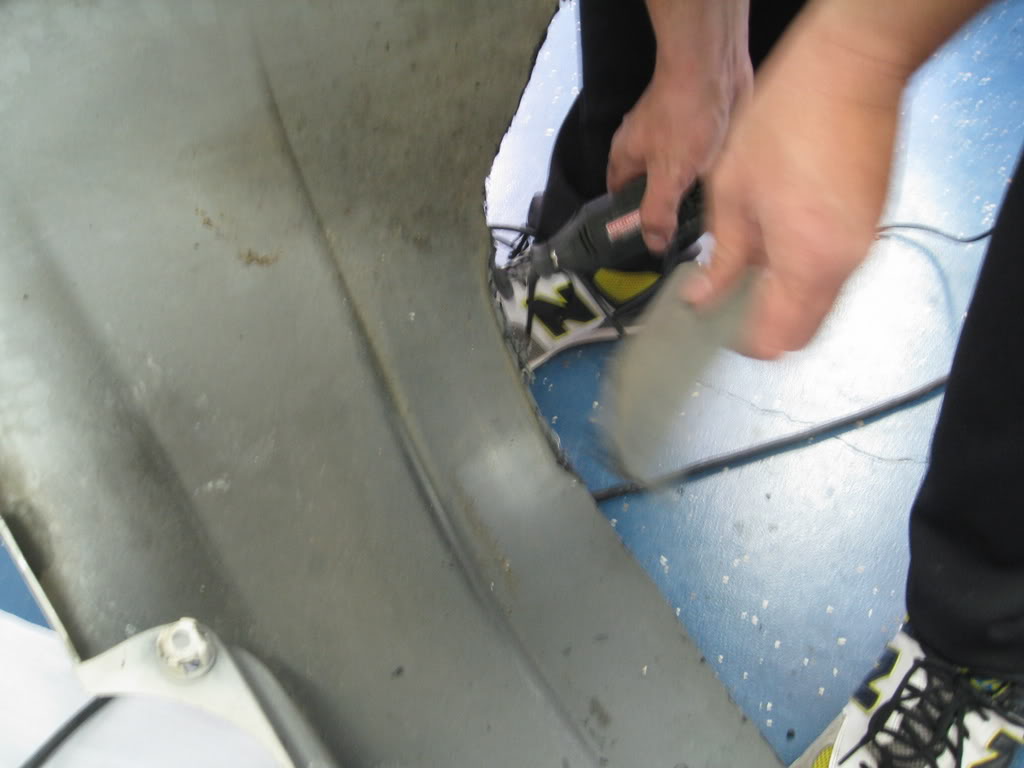
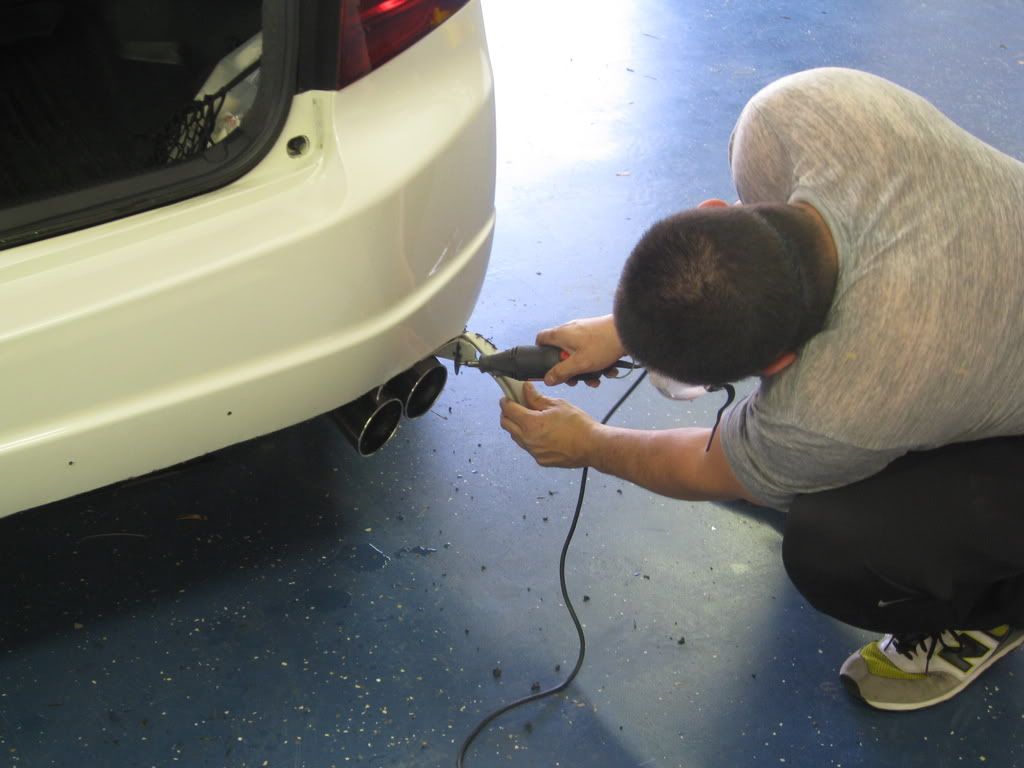
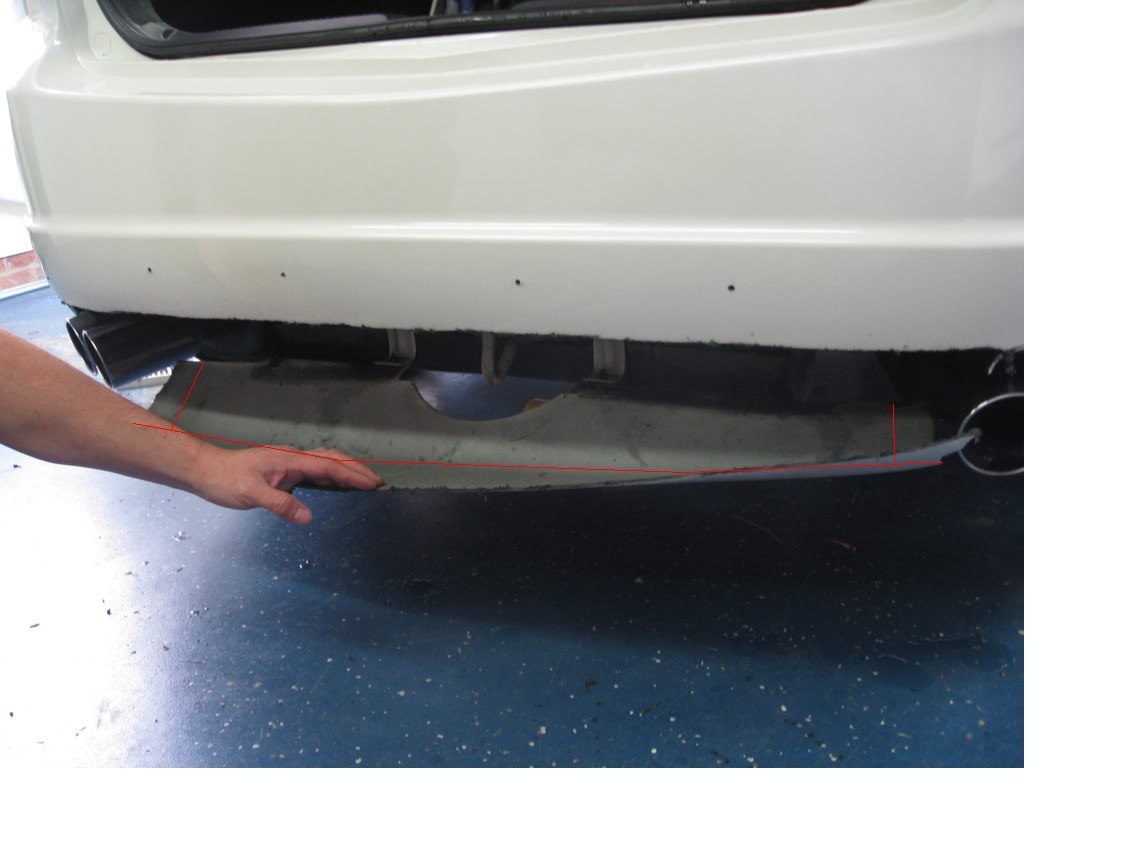
Next you will have to use a Dremil tool with a cutting wheel or some other method of cutting your bumper up. This part is fun. Eric was nice enough to come over and cut the bumper for me since he is the man and has already done this.
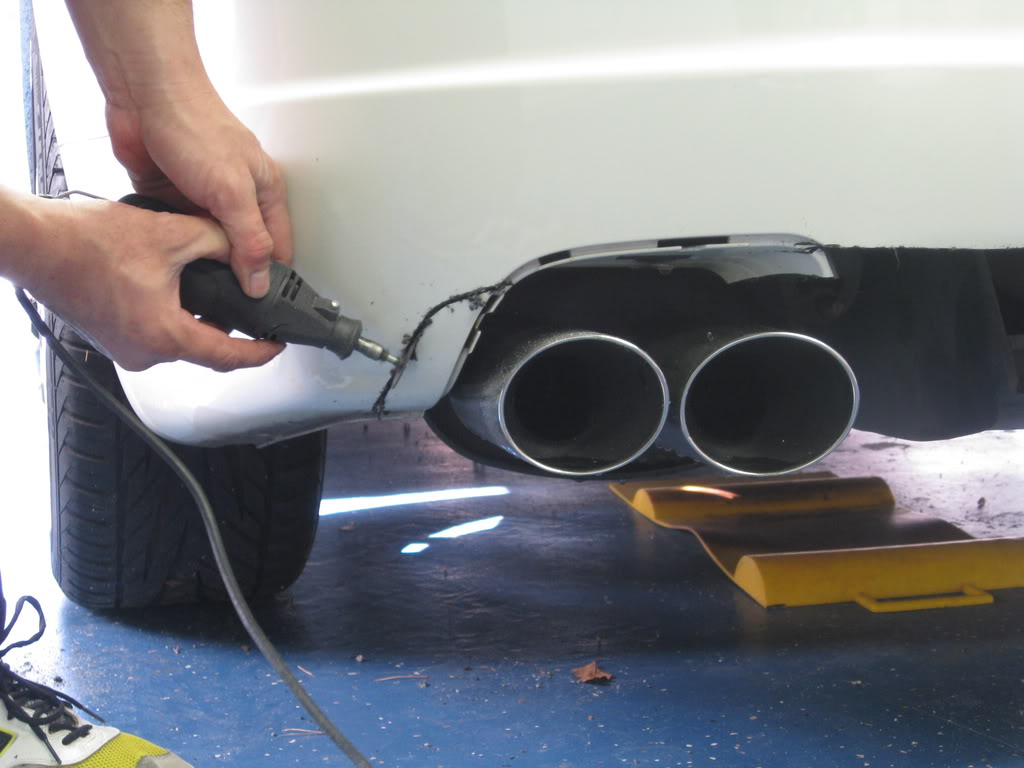
The line is required to clear the black opening in the middle of the bumper
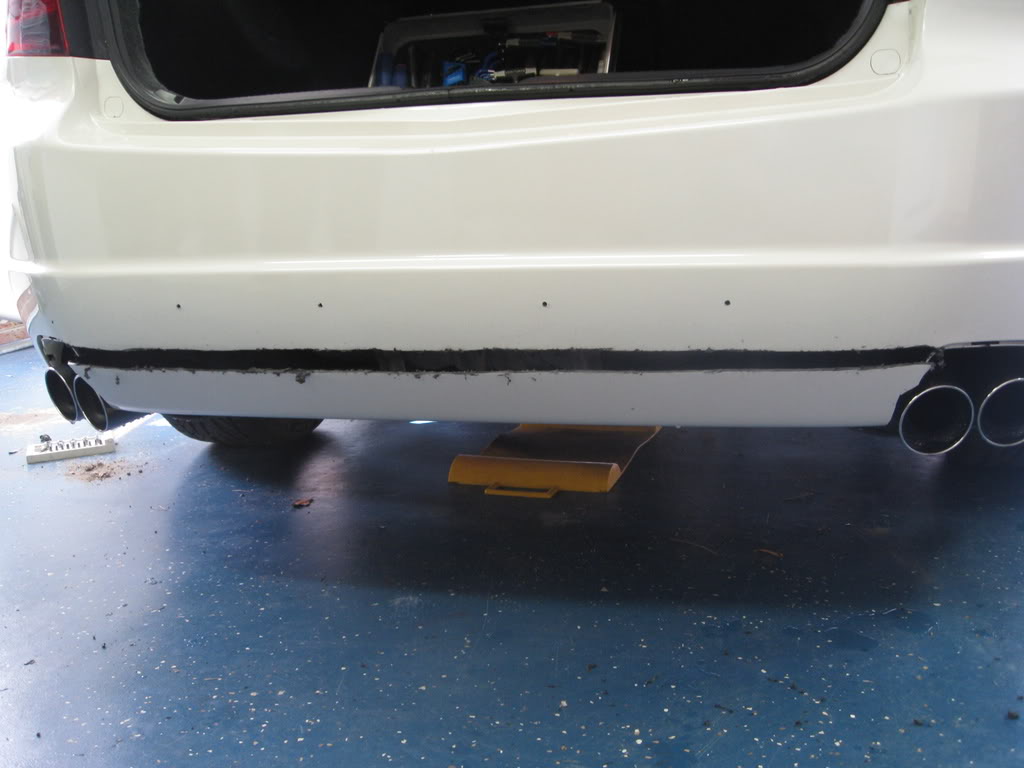
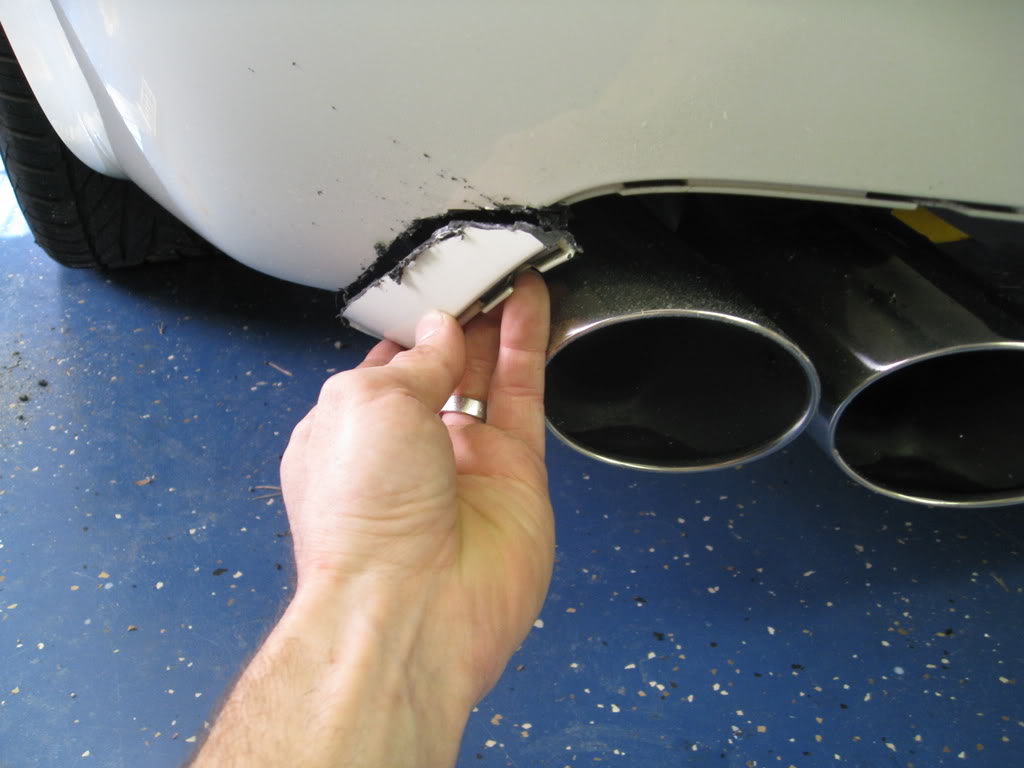
Eric is pulling the excess away to show what you should have.
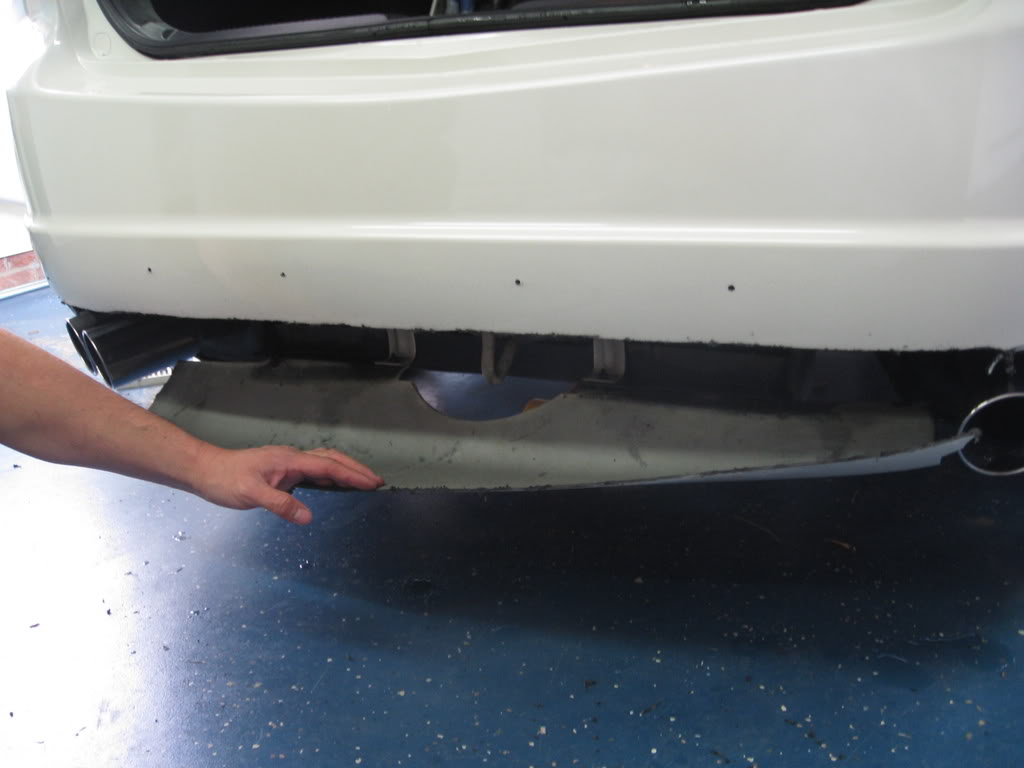
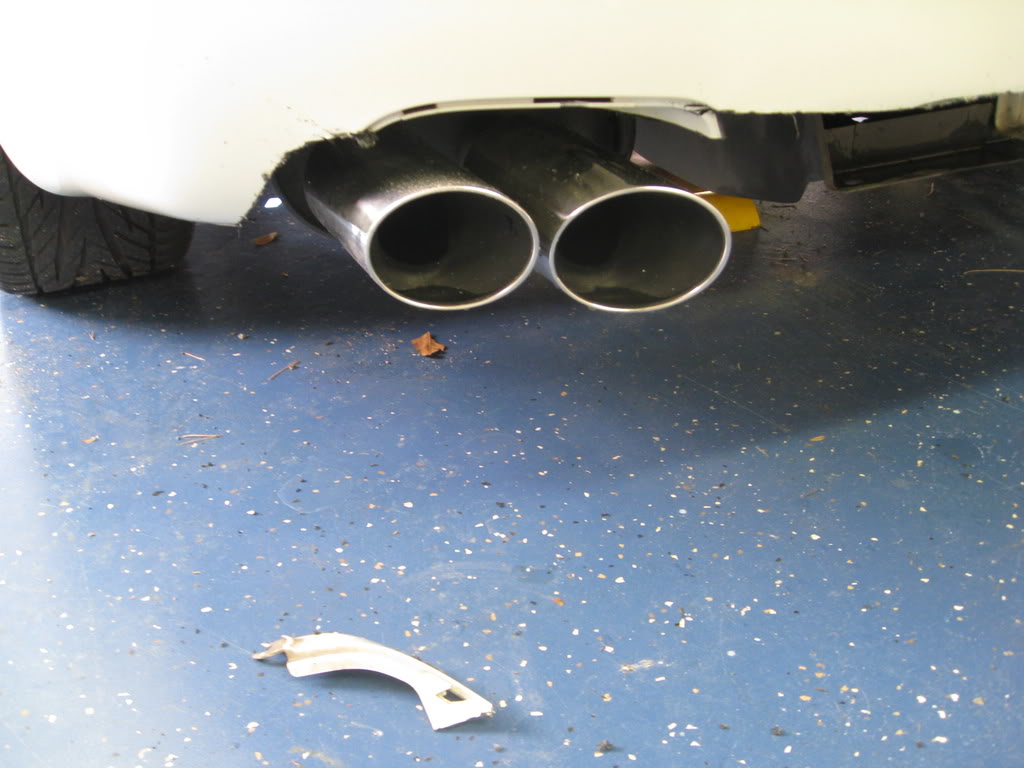
Take the four bottom body clips off the bottom and discard this piece.
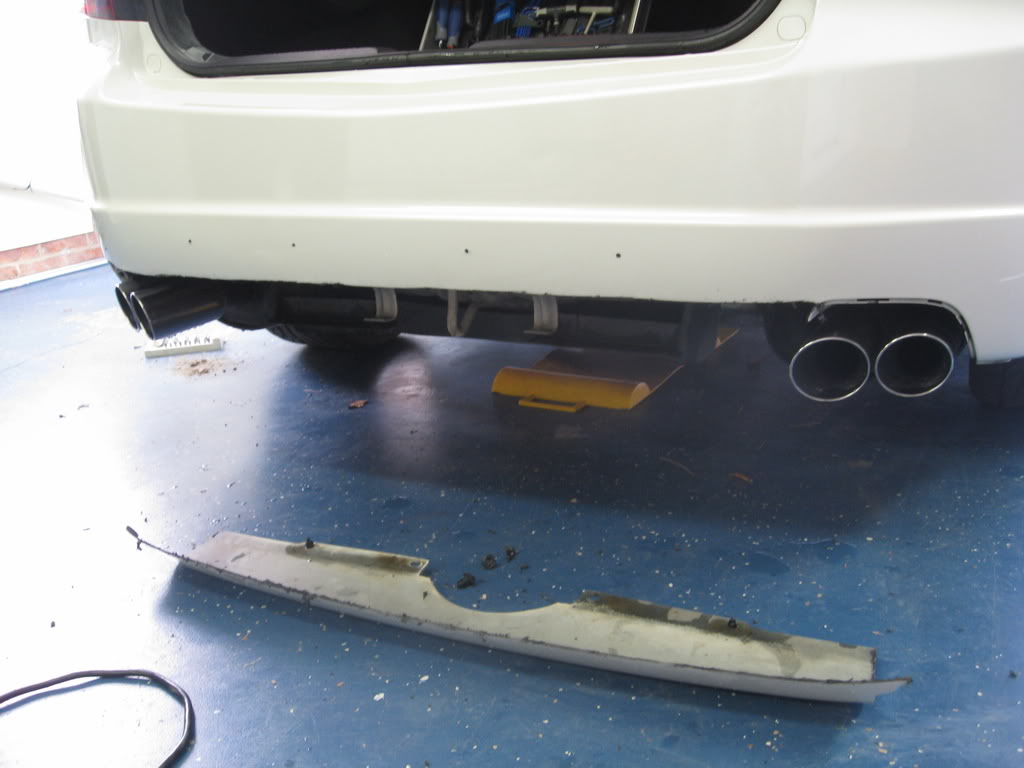
Next you are going to want to cut about 1 1/2 inches on the corners to allow the wider exhaust ports.
It should look like this when complete
Here is the line on the passenger side.
Next you want to remove your bumper from the car.
Three phillips head screws in the wheel well on each side and two 10 mm nuts one on each corner where the trunk meets the bumper.
Pull away the corners to remove one side at a time.
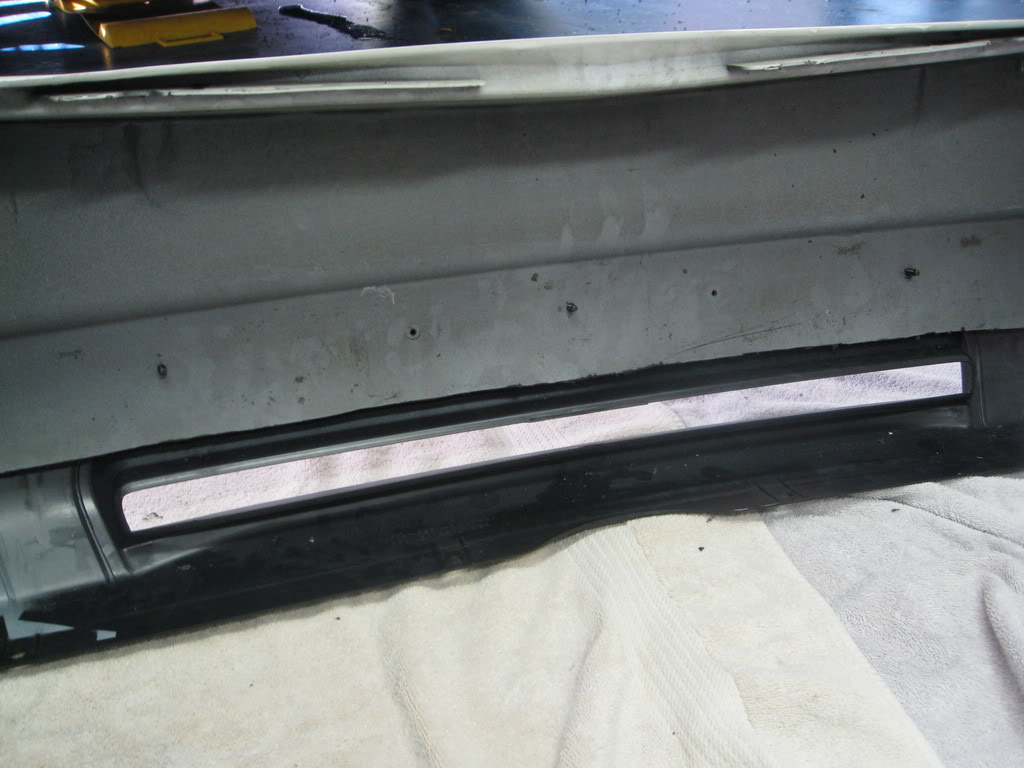
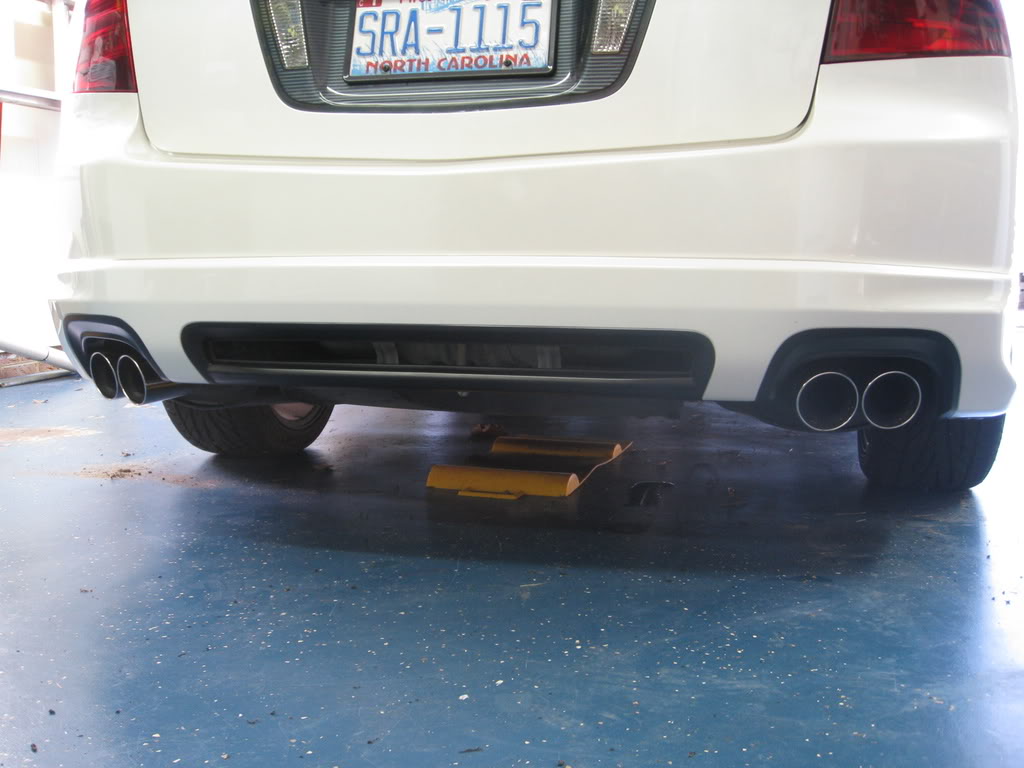
Next you want to trim all the excess plastic that is around the exhaust outlets so you have one long line across the back of the lower bumper.
The Type-S lip is different from your base Aspec lip in regards to it's mounting locations. Acura got smarter and changed how the piece is mounted.
Along the ends close to the wheel well you will see one plastic strap one on each side of the lip.
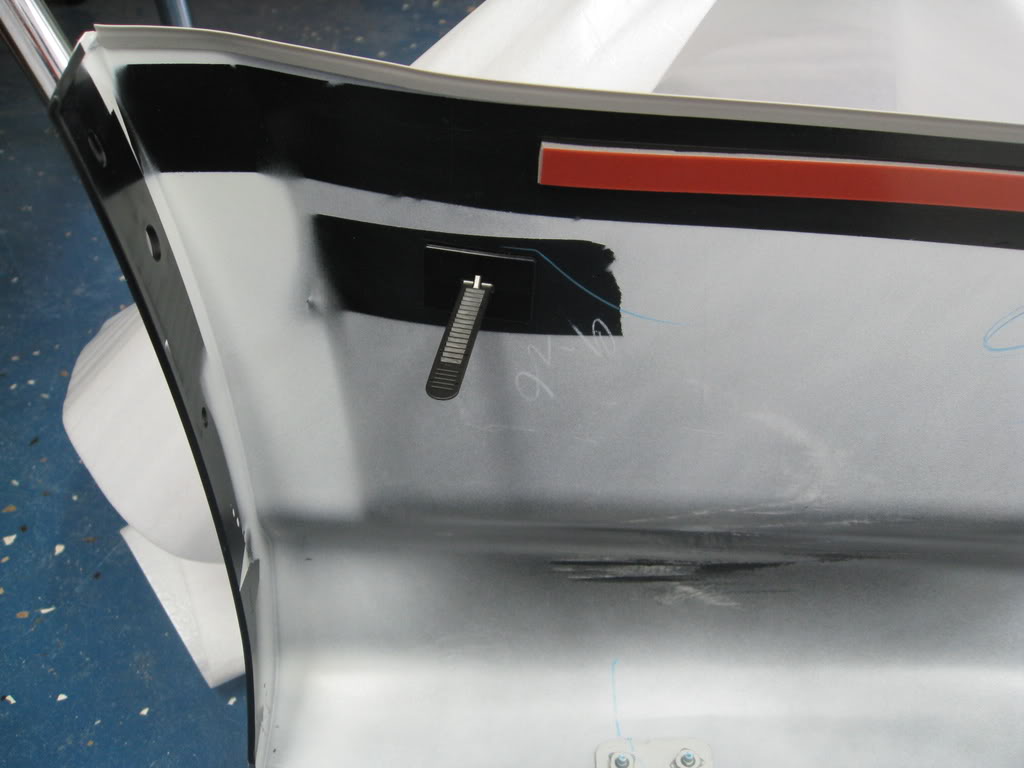
This was a little tricky so what I did was, I measured approx 2.5 inches in from the end and two inches from the top and formed a slit in my bumper for the strap to go through..
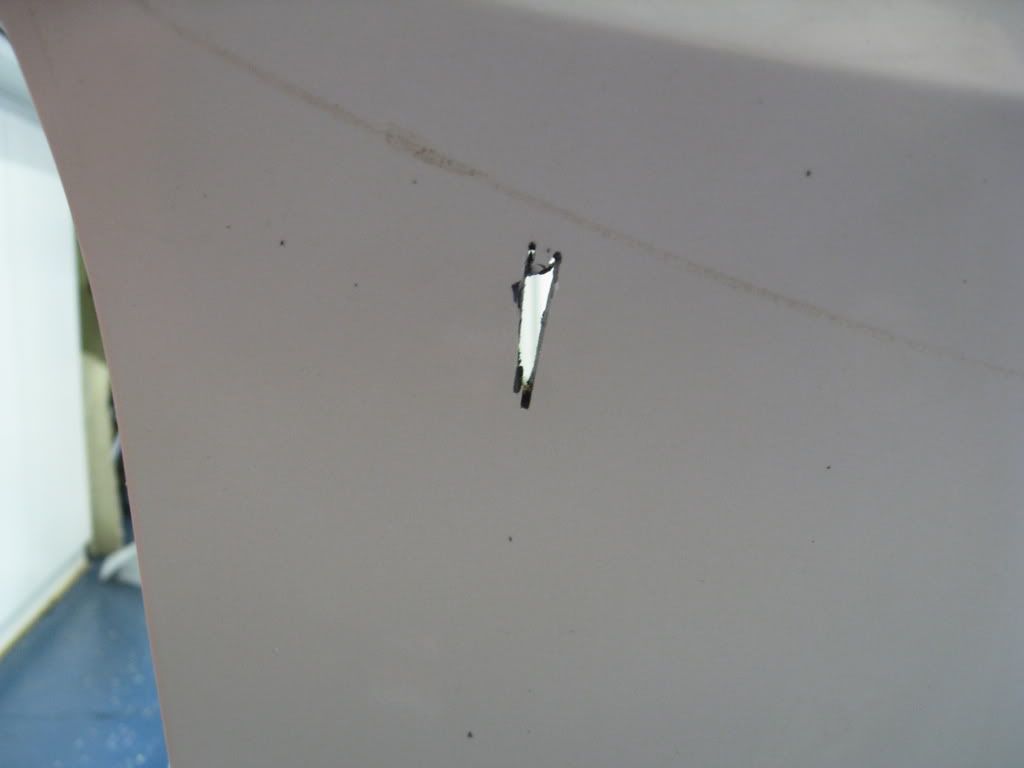
See if yours will fit like this....
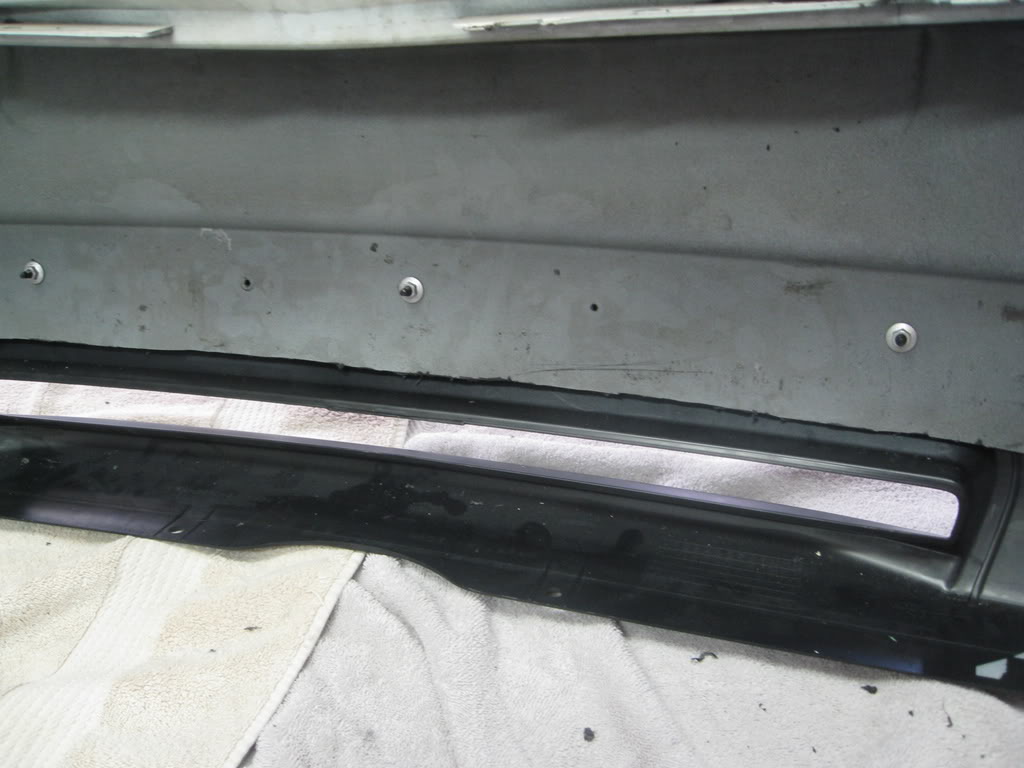
The base bumper has marks on the inside of the bumper for four holes to hold the A-spec skirt on. You need to drill a hole on the two holes on the outside edge. So the one all the way to the left and the one all the way to the right. The other two are not needed.
I measured 12 1/4 inches from the left or right of those holes and put my middle hole for the third bolt hole. After the third hole is drilled, you should be able to get all three in and see how your fit looks.

If all the holes are correct, it should look like this....
Check the skirt and bumper to make sure all points are lined up and all is flush.
Almost done, Remove the skirt and remove all the tape and attach the skirt to the bumper and screw the three 10 mm nuts on.
Next put the bumper back onto the car.
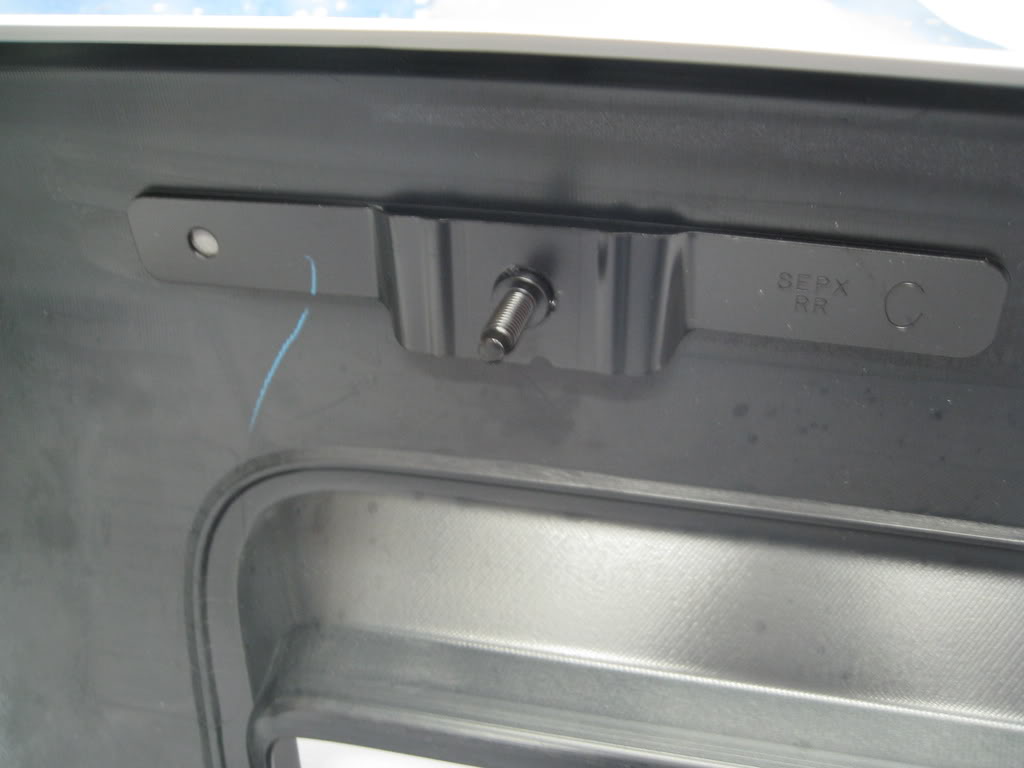
You are going to need to mount the black brackets into the rear fender well to keep the lip together. You have two phillips head screws that need to be screwed into the existing holes on the bumper with the bracket in place..
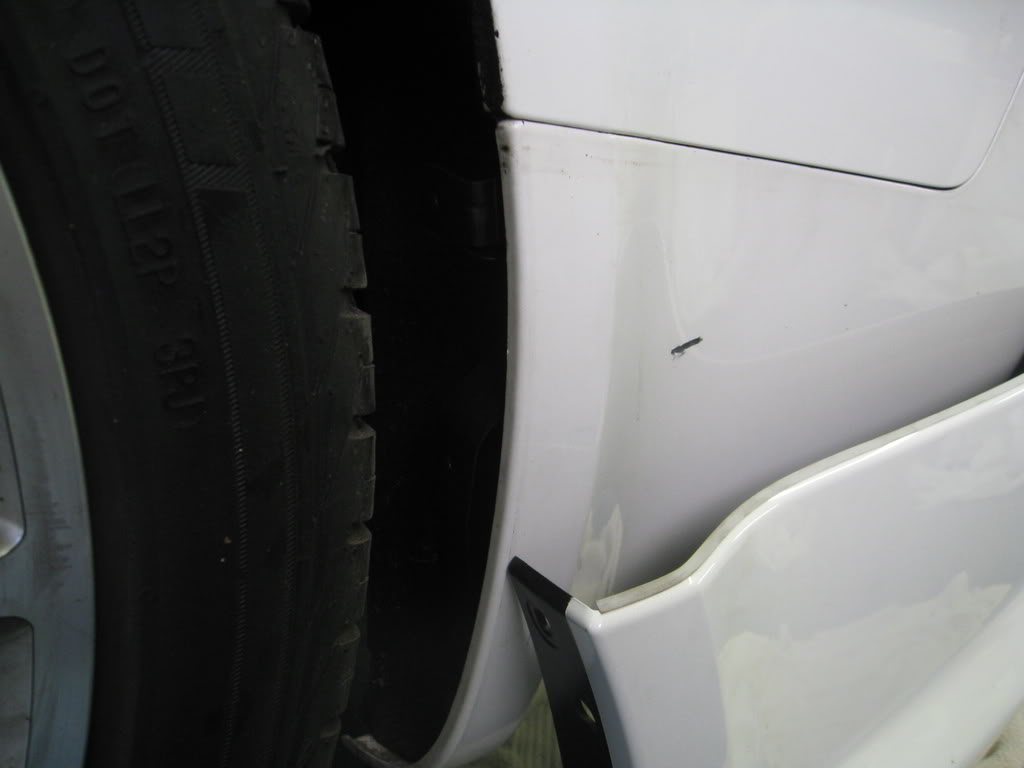
Then put the two phillips head screws that were supplied with your lip into the bracket to hold the lip on.
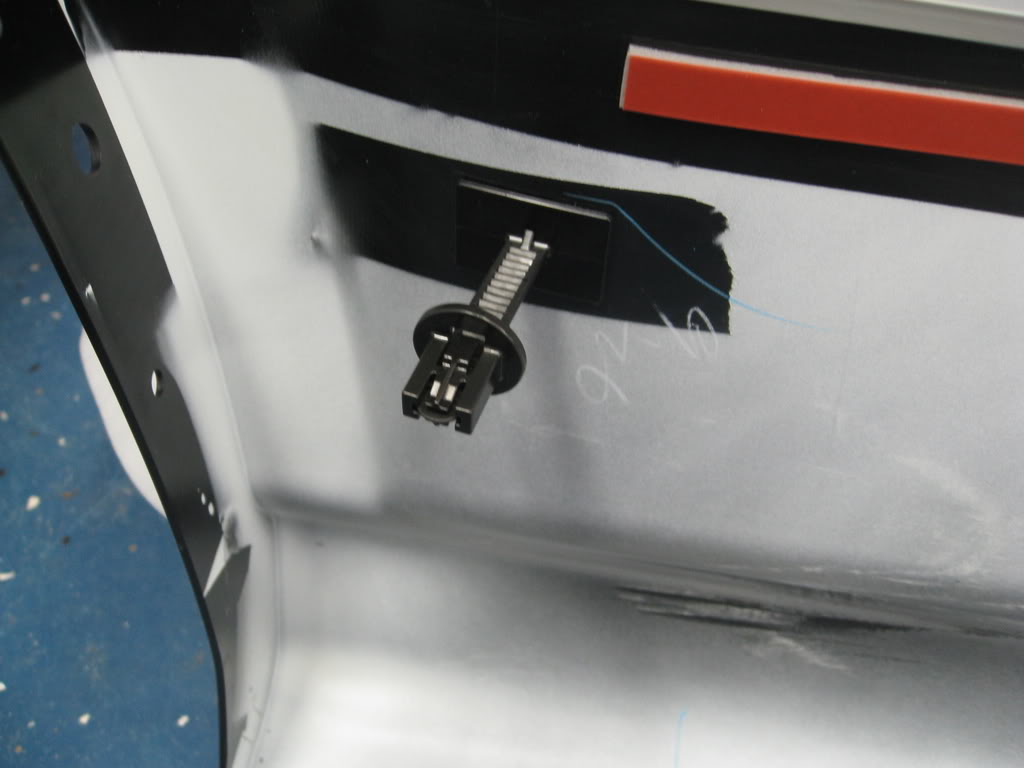
Reach under the car and attach this removable clip on each side to hold the side of the skirt in place.
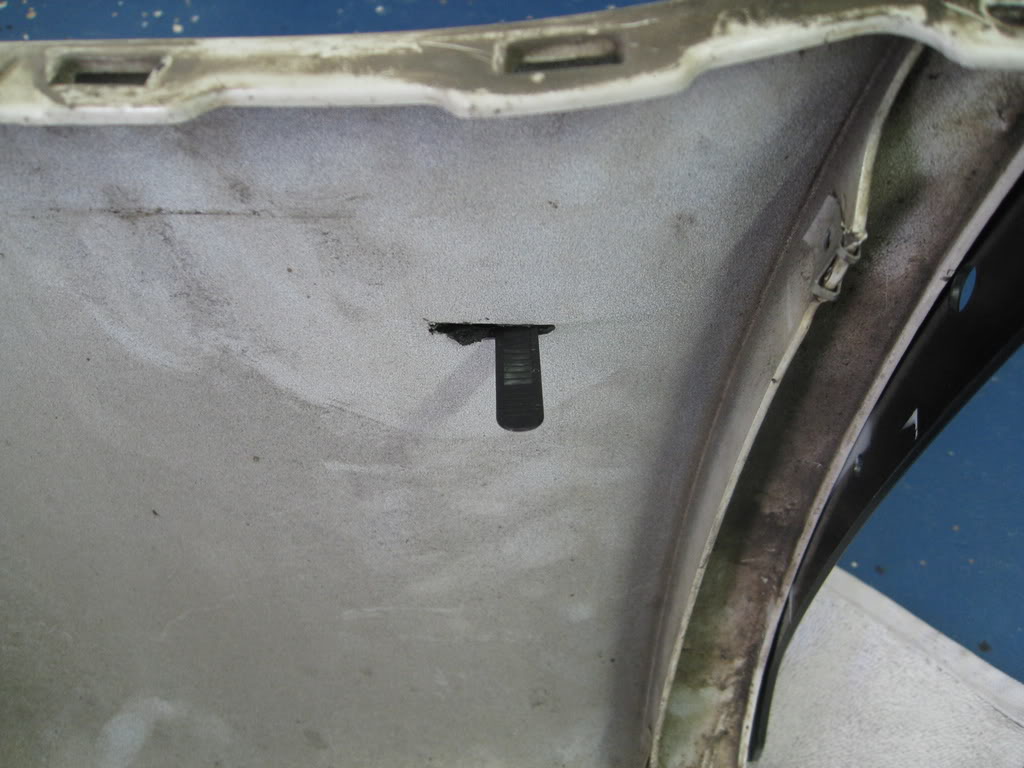
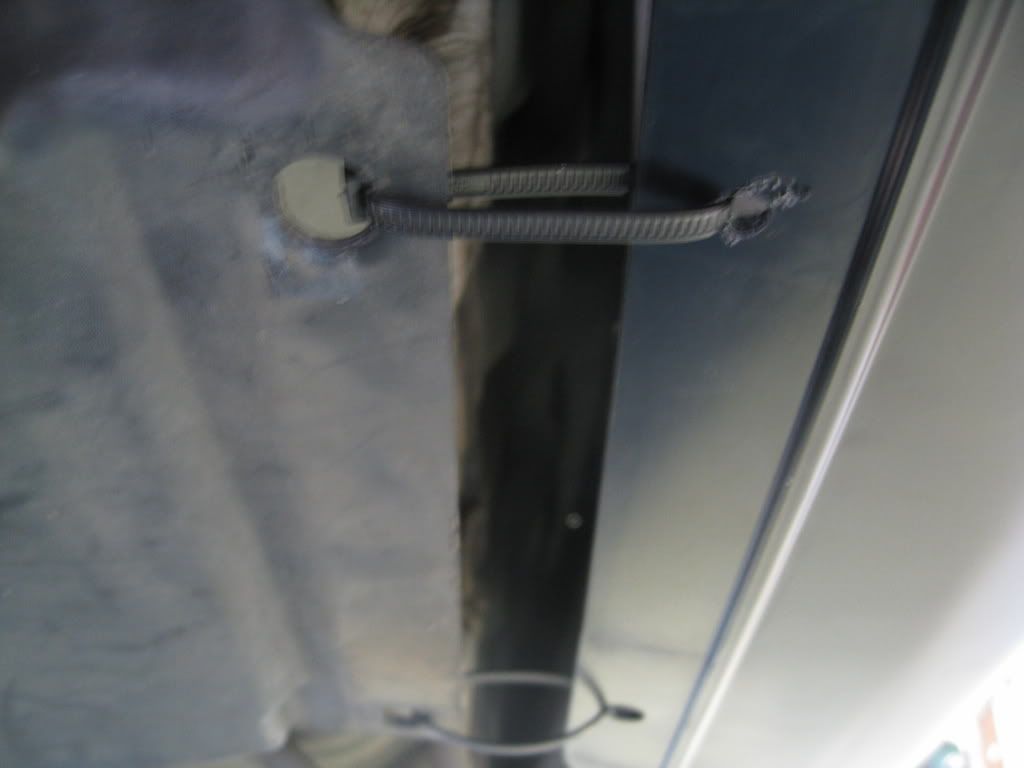
The strap.....
The strap with the removable clip that you want to click in place as far as you can.
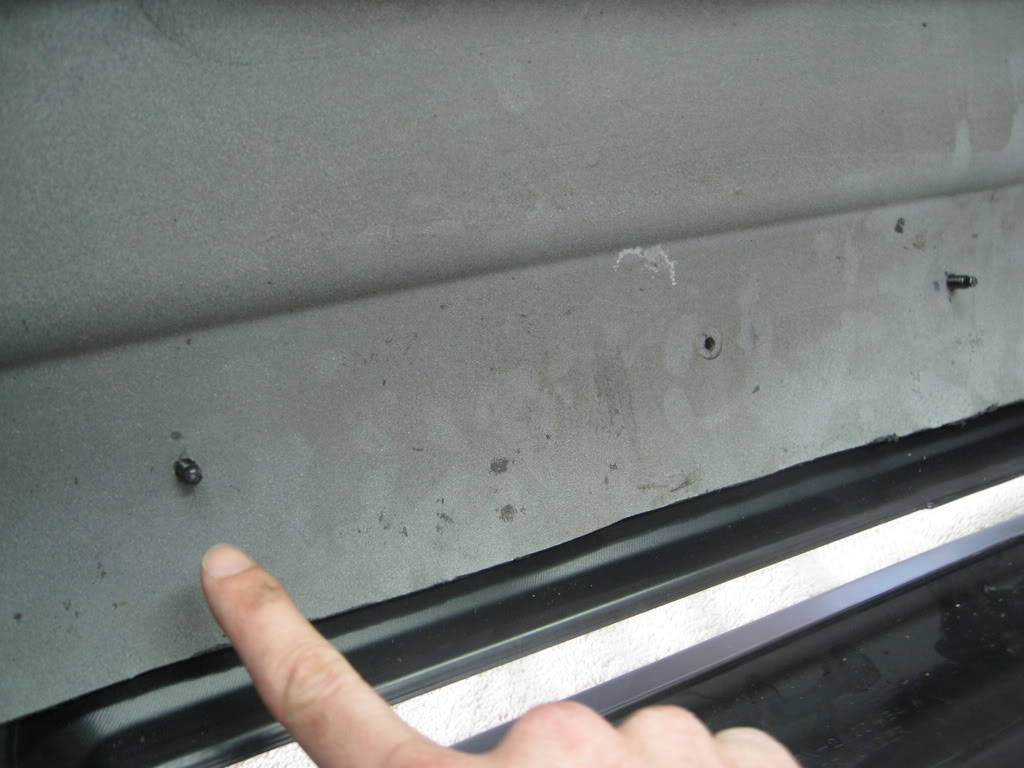
Since we cut the bottom off, you can't clip the lower body holes into anything. I used zip ties to connect them and keep them in place.
Notice the hole closest to me, I drilled to attach the under body plastic together. The farthest one was already in place.
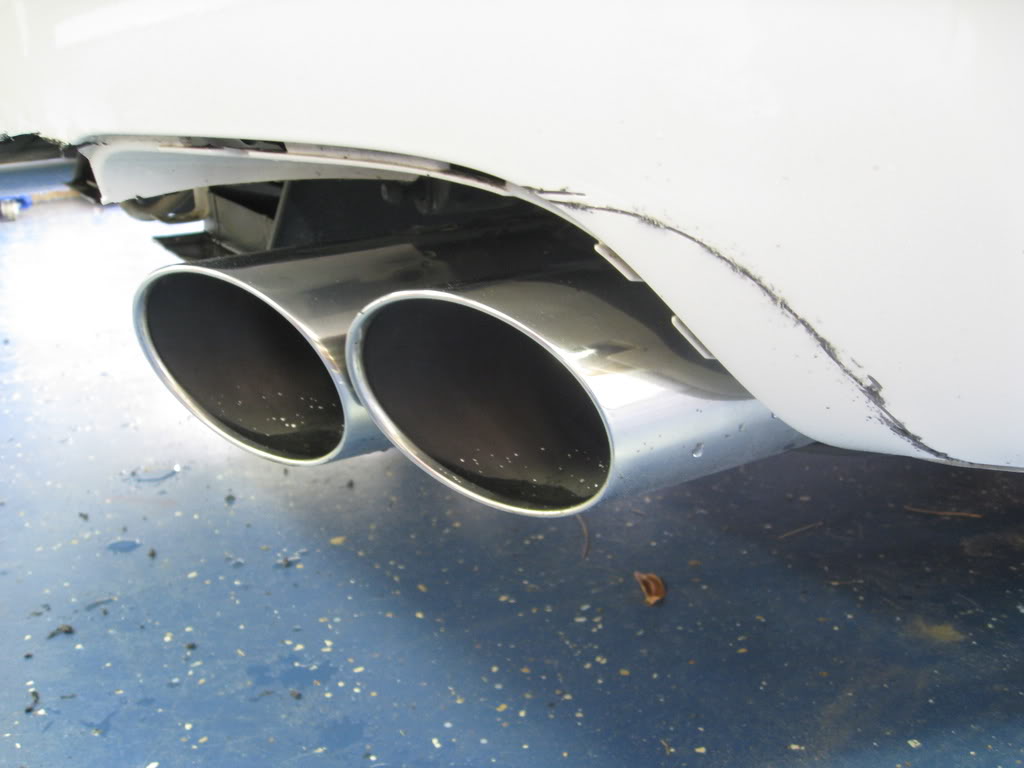
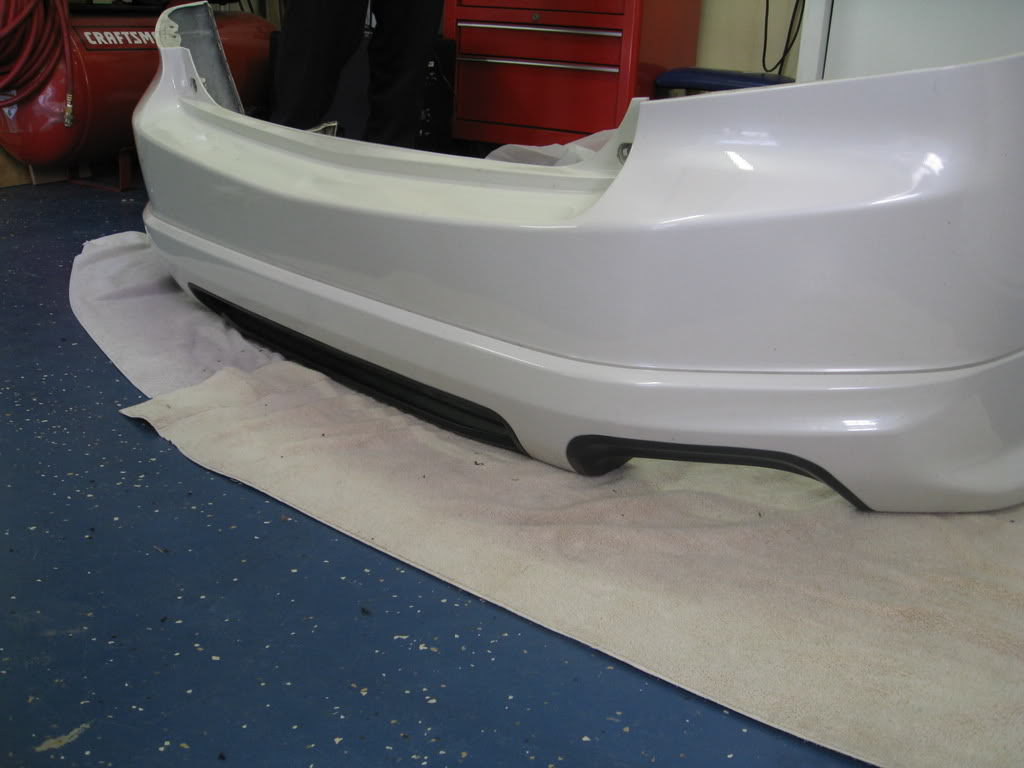
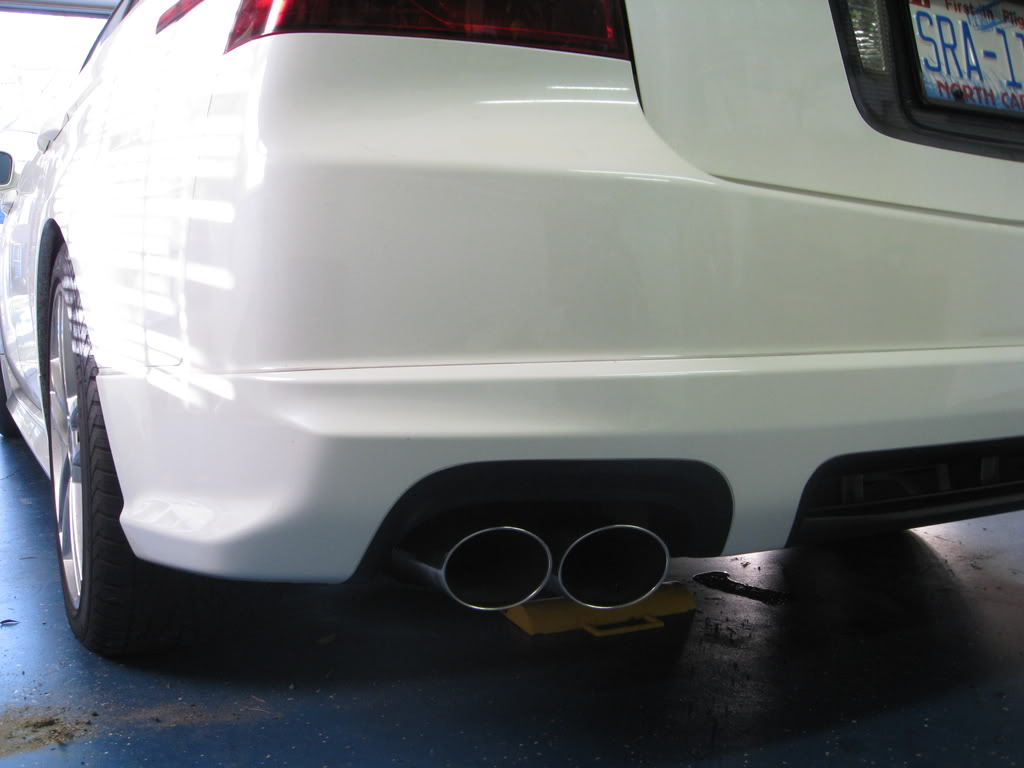
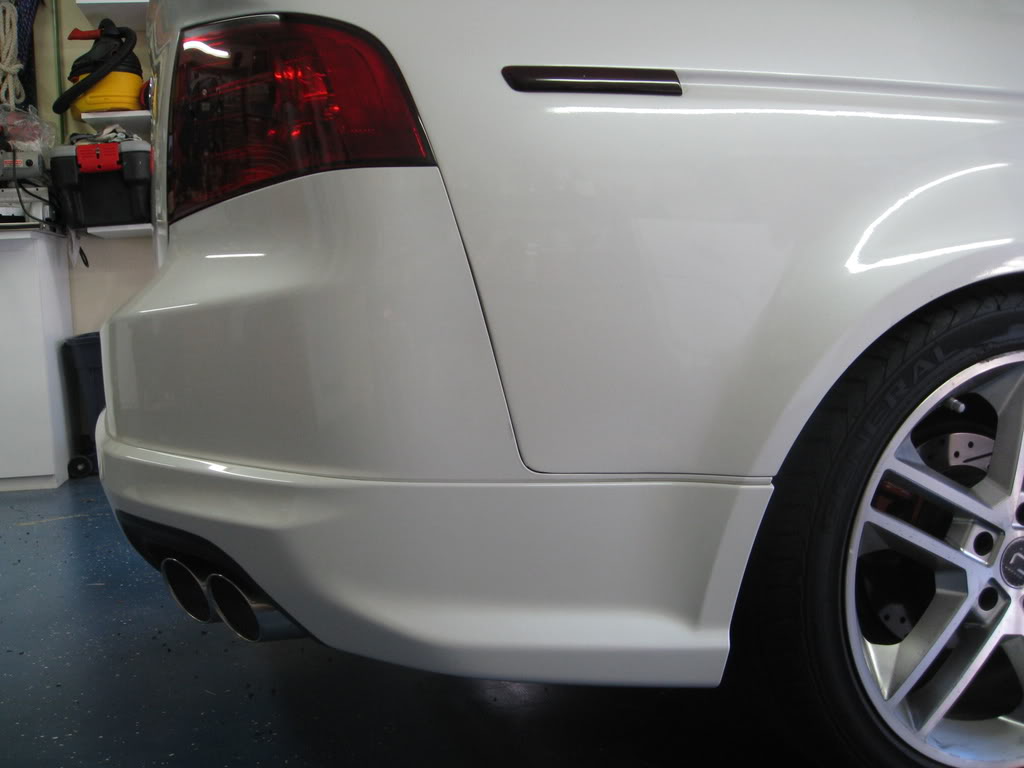
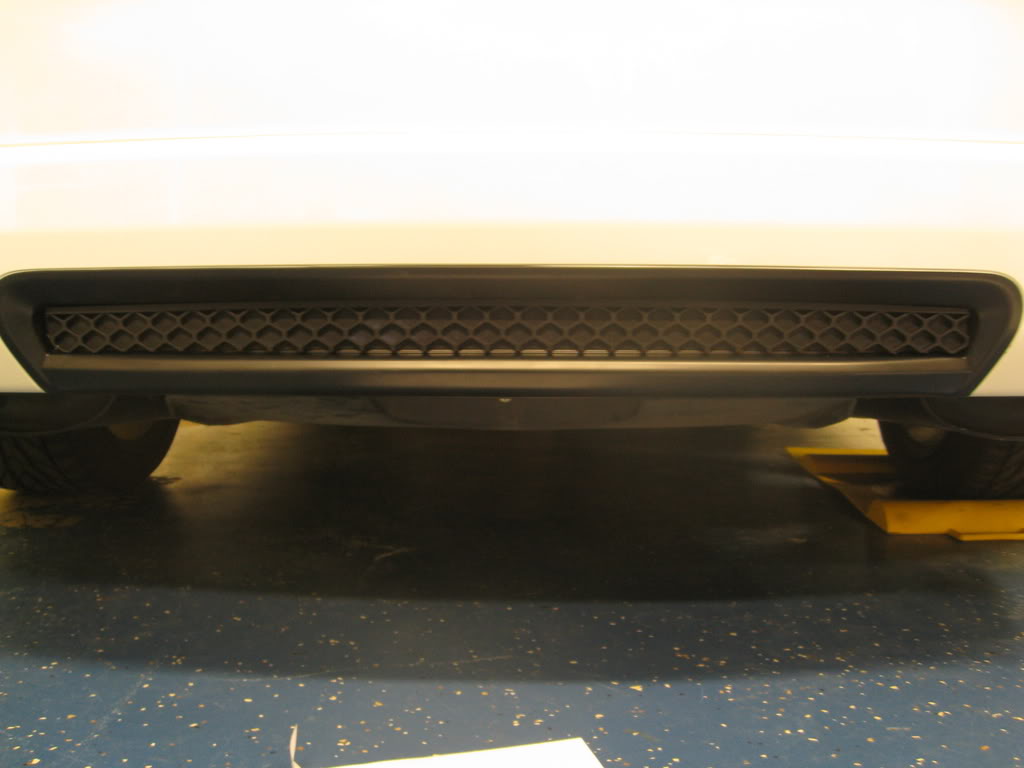
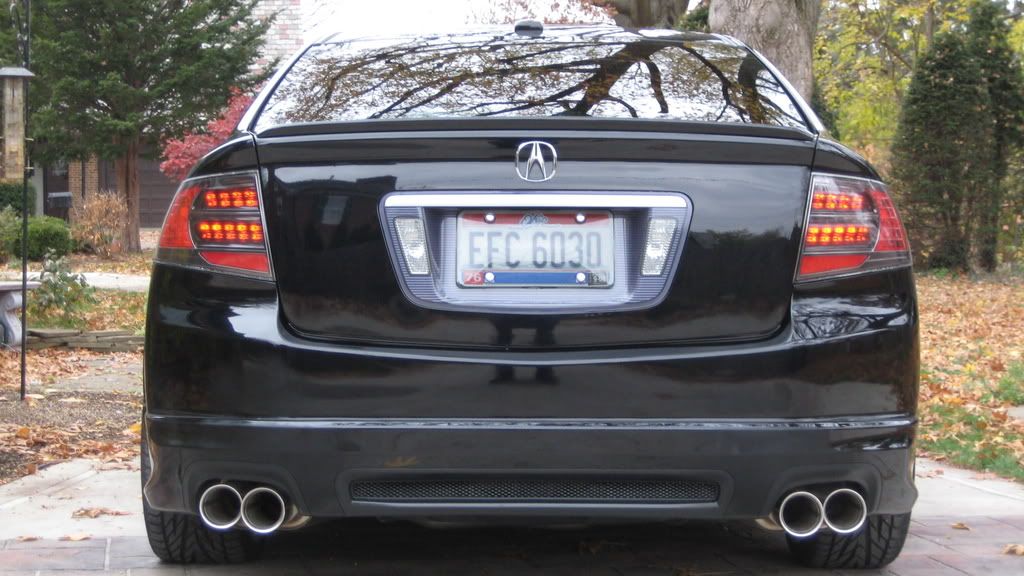
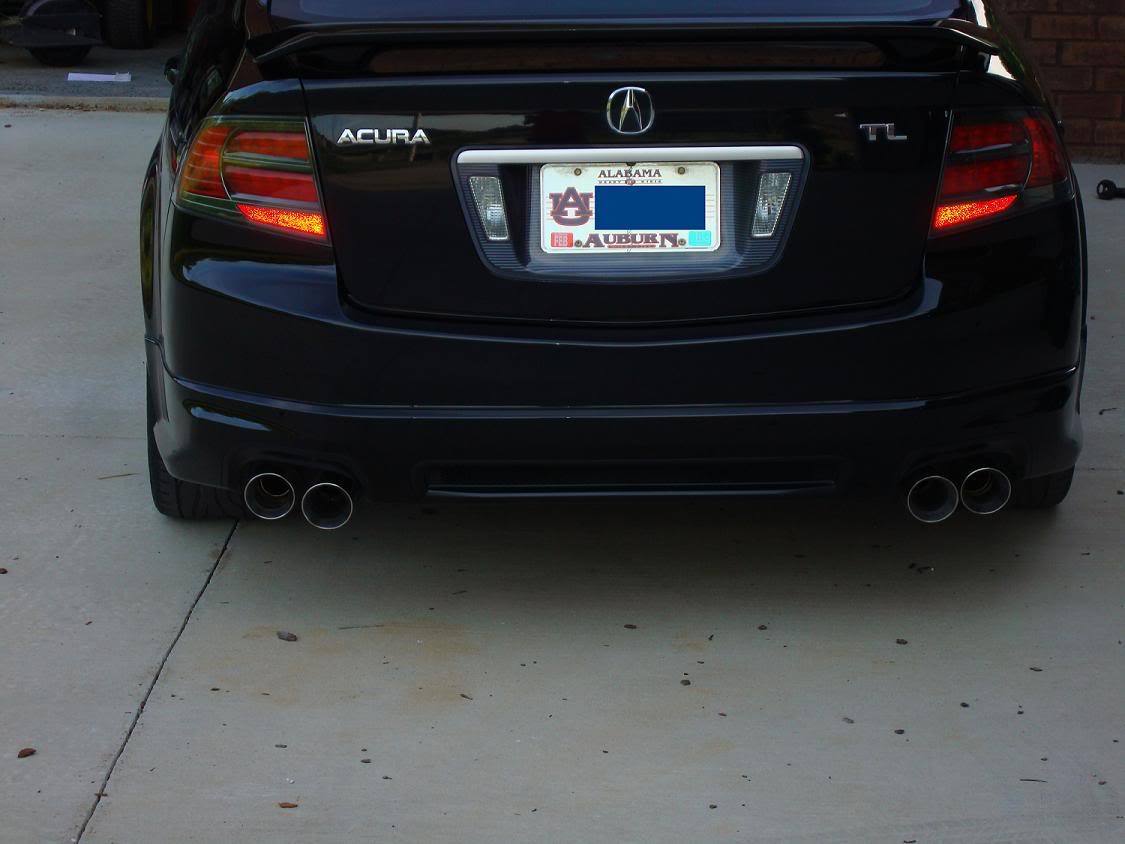
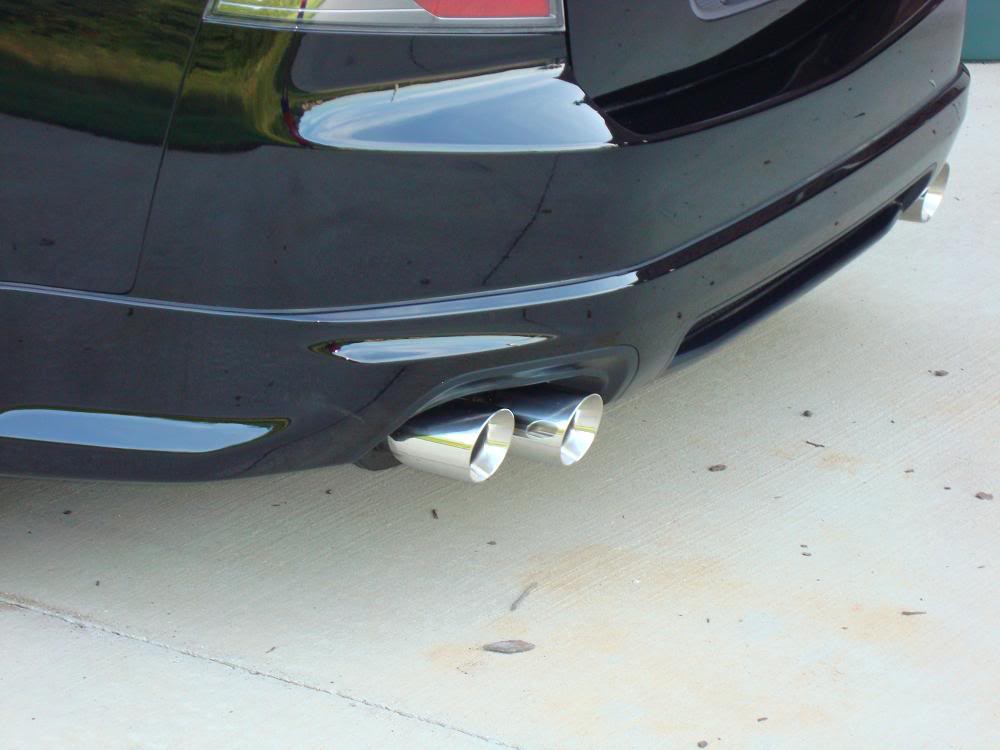
So after all of that work, here is the final look. I love it and it really makes the car that much better looking.
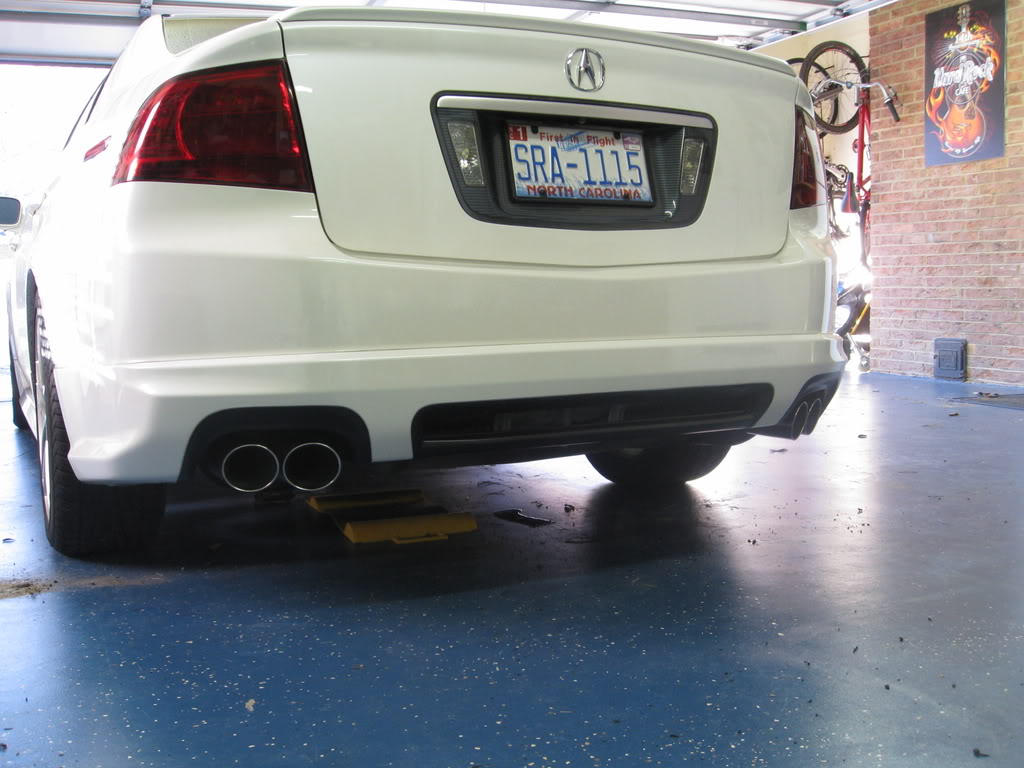
Special Thanks to Eric Badis for the cutting support and helping me out with this fun mod. You da man son!!!!
Eric hard at work....
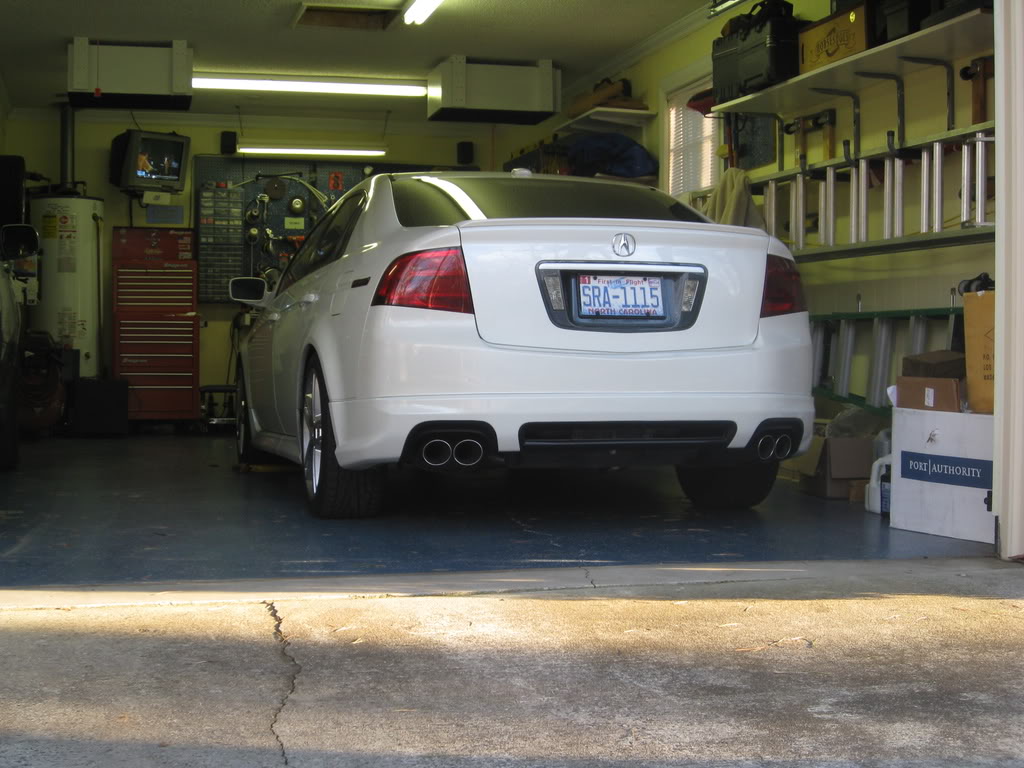
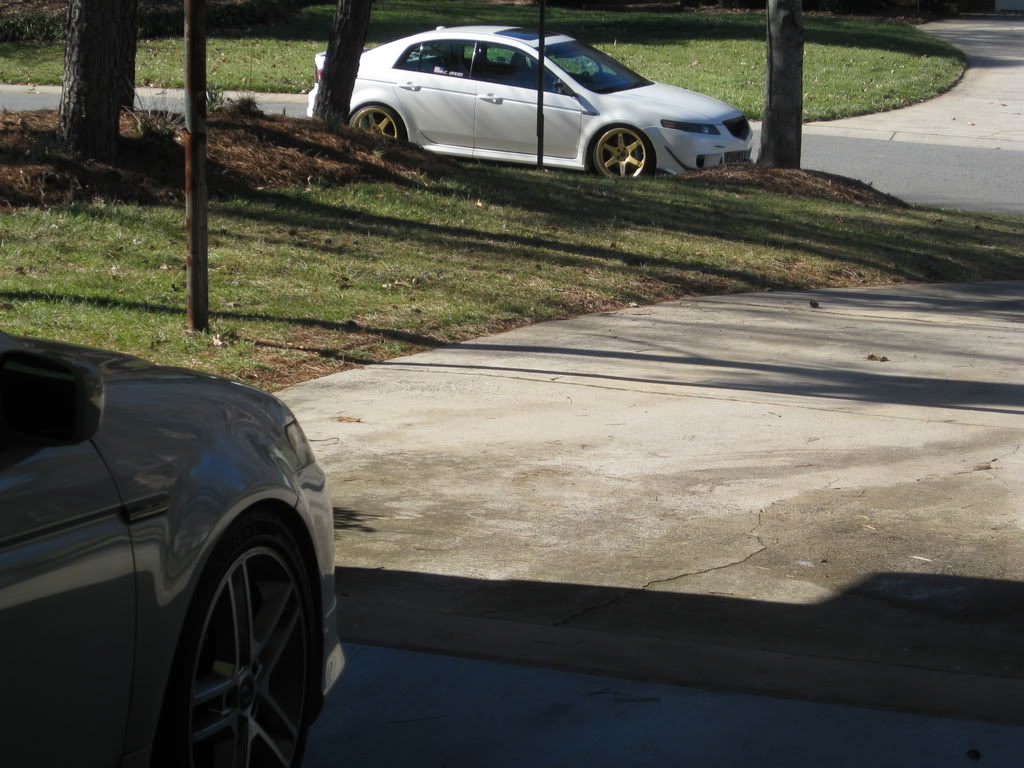
His car from a distance...
I know some guys on here love the look of the Type-S skirt over the A-spec skirt so here is what needs to be done if you want to mount it on your base bumper.
1 Order your skirt.
Choose who you would like to go with but I got mine from a fellow vendor hondaacuraworld.com Tim is a great guy and I was able to get it for 283 shipped. Yes that is painted as I know a lot of you ask. Next you will have to use a Dremil tool with a cutting wheel or some other method of cutting your bumper up. This part is fun. Eric was nice enough to come over and cut the bumper for me since he is the man and has already done this.
The line is required to clear the black opening in the middle of the bumper
Eric is pulling the excess away to show what you should have.
Take the four bottom body clips off the bottom and discard this piece.
Next you are going to want to cut about 1 1/2 inches on the corners to allow the wider exhaust ports.
It should look like this when complete
Here is the line on the passenger side.
Next you want to remove your bumper from the car.
Three phillips head screws in the wheel well on each side and two 10 mm nuts one on each corner where the trunk meets the bumper.
Pull away the corners to remove one side at a time.
Next you want to trim all the excess plastic that is around the exhaust outlets so you have one long line across the back of the lower bumper.
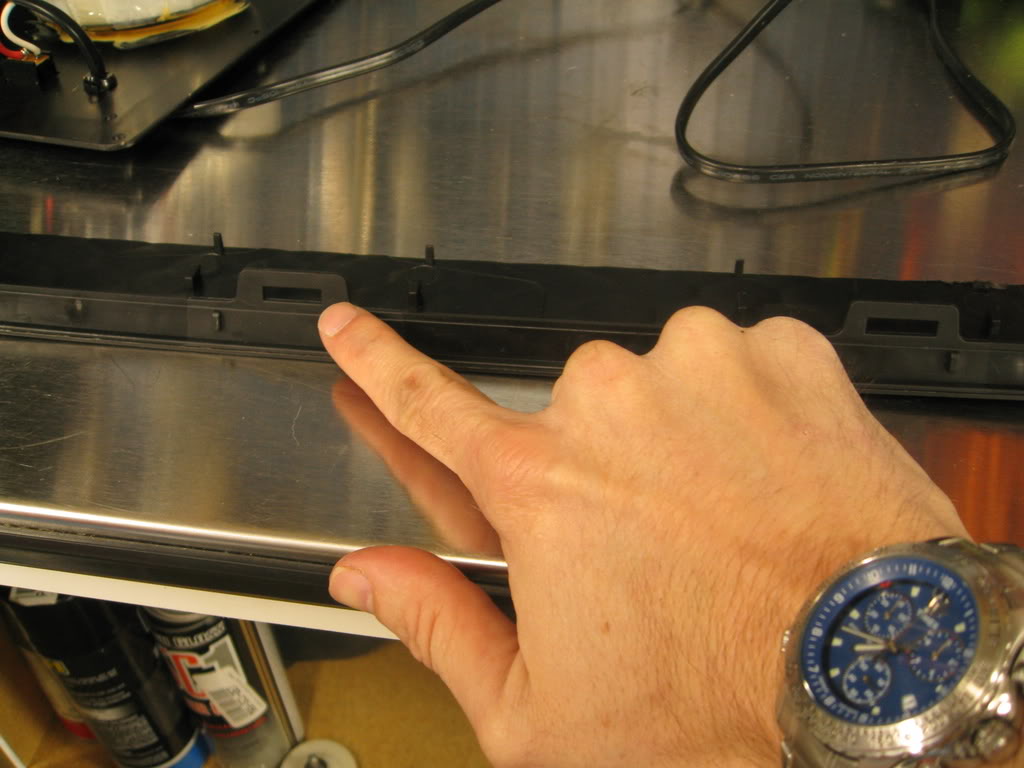
The Type-S lip is different from your base Aspec lip in regards to it's mounting locations. Acura got smarter and changed how the piece is mounted.
Along the ends close to the wheel well you will see one plastic strap one on each side of the lip.
This was a little tricky so what I did was, I measured approx 2.5 inches in from the end and two inches from the top and formed a slit in my bumper for the strap to go through..
See if yours will fit like this....
The base bumper has marks on the inside of the bumper for four holes to hold the A-spec skirt on. You need to drill a hole on the two holes on the outside edge. So the one all the way to the left and the one all the way to the right. The other two are not needed.
I measured 12 1/4 inches from the left or right of those holes and put my middle hole for the third bolt hole. After the third hole is drilled, you should be able to get all three in and see how your fit looks.
If all the holes are correct, it should look like this....
Check the skirt and bumper to make sure all points are lined up and all is flush.
Almost done, Remove the skirt and remove all the tape and attach the skirt to the bumper and screw the three 10 mm nuts on.
Next put the bumper back onto the car.
You are going to need to mount the black brackets into the rear fender well to keep the lip together. You have two phillips head screws that need to be screwed into the existing holes on the bumper with the bracket in place..
Then put the two phillips head screws that were supplied with your lip into the bracket to hold the lip on.
Reach under the car and attach this removable clip on each side to hold the side of the skirt in place.
The strap.....
The strap with the removable clip that you want to click in place as far as you can.
Since we cut the bottom off, you can't clip the lower body holes into anything. I used zip ties to connect them and keep them in place.
Notice the hole closest to me, I drilled to attach the under body plastic together. The farthest one was already in place.
So after all of that work, here is the final look. I love it and it really makes the car that much better looking.
Special Thanks to Eric Badis for the cutting support and helping me out with this fun mod. You da man son!!!!
Eric hard at work....
His car from a distance...

The following users liked this post:
intel_908 (05-10-2014)
02-12-2009, 08:29 PM
#6
The mesh part is on the 07-08 rear bumper cover.
I'm going to use trim the left over bottom 04-06 bumper piece, and rivet it to the lip with plastic rivets on the bottom. Tuck the cut edge under the back side of the lip. Then fasten the lip/piece to the mounting points on the rear under cover with the push clips. This would be an alternative to the zip ties on the bottom.
Great pics mmade.
02-12-2009, 08:29 PM
#7
Suzuka Master
Join Date: Sep 2006
Location: Raleigh, NC - USA
Age: 82
Posts: 7,674
Received 2,599 Likes
on
1,581 Posts
Looks great, nice work guys.
Trending Topics
 02-12-2009, 10:23 PM
#9
tehLEGOman
Join Date: Dec 2004
Location: Charlotte, NC
Age: 40
Posts: 9,135
Received 1,982 Likes
on
1,335 Posts
Awesome, detailed writeup Jon!
And you're welcome man. Anytime you need a hand you know whom to call.
Your TL looks insane now with this addition.
And you're welcome man. Anytime you need a hand you know whom to call.
Your TL looks insane now with this addition.
 jon that looks great! Feel any different?
02-12-2009, 10:49 PM
jon that looks great! Feel any different?
02-12-2009, 10:49 PM
#12
Team Owner
iTrader: (2)
Join Date: Jan 2008
Location: Kansas City, MO (Overland Park, KS)
Posts: 36,545
Received 6,470 Likes
on
5,162 Posts
Jon, great lookin' new rear end for your car.
02-13-2009, 10:34 AM
#15
200,000 mile club
Thread Starter
Join Date: Jul 2007
Location: Charlotte, NC
Age: 48
Posts: 1,774
Likes: 0
Received 35 Likes
on
15 Posts
JPTL your car is the nicest car on here hands down man......

I didn't know I could order the mesh since I thought it was part of the oem bumper. Thanks to you, I went to the dealer today and ordered it for 9.61. I will have it in by next week. Thanks for the tip man.
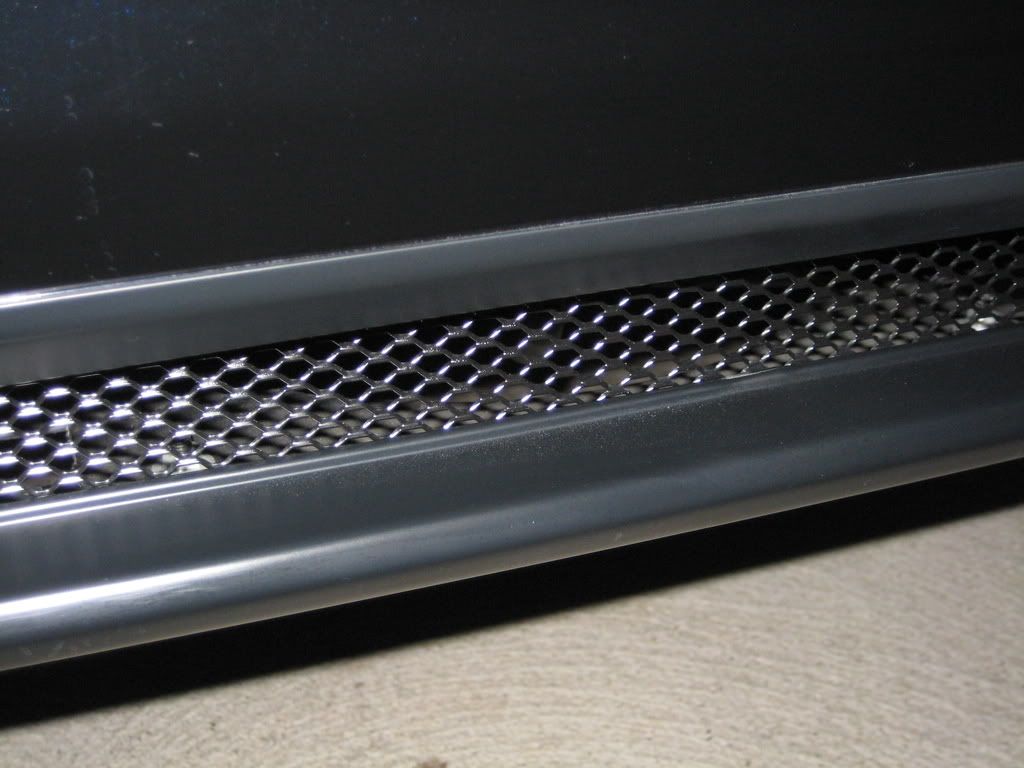
For the guys who want to put the oem mesh part into the opening, the part # is 71504-SEP-A20ZA It's called a Garnish RR. NH5
The following users liked this post:
breck569 (08-23-2013)
02-17-2009, 08:06 PM
#19
200,000 mile club
Thread Starter
Join Date: Jul 2007
Location: Charlotte, NC
Age: 48
Posts: 1,774
Likes: 0
Received 35 Likes
on
15 Posts
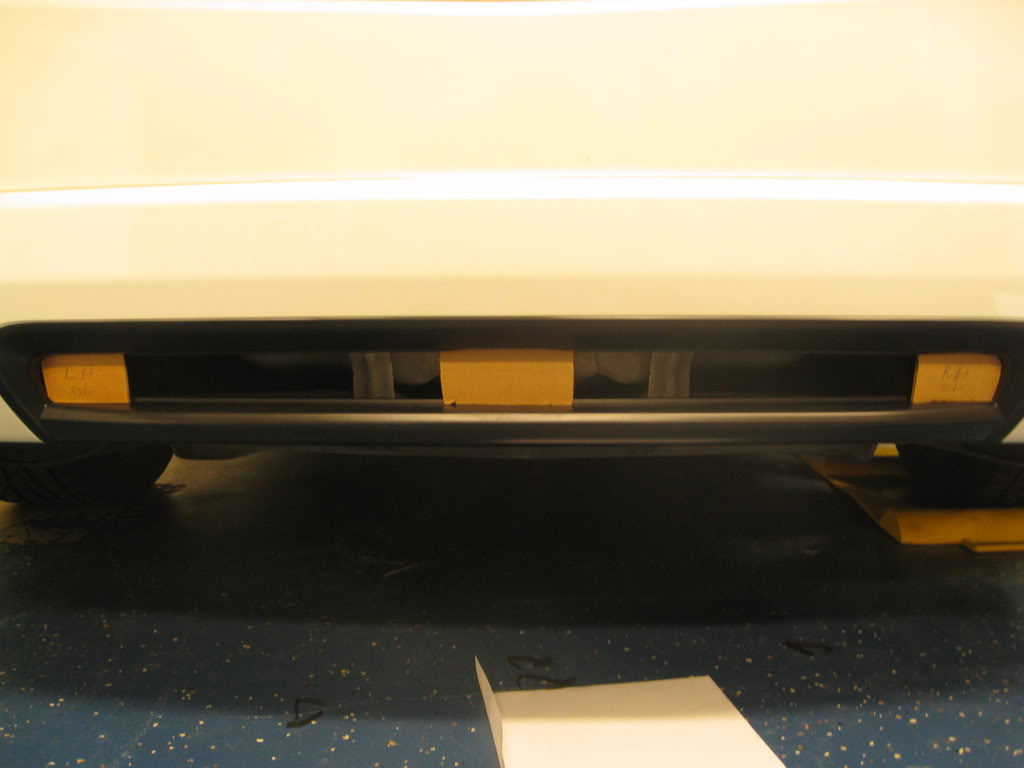
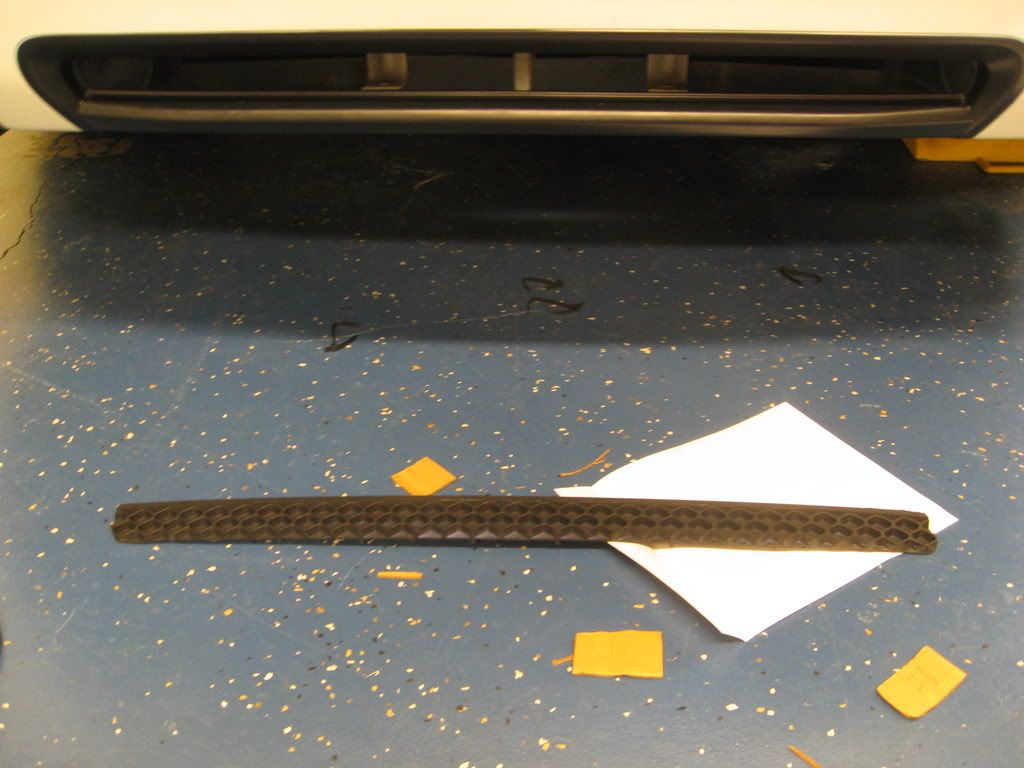
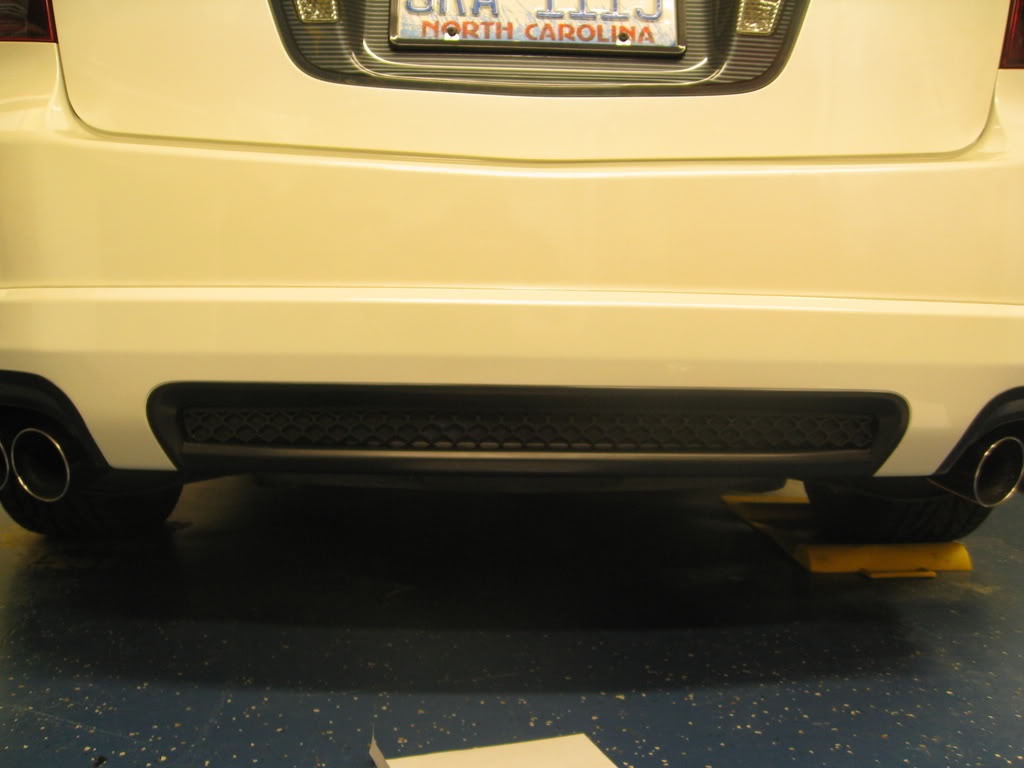
OK, so I got the rear garnesh in from the dealer today. Here it is.........
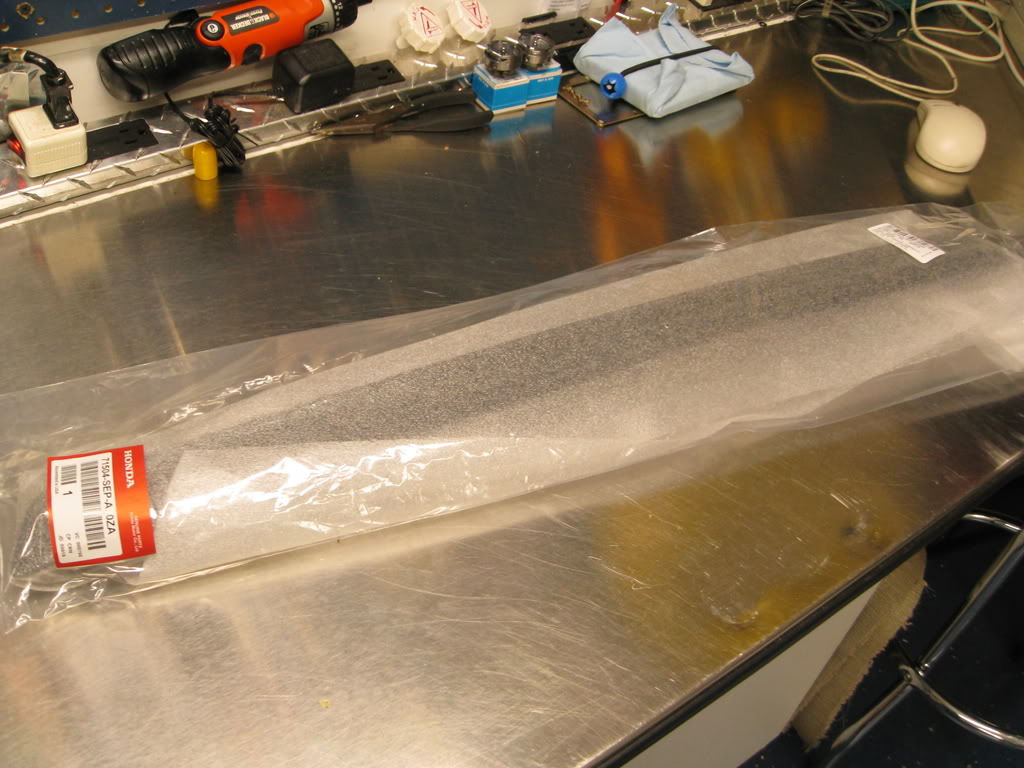
As you can see, it is way bigger than the opening of the Aspec skirt as it is supposed to fit into the rear bumper. I looked behind the skirt and I couldn't see any way to attach it without having it pop out.
After looking and poking around, I decided to measure and cut out some cardboard to get a template of the corners and middle.
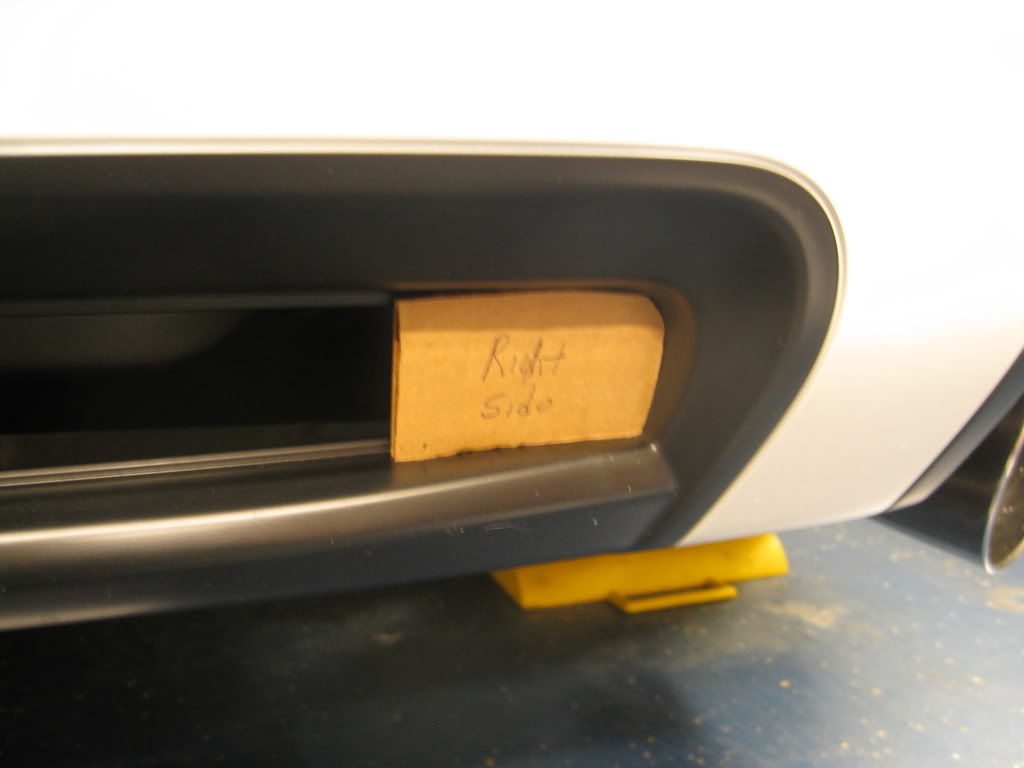
I measured just at 1 1/2 inches in the middle and of course towards the ends, it was just under an 1 1/2 inches.
I got out my trusty deck tools and drew a chaulk line straight off the bottom.
Being a NY Native, this is the kind of pizza I have to deal with in NC. You NY boys need to come down with a couple pies. Time to eat dinner...
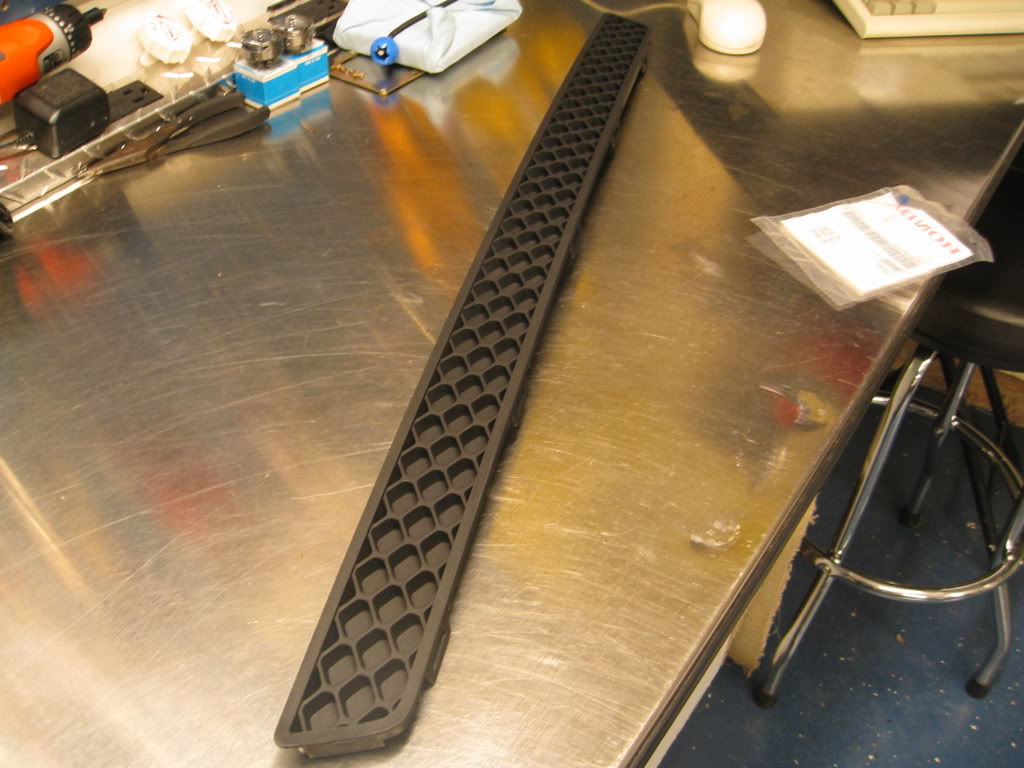
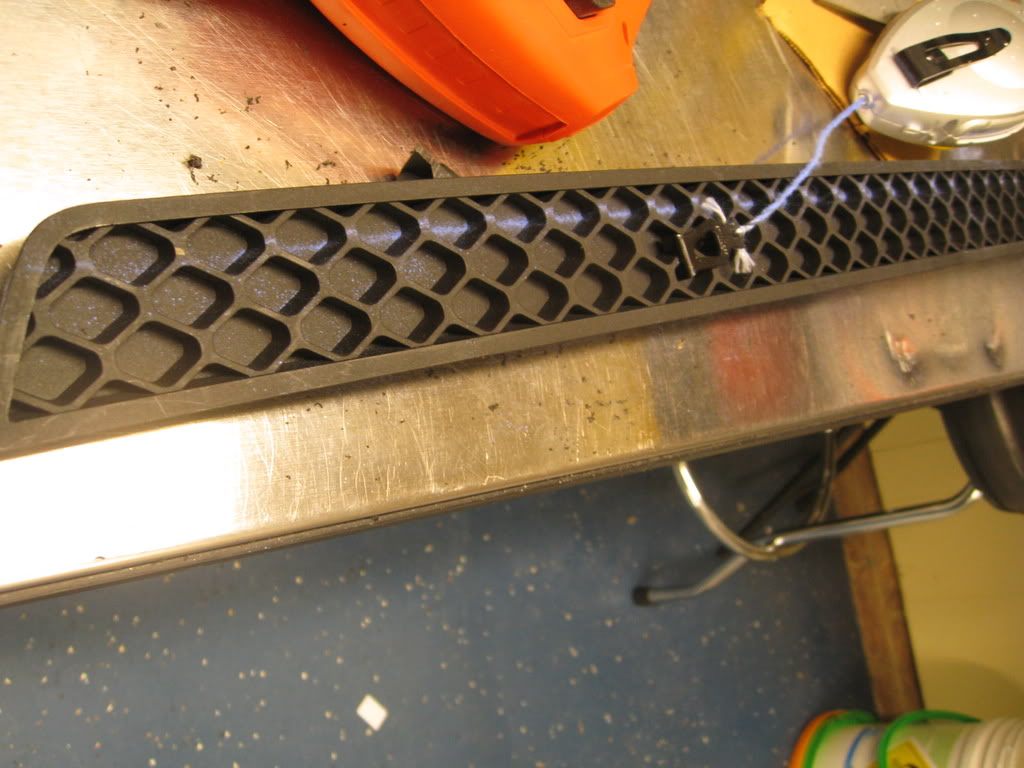
I used a jigsaw to cut this up and it trimmed it pretty clean. I sanded some of the edges with the dremel.
The piece is all cut and ready to be inserted to see if it fits.......
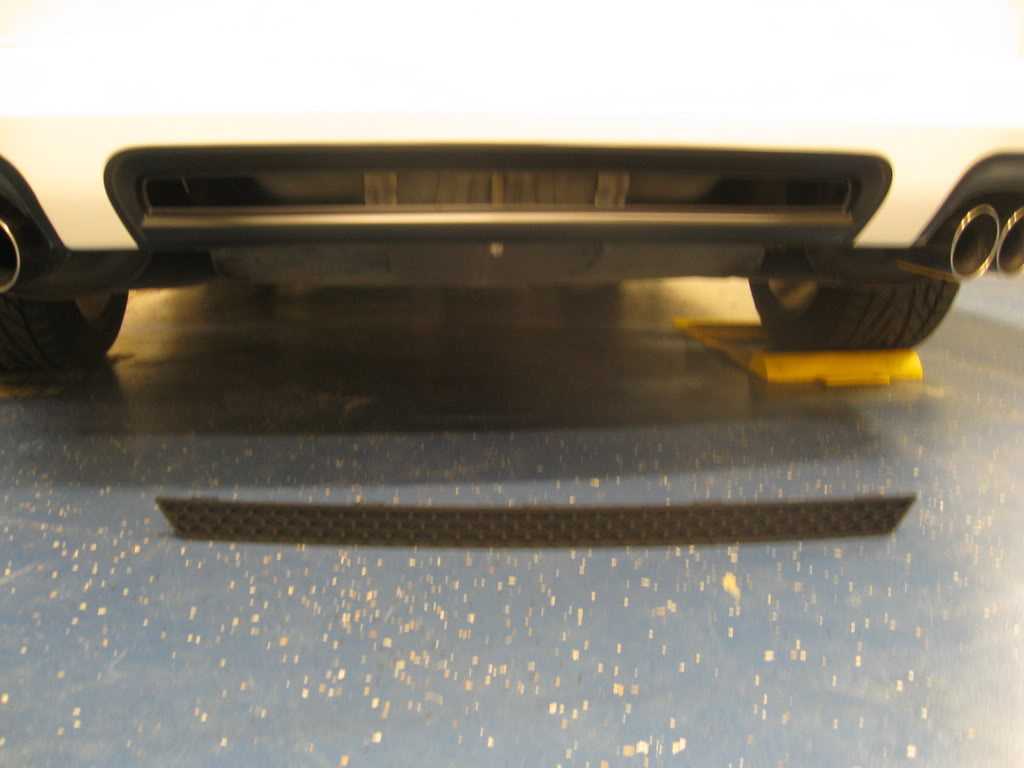
These tabs I used two zip ties and zip tied it to the frame under the car. It worked out really well. I couldn't really see any other way to mount it.
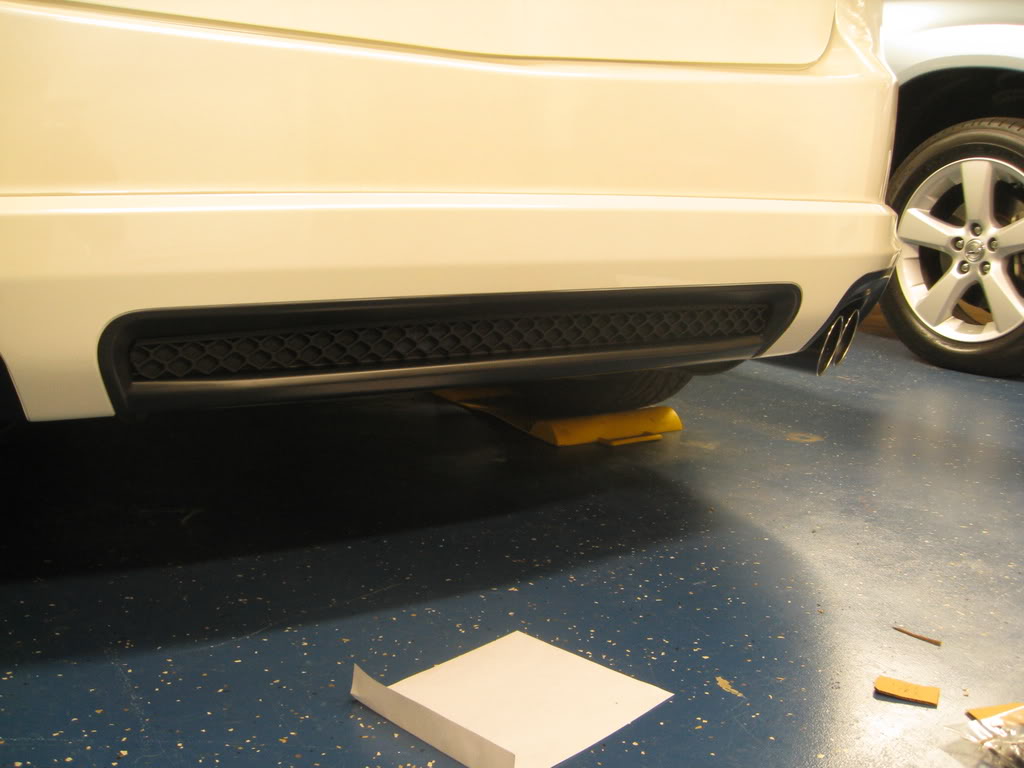
The finish product. Looks pretty good! Not stock but these days, what is stock on our cars?
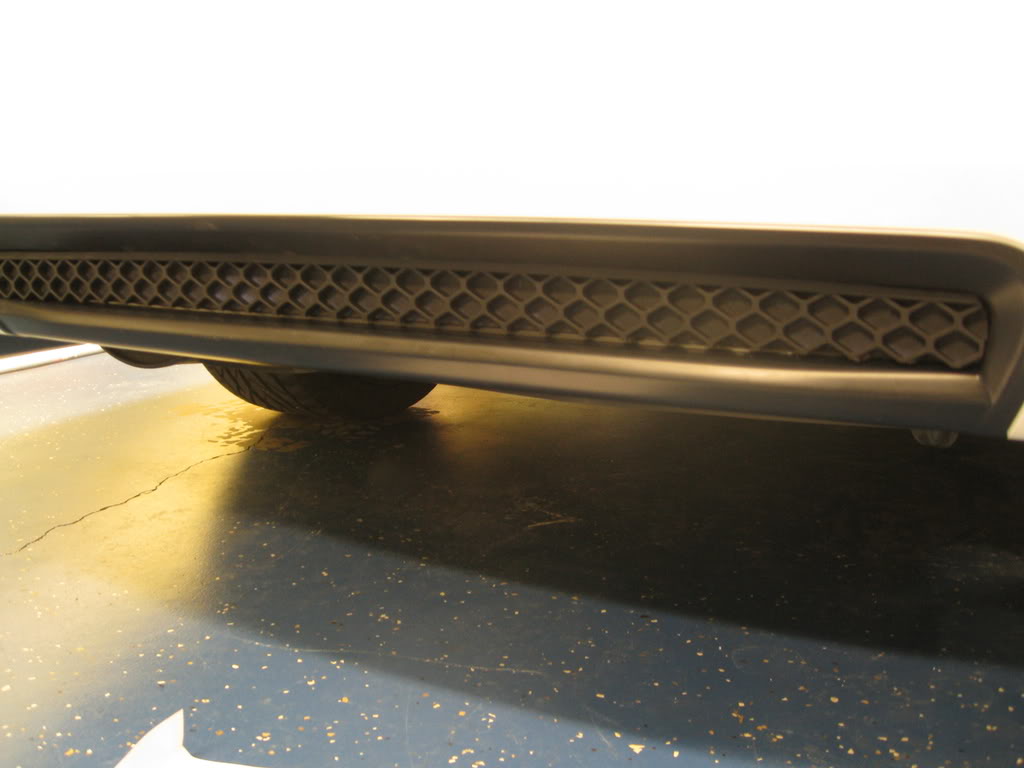
This was a pain in the ass and if you are planning to do this....Do it before you put the bumber on. If I had the bumper off, I would have mounted it up from behind. Good luck!
As you can see, it is way bigger than the opening of the Aspec skirt as it is supposed to fit into the rear bumper. I looked behind the skirt and I couldn't see any way to attach it without having it pop out.
After looking and poking around, I decided to measure and cut out some cardboard to get a template of the corners and middle.
I measured just at 1 1/2 inches in the middle and of course towards the ends, it was just under an 1 1/2 inches.
I got out my trusty deck tools and drew a chaulk line straight off the bottom.
Being a NY Native, this is the kind of pizza I have to deal with in NC. You NY boys need to come down with a couple pies. Time to eat dinner...
I used a jigsaw to cut this up and it trimmed it pretty clean. I sanded some of the edges with the dremel.
The piece is all cut and ready to be inserted to see if it fits.......
These tabs I used two zip ties and zip tied it to the frame under the car. It worked out really well. I couldn't really see any other way to mount it.
The finish product. Looks pretty good! Not stock but these days, what is stock on our cars?
This was a pain in the ass and if you are planning to do this....Do it before you put the bumber on. If I had the bumper off, I would have mounted it up from behind. Good luck!
02-17-2009, 08:43 PM
#20
New shoes on my
iTrader: (3)
Join Date: Aug 2008
Location: Long Island, NY
Age: 38
Posts: 1,186
Likes: 0
Received 3 Likes
on
2 Posts
Looks great. Great write up too. If the ATLP quads were still easily available, I might have gone that route after seeing the write up. It's definatly more involved than I had thought, but still seems simple enough.
02-17-2009, 09:46 PM
#21
tehLEGOman
Join Date: Dec 2004
Location: Charlotte, NC
Age: 40
Posts: 9,135
Received 1,982 Likes
on
1,335 Posts
Jon. You are the man. Don't ever forget that.
The following users liked this post:
rockstar143 (03-22-2016)
02-17-2009, 10:38 PM
#22
Three Wheelin'
iTrader: (3)
mmade22, by no means do I mean to thread crap but what I found also works great in place of the OEM garnish piece is some aluminum "gutter guard" from the hardware store primed/spray painted/clear coated and liquid nailed to the inside of the lip. Just an alternative that I thought gave a nice look


The following 2 users liked this post by gerzand:
robocam (05-07-2014),
rockstar143 (03-22-2016)
02-18-2009, 08:29 AM
#23
200,000 mile club
Thread Starter
Join Date: Jul 2007
Location: Charlotte, NC
Age: 48
Posts: 1,774
Likes: 0
Received 35 Likes
on
15 Posts
Thanks Eric!
That is a great addition to this thread man and if I would have seen this first, I would have went that route instead of getting the oem part and trimming it and trying to fit it like I had too. It was a pain in the ass to do it my way. Great job man and did you attach that part to the bumper while the bumper was off the car or where you able to get it on the car?
That is a great addition to this thread man and if I would have seen this first, I would have went that route instead of getting the oem part and trimming it and trying to fit it like I had too. It was a pain in the ass to do it my way. Great job man and did you attach that part to the bumper while the bumper was off the car or where you able to get it on the car?
02-18-2009, 08:46 AM
#24
Three Wheelin'
iTrader: (3)
Thanks Eric!
That is a great addition to this thread man and if I would have seen this first, I would have went that route instead of getting the oem part and trimming it and trying to fit it like I had too. It was a pain in the ass to do it my way. Great job man and did you attach that part to the bumper while the bumper was off the car or where you able to get it on the car?
That is a great addition to this thread man and if I would have seen this first, I would have went that route instead of getting the oem part and trimming it and trying to fit it like I had too. It was a pain in the ass to do it my way. Great job man and did you attach that part to the bumper while the bumper was off the car or where you able to get it on the car?
thanks man
 02-18-2009, 05:54 PM
#25
Safety Car
iTrader: (1)
Join Date: Apr 2007
Location: Northern ILLINOIS
Age: 62
Posts: 4,848
Received 133 Likes
on
129 Posts
mmade22, by no means do I mean to thread crap but what I found also works great in place of the OEM garnish piece is some aluminum "gutter guard" from the hardware store primed/spray painted/clear coated and liquid nailed to the inside of the lip. Just an alternative that I thought gave a nice look
^^^What a FINE @$$^^^
Great job on the write-up
02-18-2009, 06:38 PM
#26
Instructor
iTrader: (1)
Join Date: Jan 2007
Location: Long Island- Holbrook/Hofstra
Age: 38
Posts: 249
Likes: 0
Received 1 Like
on
1 Post
Hell of a ride. My fav combo 6 speed plus WDP!
I see you used zip ties under the car. I'm gussing Acura has two different bumpers for the type-s and non-s? Is only way around this would be to get both the lip and the OEM bumper as well?
I see you used zip ties under the car. I'm gussing Acura has two different bumpers for the type-s and non-s? Is only way around this would be to get both the lip and the OEM bumper as well?
 02-18-2009, 06:50 PM
#28
Three Wheelin'
iTrader: (3)
 ).
).But what I did was I re-used the bottom section of the bumper that was cut away and was discarded by mmade22 and fastened it with 2 nuts/bolts to the lip by drilling my own holes (you can kind of see this through the mesh grill in my first picture above) and then used 2 existing holes on the other edge of the cut away portion and bolted it up to where the OEM bumper would fasten
Last edited by gerzand; 02-18-2009 at 06:52 PM.
The following users liked this post:
robocam (05-07-2014)
02-18-2009, 08:14 PM
#29
200,000 mile club
Thread Starter
Join Date: Jul 2007
Location: Charlotte, NC
Age: 48
Posts: 1,774
Likes: 0
Received 35 Likes
on
15 Posts
^^ Good idea on reusing the materials. I never thought of that but that makes great sense. I just threw the part out and the truck got it on Monday. The underside of the car is secure enough with the zip ties but I like Gerzand's method better.
To do it the OEM way, Get a new Type-S bumper and a Type-S lip. It is a direct bolt on. I didn't have an extra 500 laying around and who cares what the bumper looks like behind the lip. This is the cheap way out that works and nobody can tell the difference.
To do it the OEM way, Get a new Type-S bumper and a Type-S lip. It is a direct bolt on. I didn't have an extra 500 laying around and who cares what the bumper looks like behind the lip. This is the cheap way out that works and nobody can tell the difference.
02-18-2009, 09:19 PM
#30
07 TL-S
I like that gutter guard. i used it for a mesh look on my civic years ago but it bends very easily.
anyhow that install looks very good from what i see. do you have any gap issues?
i have gap issues on the sides even tho i drilled what needed to be drilled on the rear bumper. i used molding tape and that doesnt help either. i need to take the bumper off and see what's up
anyhow that install looks very good from what i see. do you have any gap issues?
i have gap issues on the sides even tho i drilled what needed to be drilled on the rear bumper. i used molding tape and that doesnt help either. i need to take the bumper off and see what's up
05-13-2009, 11:50 PM
#31
Burning Brakes
awesome DIY..... real person demonstration
 05-23-2009, 07:09 PM
#33
Senior Moderator
added into the 3G Garage!
07-21-2009, 10:18 AM
#35
Ryan Christopher
Great write up. I used it to do mine last night. I did change one thing and thought it would be helpful for others.
1. The part that is cut off -

Keep this piece and cut the curved part off but leave the 4 holes.
2. Instead of using the zip ties -

You can take the piece that was cut earlier and fit it to hold the Lower lip.
The ends of the trimmed piece will need to be shortened to fit inside the lip kit as well.
With the lip installed, hold the trimmed piece up and line it up on the factory holes that held the OEM bumper in place. You will want to mark the holes from the lip on the trimmed piece. Once the holes are marked, pull the part back down and drill the holes with a 1/2 drill bit ( I actually used a unibit that went up to a 1/2" size and recommend the unibit as it is a cleaner hole).
You can then use the supplied nuts and bolts to attach the trimmed piece to the lip and use the push tabs that you removed to reattach it back to its factory location.
Sorry OP for using your pictures, but did not have the time to take any of my own. Again, this is just another option for those that are doing this install.
1. The part that is cut off -
Keep this piece and cut the curved part off but leave the 4 holes.
2. Instead of using the zip ties -
You can take the piece that was cut earlier and fit it to hold the Lower lip.
The ends of the trimmed piece will need to be shortened to fit inside the lip kit as well.
With the lip installed, hold the trimmed piece up and line it up on the factory holes that held the OEM bumper in place. You will want to mark the holes from the lip on the trimmed piece. Once the holes are marked, pull the part back down and drill the holes with a 1/2 drill bit ( I actually used a unibit that went up to a 1/2" size and recommend the unibit as it is a cleaner hole).
You can then use the supplied nuts and bolts to attach the trimmed piece to the lip and use the push tabs that you removed to reattach it back to its factory location.
Sorry OP for using your pictures, but did not have the time to take any of my own. Again, this is just another option for those that are doing this install.
The following users liked this post:
robocam (05-07-2014)
07-22-2009, 12:26 PM
#37
Ryan Christopher
I will try and get some pictures of it this weekend and modify some pictures to show where to cut. I can not post to photobucket from work!
BTW, it bolted up solid!
07-27-2009, 06:33 PM
#38
Ryan Christopher
Here are the cut lines if you wish to use the bottom part as the filler piece rather then some ties.
And some pictures of how mine turned out. LOVE IT! It looks sweet.
I know, I can see the end of the muffler piece. I think I may paint it black with some high temp paint.
And some pictures of how mine turned out. LOVE IT! It looks sweet.
I know, I can see the end of the muffler piece. I think I may paint it black with some high temp paint.
The following users liked this post:
robocam (05-07-2014)
10-09-2009, 08:08 PM
#40
2004 ssm acura tl
Join Date: Oct 2009
Location: burnaby
Age: 35
Posts: 26
Likes: 0
Received 0 Likes
on
0 Posts
hey got a question if i dunt wanna cut my bumper nd install the type s lip in will a 07 or 08 type s bumper fit on to my 2004? withought any modifications?