My 1st attemp to DIY tranny rebuild
 02-03-2012, 11:55 AM
#1
My 1st attemp to DIY tranny rebuild
OK, so I have a 2-3 and 3-4 gear slipping, getting stuck in gear sometimes and tcs and check engine light on. Interestingly enough, on this car the P to R, P to D and R to D shift is very smooth, no long delay or hard shock when cold like I experience on my other TL.
Anyways, a little info. I have a 2002 TL Type P and a 2003 TL type P. I bought a used type S tranny and will be attempting to rebuild the other tranny myself. I know that all parts interchange say type s transmission and type p transmissions are different and will not work. I know that and have confirmed that they do differ but very slightly. The internals are the same, the case is the same, the only difference is the steering rack output for the type p transmission where as the type s has a plug in its place. I have searched on the forum and found guys installing the type s on base model tls with no big side effects beside a slightly harsher steering force at low rpm. No big deal. I'll let you know how that goes when I install the used transmission into the 03 on monday-tuesday of next week.
Now to the more interesting part, I plan to do a diy rebuild on the other transmission. I have never rebuild a tranny before so I am trying to do as much research as possible. I found a few guys successfully rebuild their honda 4 and 5 speed transmissions and that gives me courage to push ahead. As I've mentioned, I've never done a tranny rebuild but I am no noobie with cars.
A little background about myself, I've worked as a mechanic since I was 12. I have swapped out hundreds of transmissions and engines in the past. I have rebuild a few engines before, but never touched a tranny. I am not afraid of trying new things no matter how intimidating it might seem. I am careful and try to gather as much info and tools before I begin a project.
Anyways, I have searched online, called my local tranny shop and called WIT customer service. I am planning on getting the master rebuild kit w/ steels. I have found the pricing to fluctuate quite much. My local store quoted me $326.88 for the kit. I found online prices to range from $236.30 at WIT to over $400 for what seemed to be the same kit. I called and spoke with WIT and he informed me that kits prices vary due to the type of friction clutches that come with the kit. So, the least expensive kit from WIT comes with the raybestos clutches the GPX line. He told me these are the updated clutches from raybestos that are better than the previous line that broke loose and fell apart. He says these are very popular and outsell the others. As much as I want to buy the OEM frictions, I plan to try out the least expensive kit as this is my very first rebuild that might go south and I don't want to invest a fortune on this experiment.
If this goes well, I'll also rebuild the 2002 honda accord v6 tranny that also has sloppy shifts and slipping.
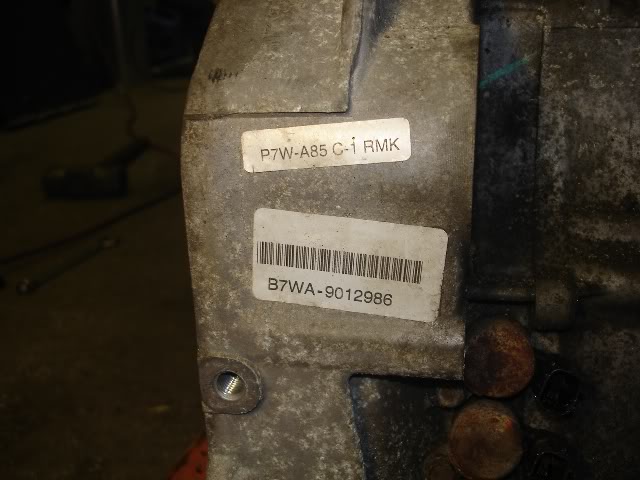
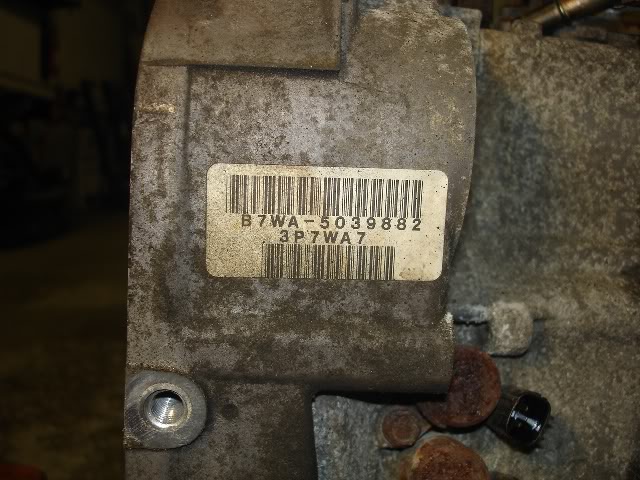
By the way, the tranny code for the acura that I'll be rebuilding is the B7WA.
Wish me luck.
Also, my local shops quoted me $2200 for a rebuild or over $3k for a reman. We'll see what my total comes up for a DIY.
Anyways, a little info. I have a 2002 TL Type P and a 2003 TL type P. I bought a used type S tranny and will be attempting to rebuild the other tranny myself. I know that all parts interchange say type s transmission and type p transmissions are different and will not work. I know that and have confirmed that they do differ but very slightly. The internals are the same, the case is the same, the only difference is the steering rack output for the type p transmission where as the type s has a plug in its place. I have searched on the forum and found guys installing the type s on base model tls with no big side effects beside a slightly harsher steering force at low rpm. No big deal. I'll let you know how that goes when I install the used transmission into the 03 on monday-tuesday of next week.
Now to the more interesting part, I plan to do a diy rebuild on the other transmission. I have never rebuild a tranny before so I am trying to do as much research as possible. I found a few guys successfully rebuild their honda 4 and 5 speed transmissions and that gives me courage to push ahead. As I've mentioned, I've never done a tranny rebuild but I am no noobie with cars.
A little background about myself, I've worked as a mechanic since I was 12. I have swapped out hundreds of transmissions and engines in the past. I have rebuild a few engines before, but never touched a tranny. I am not afraid of trying new things no matter how intimidating it might seem. I am careful and try to gather as much info and tools before I begin a project.
Anyways, I have searched online, called my local tranny shop and called WIT customer service. I am planning on getting the master rebuild kit w/ steels. I have found the pricing to fluctuate quite much. My local store quoted me $326.88 for the kit. I found online prices to range from $236.30 at WIT to over $400 for what seemed to be the same kit. I called and spoke with WIT and he informed me that kits prices vary due to the type of friction clutches that come with the kit. So, the least expensive kit from WIT comes with the raybestos clutches the GPX line. He told me these are the updated clutches from raybestos that are better than the previous line that broke loose and fell apart. He says these are very popular and outsell the others. As much as I want to buy the OEM frictions, I plan to try out the least expensive kit as this is my very first rebuild that might go south and I don't want to invest a fortune on this experiment.
If this goes well, I'll also rebuild the 2002 honda accord v6 tranny that also has sloppy shifts and slipping.
By the way, the tranny code for the acura that I'll be rebuilding is the B7WA.
Wish me luck.
Also, my local shops quoted me $2200 for a rebuild or over $3k for a reman. We'll see what my total comes up for a DIY.

The following 2 users liked this post by nsnrider:
i5rory (10-26-2023),
stickwithjoe (02-11-2012)
02-03-2012, 12:26 PM
#2
Senior Moderator
I rebuilt mine. You will have to get crafty with your tools to get things apart and together. You will have to check lots of tolerances. The trans is a 3 shaft design much like a manual trans.
The following users liked this post:
i5rory (10-26-2023)
02-06-2012, 09:01 AM
#4
Senior Moderator
02-06-2012, 11:59 AM
#5
Cruisin'

Join Date: Apr 2009
Location: PA
Posts: 16
Likes: 0
Received 0 Likes
on
0 Posts
You should have no probably other than some specialty tools to get the clutch baskets apart. Luckily I am a tool and die maker and have the means to make special tools and don't have to buy/borrow. I just finished rebuilding my 4 speed last month (even though it didn't need it). Just take plenty of pictures and notes and all will work out for you. Good luck

Trending Topics
02-20-2012, 08:06 PM
#8
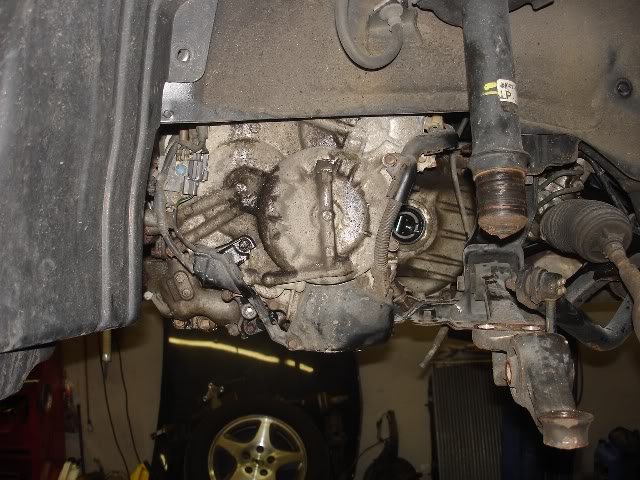
ok, so i have swapped in the type s tranny into the base model tl. Everything went in perfectly except the power steering speed sensor. I just ended up blocking off the input/output on the steering rack. For thos of you wondering on the effects, after I test drove the car, I did not feel any difference in the steering.
Anyways, after going throw the swap, on the test drive i felt a jerk from 1-2 shift and howling on the highway. I came back from a test run and rechecked everything and checked the tranny fluid. Everything was fine. I went fot another run on the highway and city. Turns out this tranny that I got (supposedly a rebuild warranty unit form an 03) is junk. It shifts better than the original tranny but nonetheless it is acts up on the upshift from 1-2 and shudders on the downshift as well, not to mention the bad differential bearings.
This was really bad news as I had high hopes for the used tranny. At least the second time around the removal and installation would go quicker. It took me two days to take the tranny out, reinstall the "new" used tranny along will ball joints and other maintenance stuff. I'm guessing it would take me less than a day the second time around.
I took a bunch of pics of everything and will post them up later as I left the camera at the shop.
02-20-2012, 08:17 PM
#9
As for the rebuild:
So now that I need to rebuild two trannies, this gives me an even bigger push to get down to business.
The overhaul kit with frictions and steels came in a few days ago from WIT. I also bought the internal and external filter to go with this rebuild.
My first reaction is this is a lot of stuff. There must be over 100 pieces in this kit. It looks pretty all new parts.
Anyways, today I torn the tranny apart. All to the very last bolt. I did make a big stupid newbie mistake. I remember reading about the left hand threads on the shaft nuts but completely forgot about it when I started ripping this apart. In all of the excitement, I took of the first of the three nuts with no problems, then I tried the second one and it barely budged. So I figured it sitting tight and just need a bigger impact gun. I pulled out my 1000+ foot per pound torque gun and went to town....................well that didn't work too well. I ended stripping the threads on the secondary shaft, now i need to replace it. My stupid mistake of going too fast and not taking my time.
Anyways, I ripped everything apart including the valve bodies. Most of the clutches seem OK except one that you can definitely tell has been slipping, chewed up the frictions to the metal and ate up the steels. No metal shavings in the tranny though but a lot of the friction disk material throughout the tranny and all of the screens were clogged with it.
Tomorrow I will start to clean all of the parts and hopefully pull out the type s tranny out of the car that i just installed. I will be using the secondary shaft out of that tranny to install in this rebuild tranny.
I am taking a ton of pics and will upload them later, probably in a few days when I get some more progress on this rebuild.
 02-25-2012, 02:22 PM
#11
Cruisin'
Join Date: Apr 2009
Location: PA
Posts: 16
Likes: 0
Received 0 Likes
on
0 Posts
I almost did the same thing with the secondary shaft. I just so happened to look at it real close before I went and got the bigger impact. If you look at them there is an arrow stamped on top of the left hand nuts. The one that got me was the detent arm. I didnt have the selector shaft in the right position and snapped the detent arm.
02-28-2012, 08:52 PM
#12
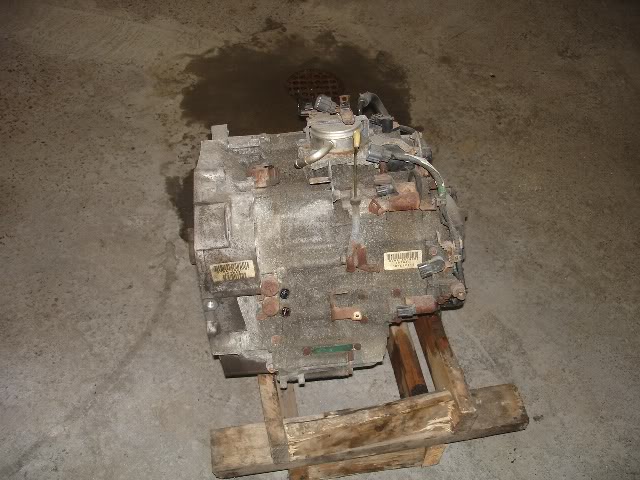
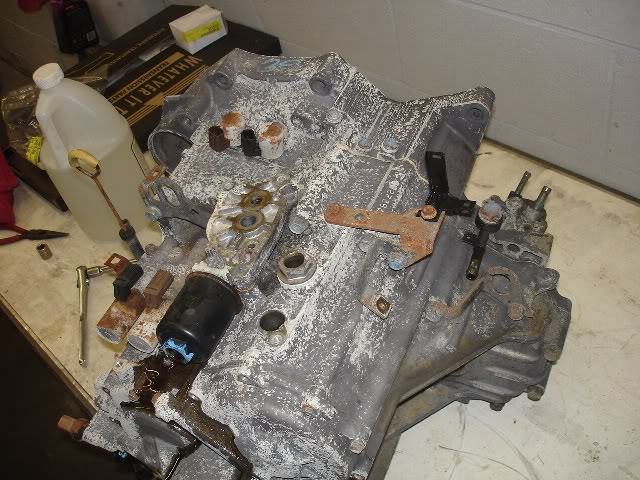
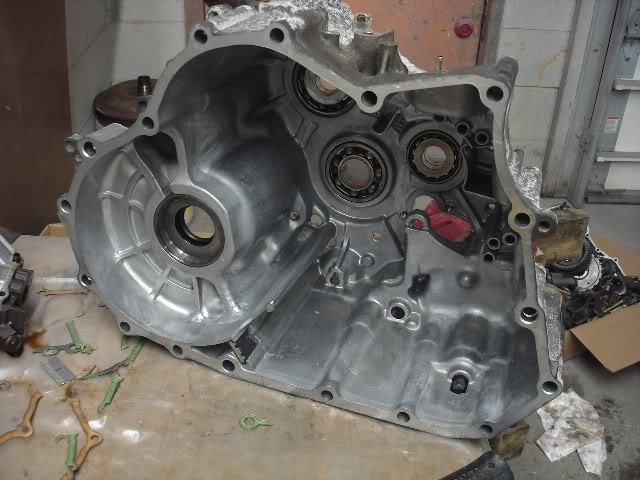
Here are the pics of the work I've been doing over the past few weeks. To start, I have the two type-s and type-p trannies side by side, both B7WA code.
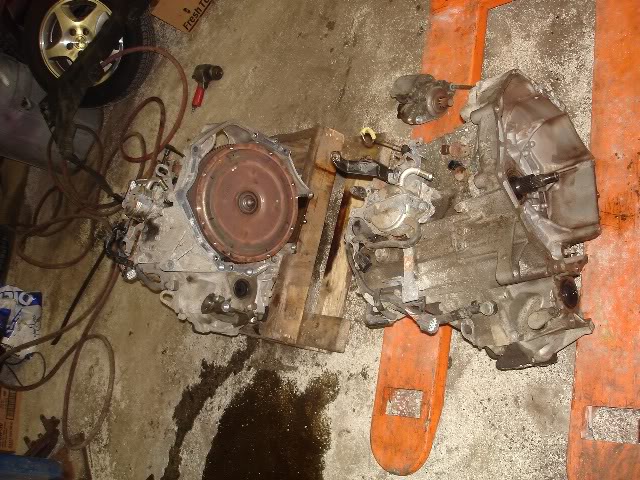
The difference between the two is lack of the power steering speed sensor on the type-s that has a plug covering the opening.
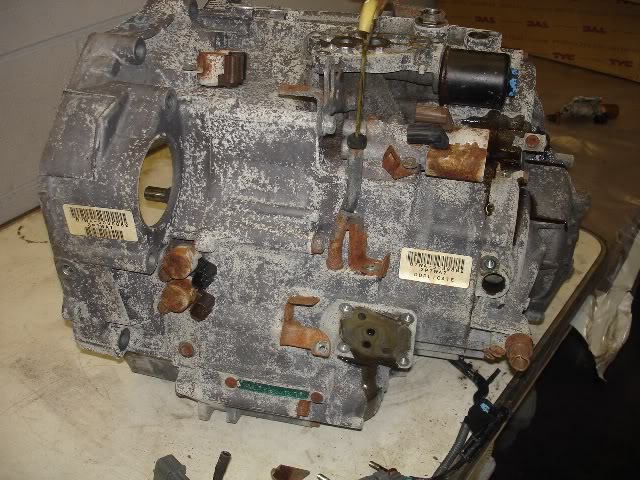
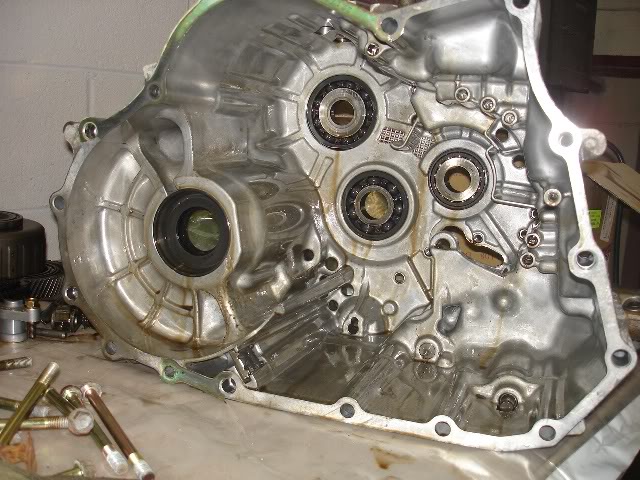
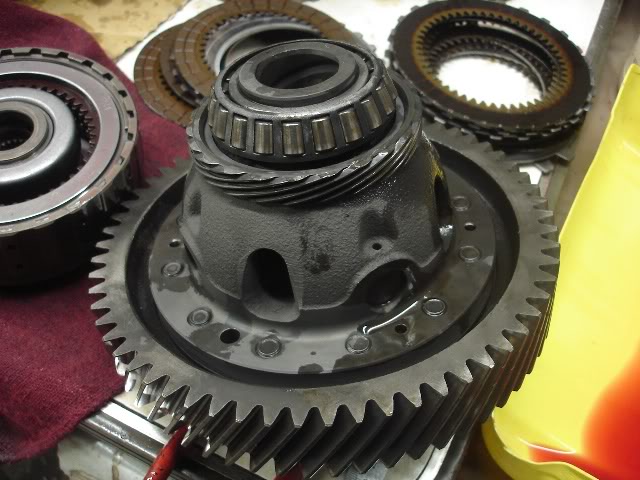
At first I thought I could swap the sensors from the type-p over to the type-s transmission but it turns out they have different differentials. The type-p has an extra "gear" as you can see in the following pic if you look into the hole opening.
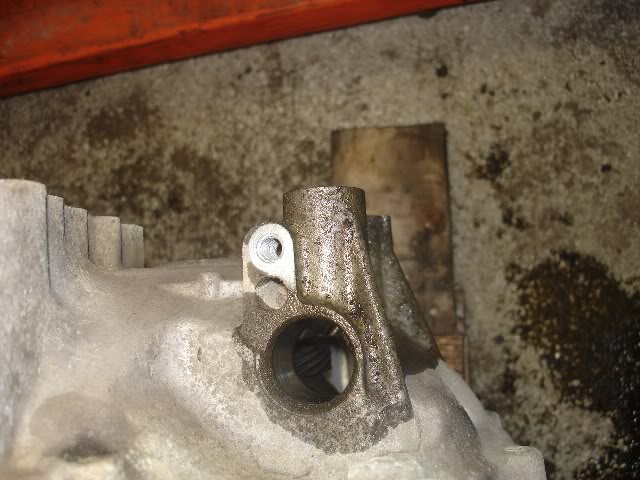
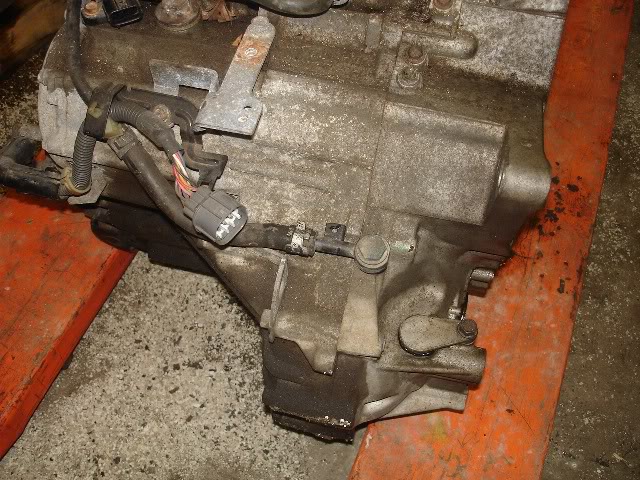
And this is where the power steering speed sensor connects to originally:
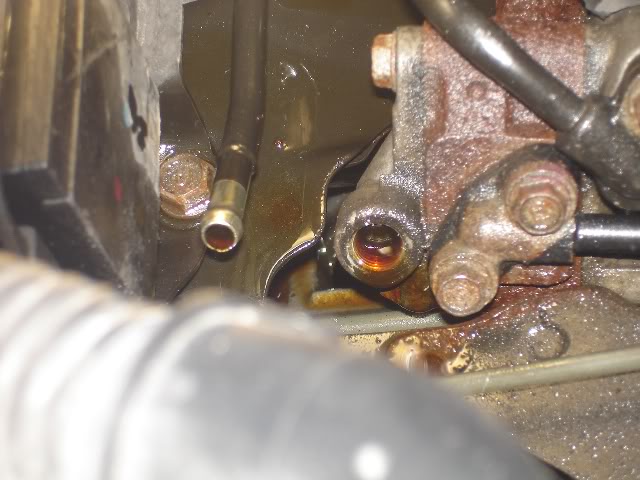
When I installed the type-s tranny into the regular tl, I had to come up with a way to block off those two openings so I don't loose power steering fluid. Once everything back together, I did not feel any difference in the steering with this speed sensor removed. So for those of you thinking of installing a type-s tranny into your base tl, you too probably won't even notice any difference in the steering feel.
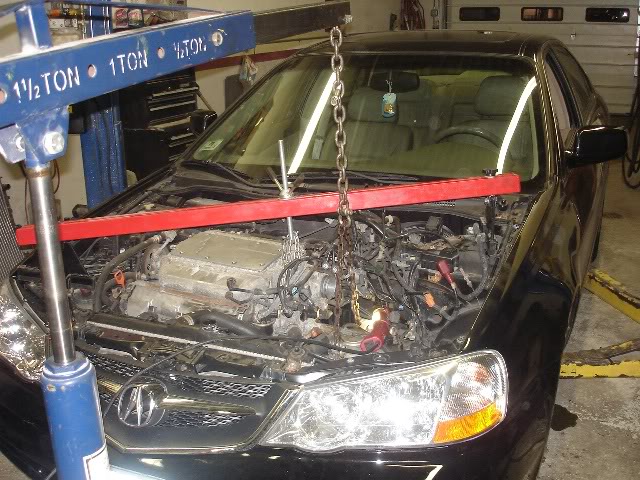
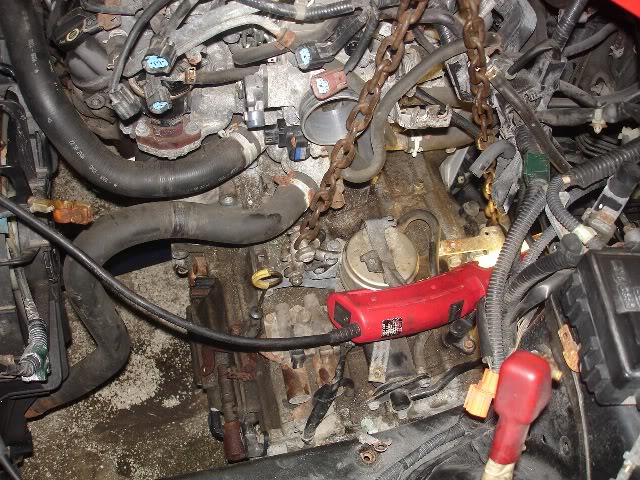
Some pics of the installation of the type-s tranny into the car.
The difference between the two is lack of the power steering speed sensor on the type-s that has a plug covering the opening.
At first I thought I could swap the sensors from the type-p over to the type-s transmission but it turns out they have different differentials. The type-p has an extra "gear" as you can see in the following pic if you look into the hole opening.
And this is where the power steering speed sensor connects to originally:
When I installed the type-s tranny into the regular tl, I had to come up with a way to block off those two openings so I don't loose power steering fluid. Once everything back together, I did not feel any difference in the steering with this speed sensor removed. So for those of you thinking of installing a type-s tranny into your base tl, you too probably won't even notice any difference in the steering feel.
Some pics of the installation of the type-s tranny into the car.
02-28-2012, 09:30 PM
#13
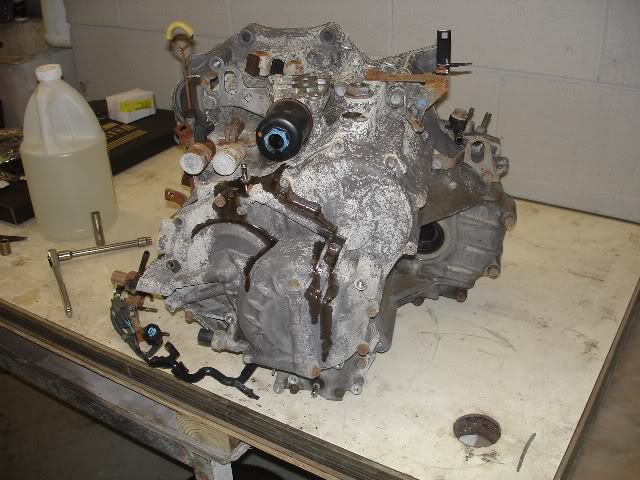
So for those who have read the above posts know that the type-s transmission I installed turned out to be bad. Anyways, on with my rebuild of the original tranny.
Here it is ready for its rebuild:
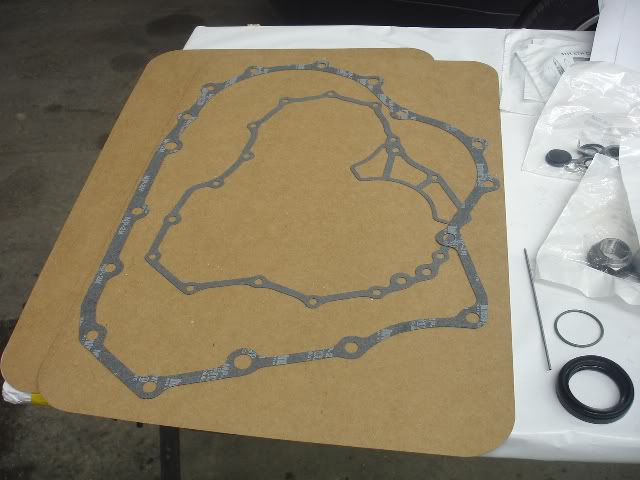
Here's a pic of the rebuild kit I bought from WITtrans for the w7ba with steels and internal and external filters.
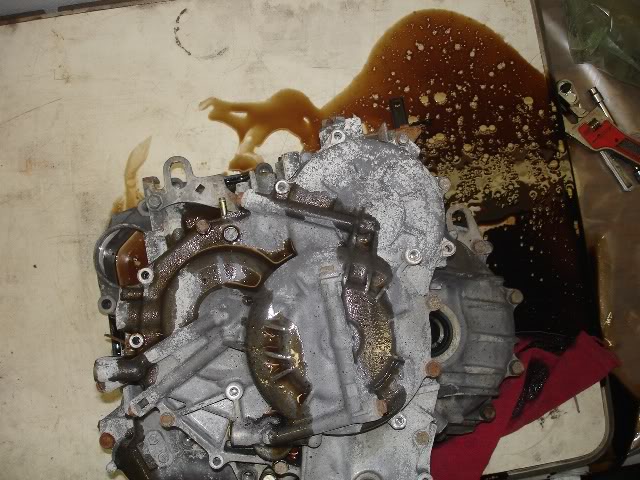
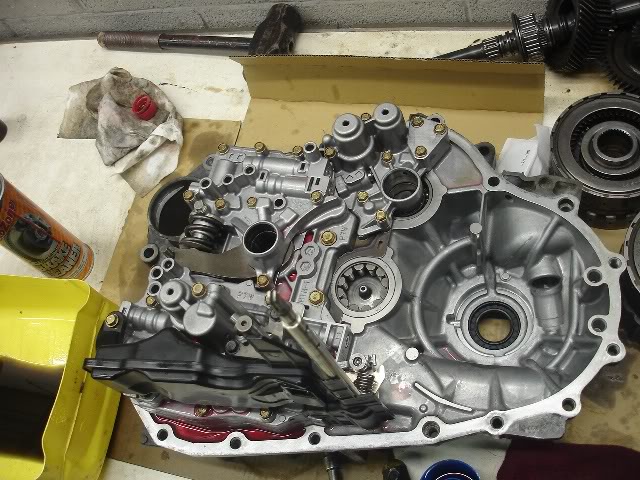
On my bench starting to pull off the solenoids, sensors, harness and switches:


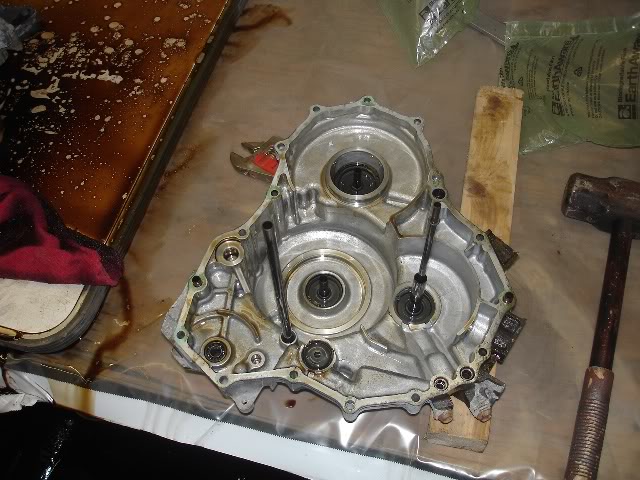
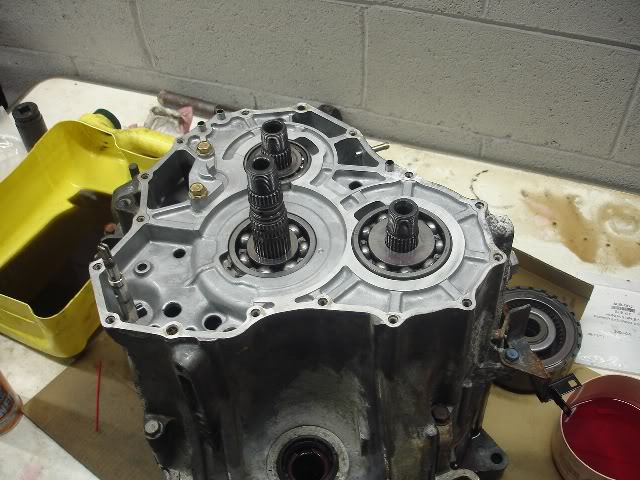
And with the rear cover removed exposing the shaft nuts.
I couldn't find a second bolt that is long enough so I quickly welded two bolts together to make one long bolt to use with the puller to pull of the gears.
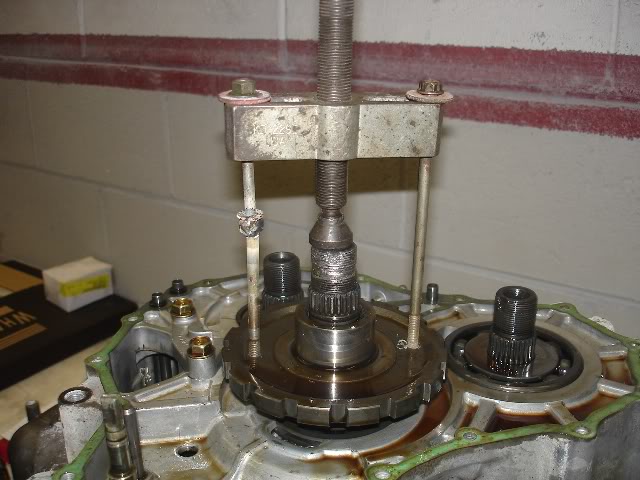
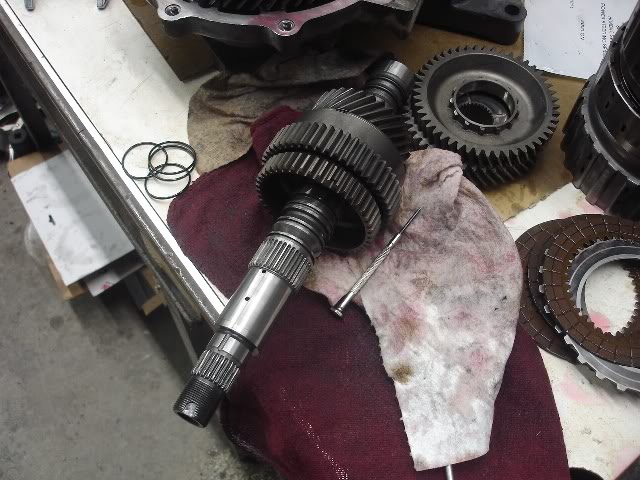
This is the secondary shaft that I needed to replace because I damaged the threads when trying to remove the nut.
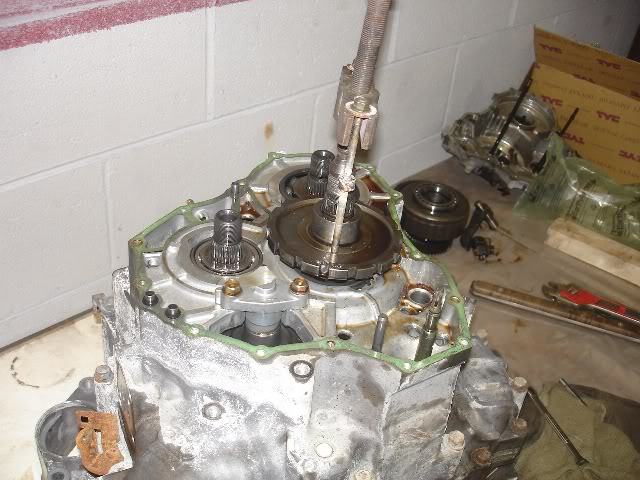
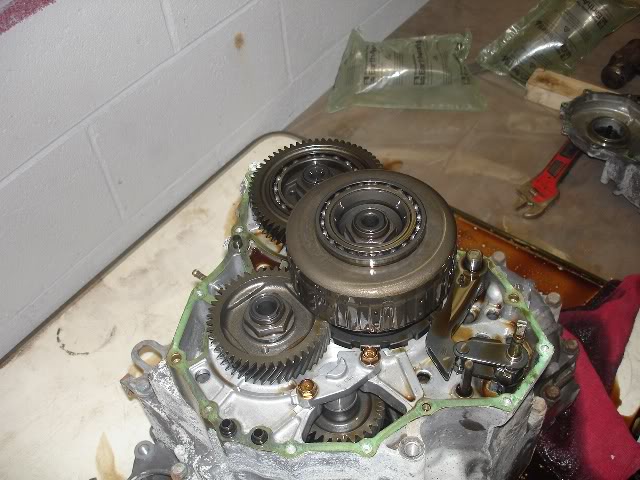
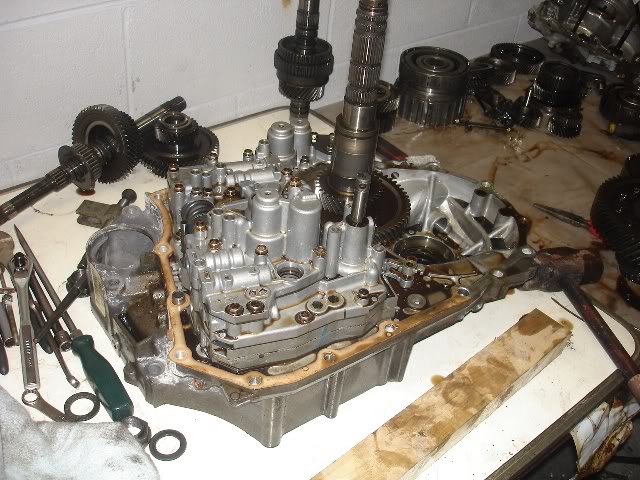
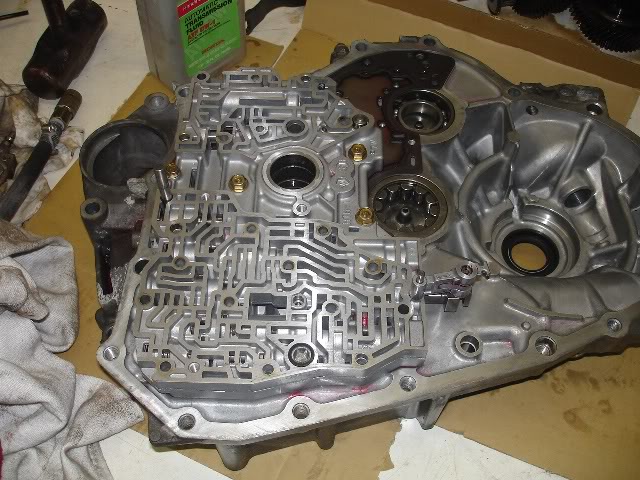
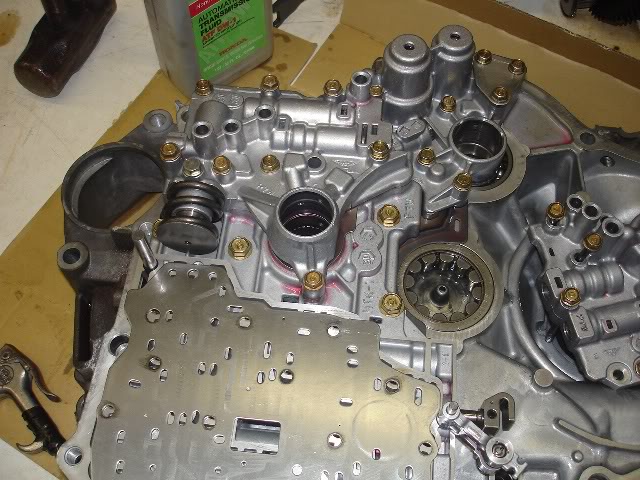
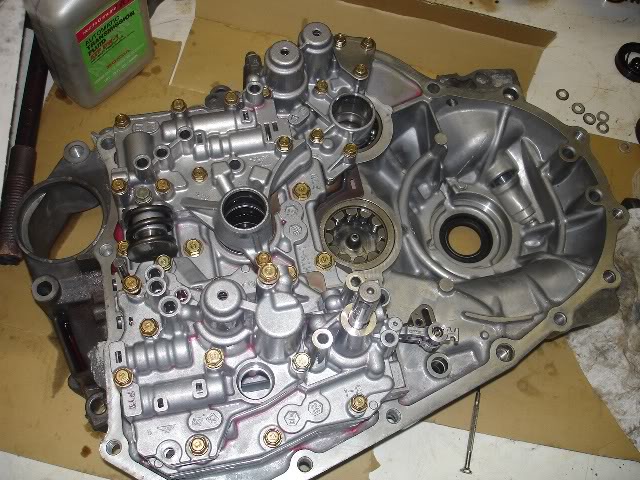
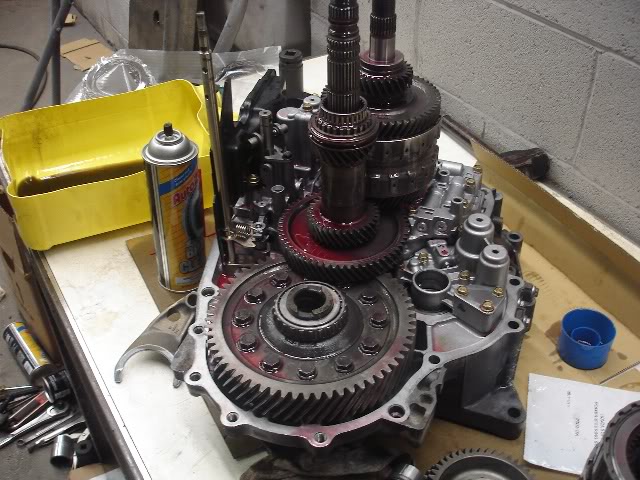
Finally pulled of the main case exposing the internals. My first reaction is....am I really crazy enough to attempt this???

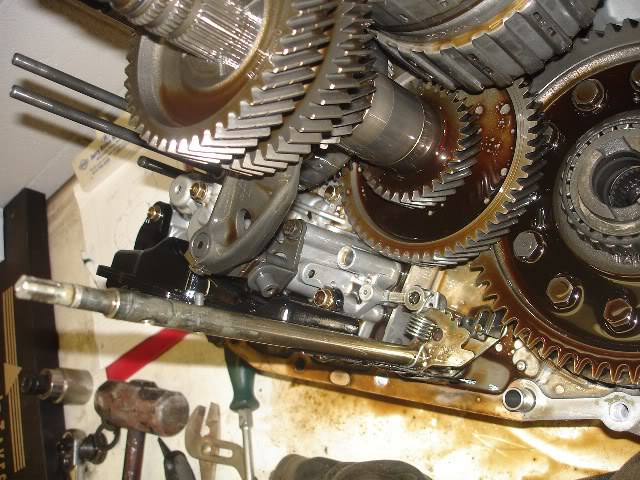
I took a bunch of pictures figured I might need to look at them when putting everything back together.
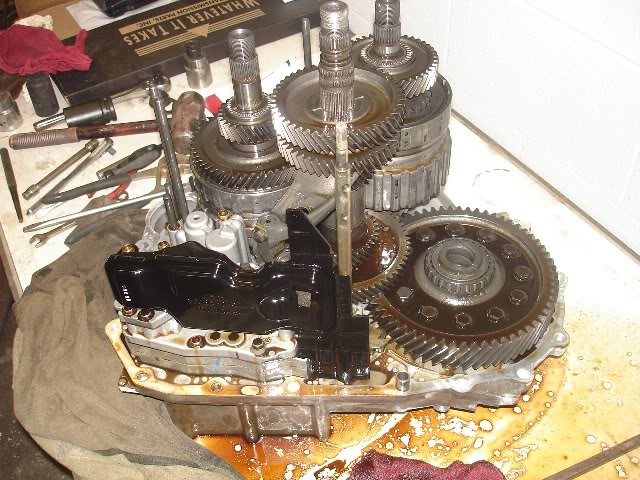
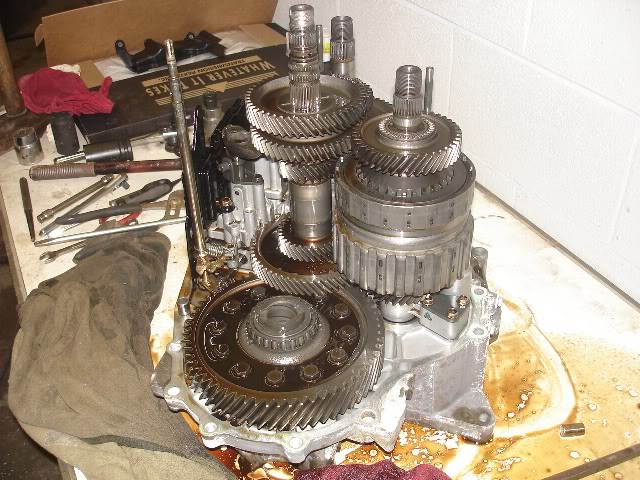
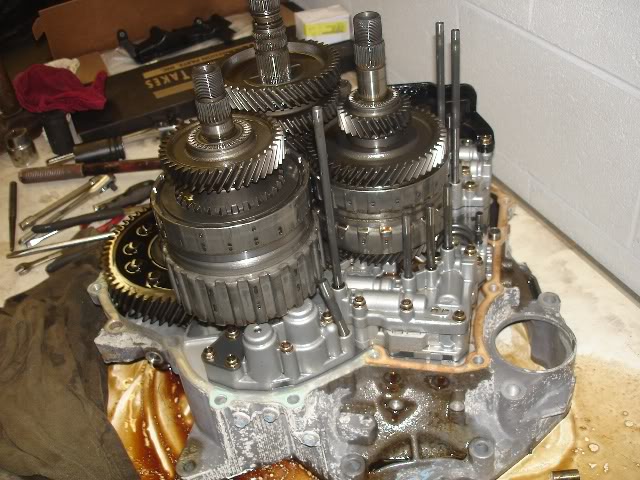
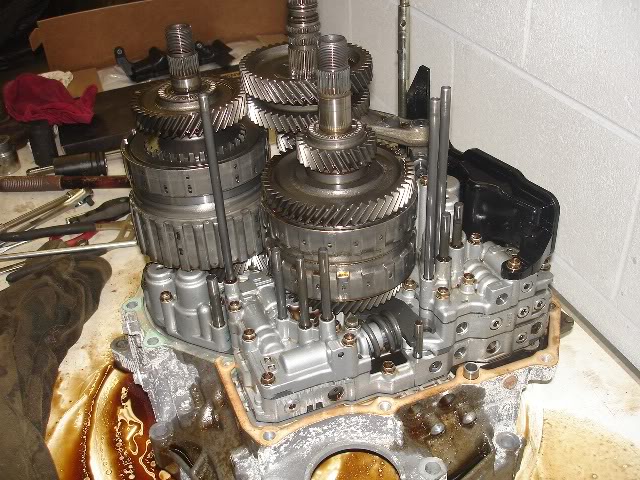
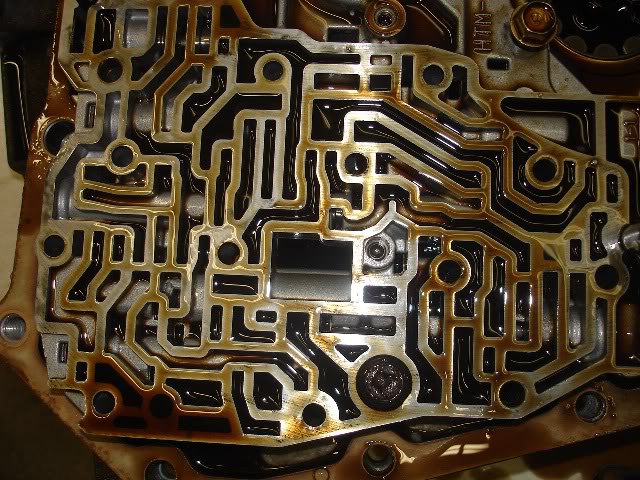
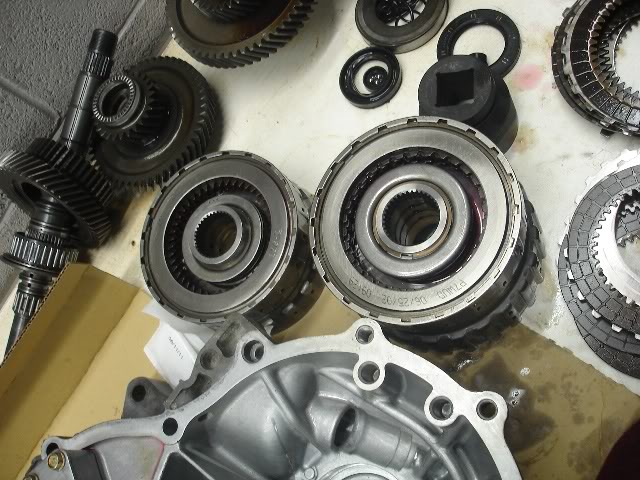
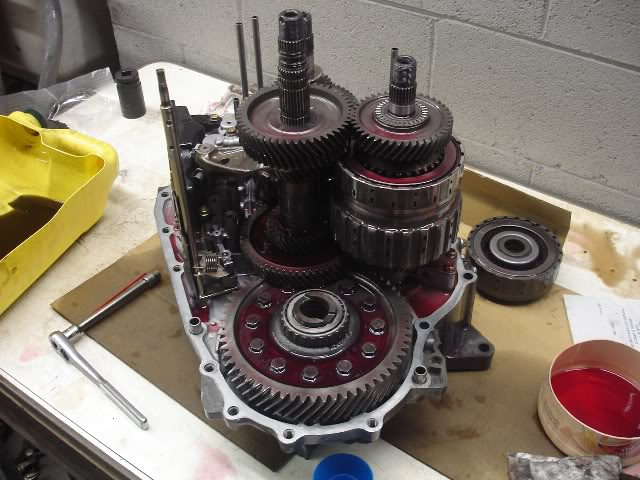
Most of the shafts and gears removed looking at the valve bodies:
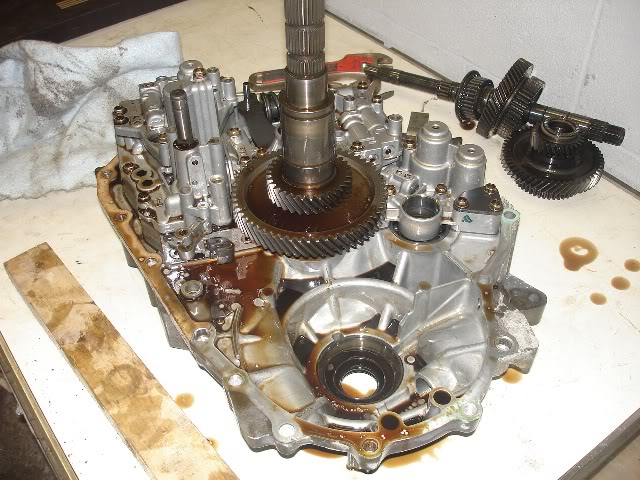
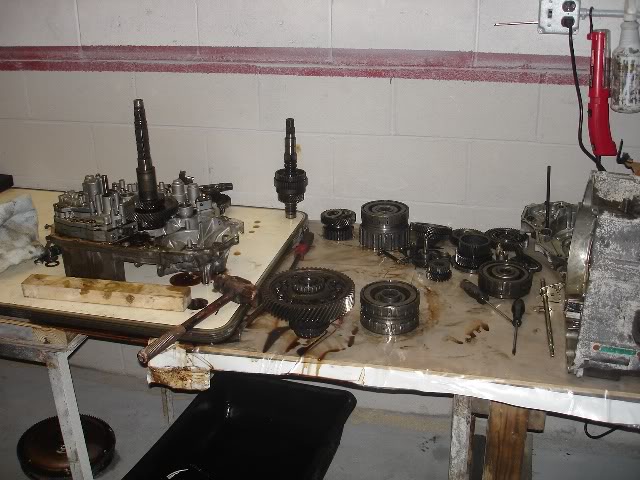
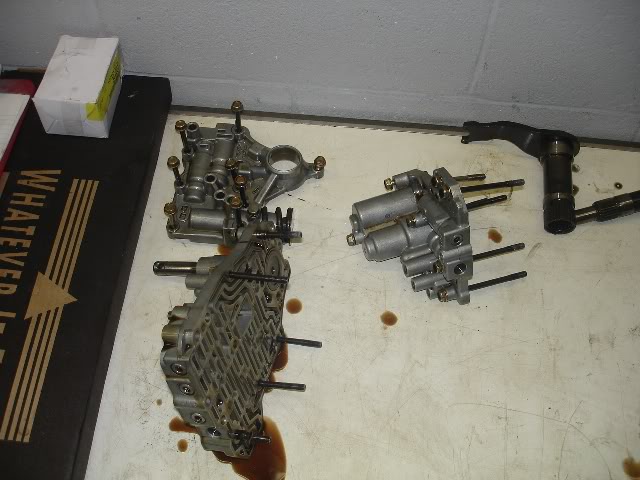
Snap shot of the parts removed:
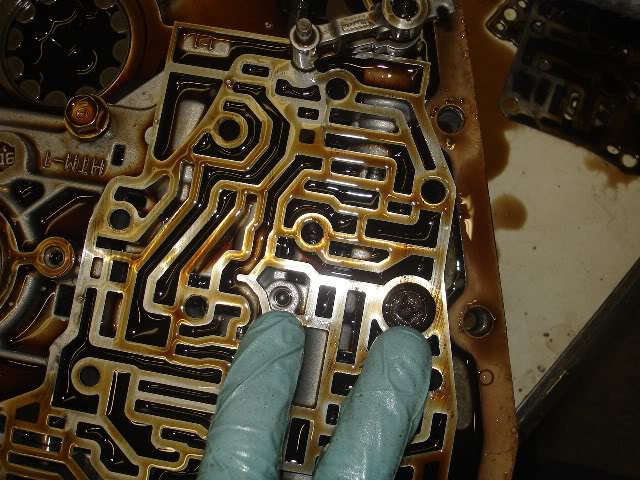
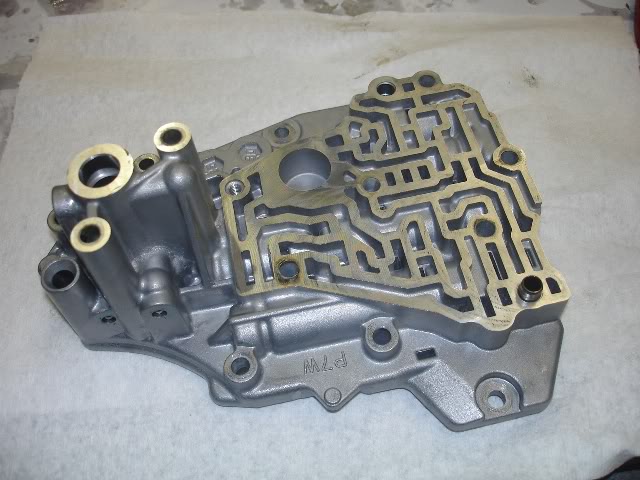
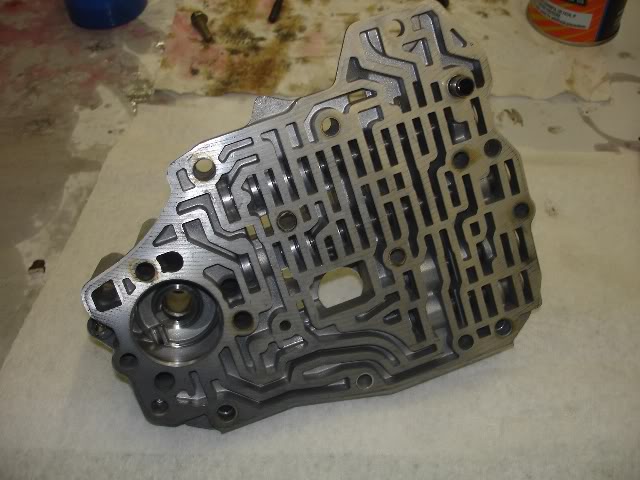
Closer look at the valve bodies. Taking them apart one at a time.
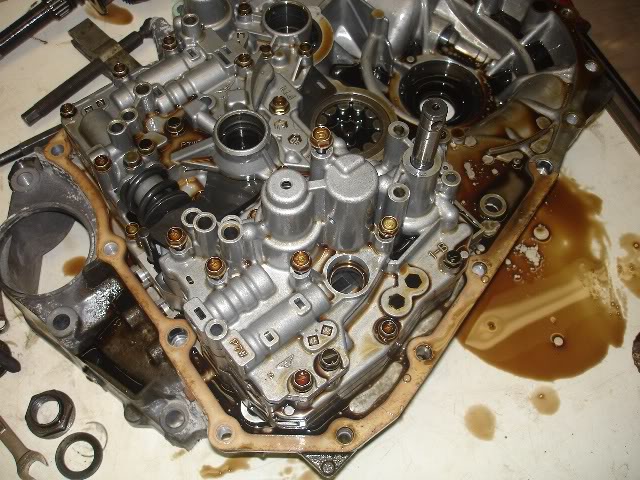
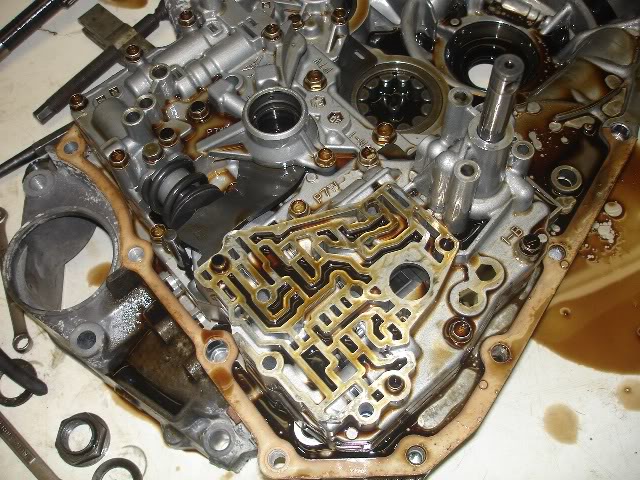

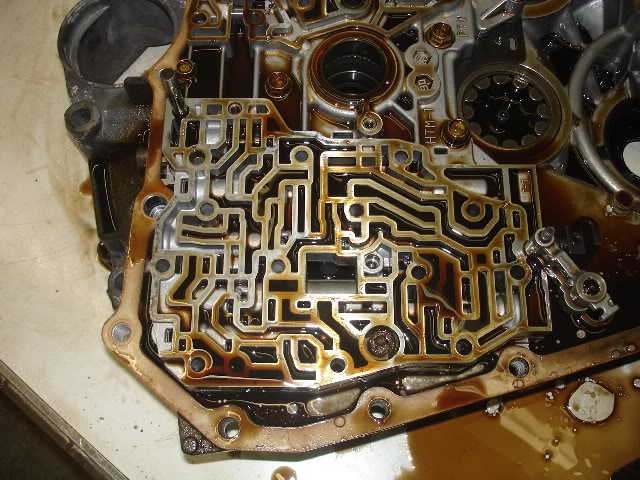
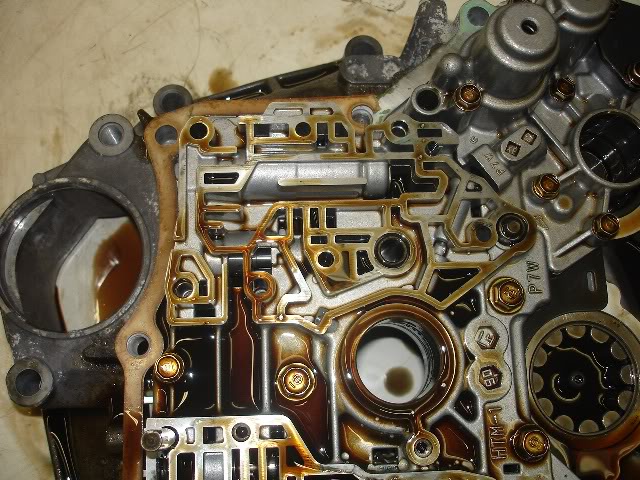
As you can see the ATF is very dark and burned and the filters are clogged:
Now its time to start cleaning everything up one assembly at a time. Hopefully I don't forget anything.
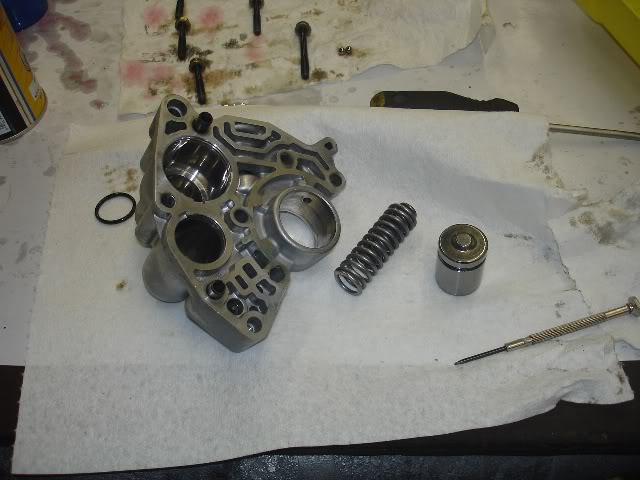
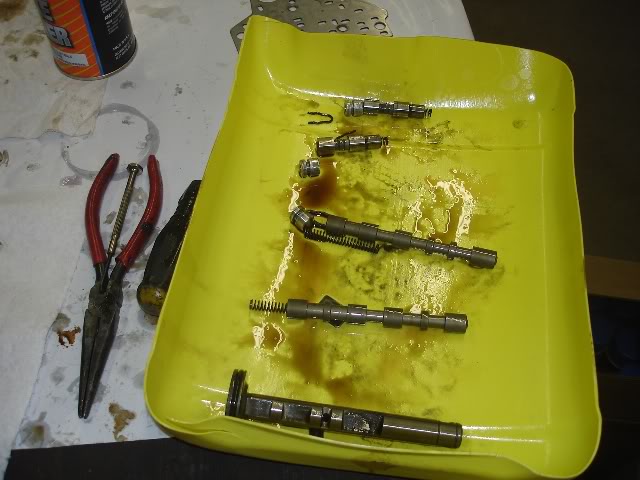
Cleaning out the plungers, springs, caps, etc. In the future I will use something better to arrange the internals so they don't roll around but this is all I had at the time:
Here is a closer pic of the diff from the type-p transmission with that extra gear on top just below the bearing that drives the power steering speed sensor.
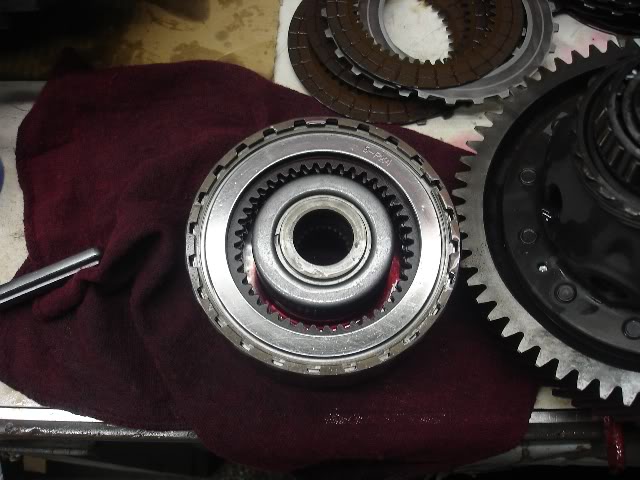
And here are the clutch packs all rebuild and ready to go back in.

Starting to put everything back together. As you can see I use plenty of Honda ATF. I let the clutches soak in ATF for more than 24 hours to make sure they are well saturated. I figured you cannot have too little atf when rebuilding a tranny. Look at all the pink new fluid.
This is what I used to aid in my rebuild, copies from the FSM. This helped out immensely. I didn't want to spend money on a transmission manual.

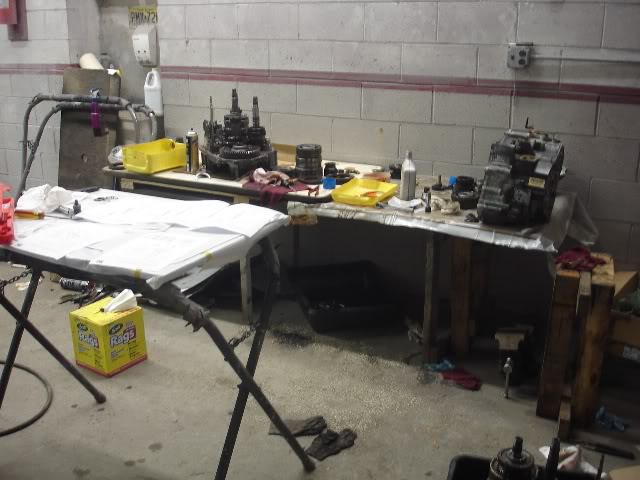
My little work bench, not ideal but it worked fine for my first rebuild.
Last shot before the case goes on.
And the new gaskets.
And cover on. Took me a little while to get it on making sure all the lines fit properly.
Overall, it took me about 25-30 hours for this rebuild. I took my time, especially after stripping the shaft threads. I cleaned everything thoroughly with brake cleaner and wipes. I used about 8 cans of brake cleaner and half a box of wipes. Used the air gun to blow off the excess and lubed everything with honda atf when reassembling everything. I replaced all of the gaskets and o rings that I could find. Also replaced the washers.
At one point, on the last accumulator body, I wasn't sure if I reinstalled the plunger and spring in the correct order. The fsm was unclear for that particular part. After bolting it on, I decided to take it back off and recheck as I didn't want to risk having it not work properly.
The shafts went back fairly smoothly, but took some time. Torqued everything up and ready for the install back into the car.
Up next, installation and test drive.

Here it is ready for its rebuild:
Here's a pic of the rebuild kit I bought from WITtrans for the w7ba with steels and internal and external filters.
On my bench starting to pull off the solenoids, sensors, harness and switches:
And with the rear cover removed exposing the shaft nuts.
I couldn't find a second bolt that is long enough so I quickly welded two bolts together to make one long bolt to use with the puller to pull of the gears.
This is the secondary shaft that I needed to replace because I damaged the threads when trying to remove the nut.
Finally pulled of the main case exposing the internals. My first reaction is....am I really crazy enough to attempt this???
I took a bunch of pictures figured I might need to look at them when putting everything back together.
Most of the shafts and gears removed looking at the valve bodies:
Snap shot of the parts removed:
Closer look at the valve bodies. Taking them apart one at a time.
As you can see the ATF is very dark and burned and the filters are clogged:
Now its time to start cleaning everything up one assembly at a time. Hopefully I don't forget anything.
Cleaning out the plungers, springs, caps, etc. In the future I will use something better to arrange the internals so they don't roll around but this is all I had at the time:
Here is a closer pic of the diff from the type-p transmission with that extra gear on top just below the bearing that drives the power steering speed sensor.
And here are the clutch packs all rebuild and ready to go back in.
Starting to put everything back together. As you can see I use plenty of Honda ATF. I let the clutches soak in ATF for more than 24 hours to make sure they are well saturated. I figured you cannot have too little atf when rebuilding a tranny. Look at all the pink new fluid.
This is what I used to aid in my rebuild, copies from the FSM. This helped out immensely. I didn't want to spend money on a transmission manual.
My little work bench, not ideal but it worked fine for my first rebuild.
Last shot before the case goes on.
And the new gaskets.
And cover on. Took me a little while to get it on making sure all the lines fit properly.
Overall, it took me about 25-30 hours for this rebuild. I took my time, especially after stripping the shaft threads. I cleaned everything thoroughly with brake cleaner and wipes. I used about 8 cans of brake cleaner and half a box of wipes. Used the air gun to blow off the excess and lubed everything with honda atf when reassembling everything. I replaced all of the gaskets and o rings that I could find. Also replaced the washers.
At one point, on the last accumulator body, I wasn't sure if I reinstalled the plunger and spring in the correct order. The fsm was unclear for that particular part. After bolting it on, I decided to take it back off and recheck as I didn't want to risk having it not work properly.
The shafts went back fairly smoothly, but took some time. Torqued everything up and ready for the install back into the car.
Up next, installation and test drive.
The following 6 users liked this post by nsnrider:
hatepotholez (04-10-2013),
mastini (04-01-2012),
stickwithjoe (03-13-2012),
TheMightyQuinn (02-29-2012),
Type-ES (02-28-2012),
and 1 others liked this post.
02-28-2012, 09:45 PM
#14
Second time around, it took me two hours to remove the tranny and about 4 hours to install the "new" rebuilt transmission. Filled it up with new honda atf, rechecked the connections and topped of power steering fluid and coolant.
It's time to start the car.
Start up the car and the first thing I noticed right away is the ABS, check engine, VSC lights are on and D5 is blinking.
My heart almost sanked when I saw that.
Deep break, lets get the scanner on and see what is comming up. Pulled a code P1768 for linear shift solenoid A. Not sure what is going on but figured lets go around the block to see how it drives.
Pull out of the driveway and notice it is starting from 2nd gear and tiptronic doesn't work. Car won't shift into 4th or 5th gears.
Get back to the shop, took of the linear solenoids and swapped them from the other tranny. Turns out one of the solenoid connections got damaged either during removal of re installation. Put the other solenoid back in, cleared the codes and started the car up again.
No codes, no lights.
Went for a drive and transmission is shifting PERFECTLY.
Everything seems to be working great. Took it on the highway, no slipping, jerking or anything else abnormal. Pics up speed fast and smoothly.
I am very happy. I will take it easy for a few days and see if anything will come up.
Next, I'll see how much I ended spending on this rebuild.
It's time to start the car.
Start up the car and the first thing I noticed right away is the ABS, check engine, VSC lights are on and D5 is blinking.
My heart almost sanked when I saw that.
Deep break, lets get the scanner on and see what is comming up. Pulled a code P1768 for linear shift solenoid A. Not sure what is going on but figured lets go around the block to see how it drives.
Pull out of the driveway and notice it is starting from 2nd gear and tiptronic doesn't work. Car won't shift into 4th or 5th gears.
Get back to the shop,
took of the linear solenoids and swapped them from the other tranny. Turns out one of the solenoid connections got damaged either during removal of re installation. Put the other solenoid back in, cleared the codes and started the car up again.No codes, no lights.
Went for a drive and transmission is shifting PERFECTLY
.Everything seems to be working great. Took it on the highway, no slipping, jerking or anything else abnormal. Pics up speed fast and smoothly.
I am very happy. I will take it easy for a few days and see if anything will come up.
Next, I'll see how much I ended spending on this rebuild.
The following users liked this post:
i5rory (10-26-2023)
02-28-2012, 10:10 PM
#19
Senior Moderator
Good job.
Oh and you should feel a difference without the variable speed shaft in. The steering should be more weighted, and much better feeling. Did you block them off or connect them together?
Oh and you should feel a difference without the variable speed shaft in. The steering should be more weighted, and much better feeling. Did you block them off or connect them together?
02-28-2012, 10:47 PM
#20
I tried to connect them together but due to the different line diameter, I blocked them off. I did not drive all that much on the type-s tranny (since it was giving me trouble) therefore I do not have long term effects of not having that sensor in the base model tl. Again, I personally did not feel any difference, if it was a bit weighted, i didn't notice it.
02-28-2012, 11:02 PM
#21
6G TLX-S

Excellent work. You've saved yourself a whole lot of money.
02-29-2012, 07:32 AM
#22
Senior Moderator
I tried to connect them together but due to the different line diameter, I blocked them off. I did not drive all that much on the type-s tranny (since it was giving me trouble) therefore I do not have long term effects of not having that sensor in the base model tl. Again, I personally did not feel any difference, if it was a bit weighted, i didn't notice it.
 WOW.. I don't think I would ever rebuild one. Wondering if you have pix of the clutch packs during the rebuild?
03-05-2012, 08:39 AM
WOW.. I don't think I would ever rebuild one. Wondering if you have pix of the clutch packs during the rebuild?
03-05-2012, 08:39 AM
#25
Senior Moderator
 03-05-2012, 11:55 AM
#28
Senior Moderator
The clutchpacks are what fail, but its due to lack of fluid getting to them to cool and lubricate them.
08-23-2012, 12:09 PM
#29
Racer

Join Date: Jul 2012
Location: Orlando, Florida
Age: 41
Posts: 288
Likes: 0
Received 5 Likes
on
3 Posts
nsnrider how's the tranny been running since the rebuild? my 99 started slipping from 4th to 3rd and backwards, and than in 4th is at reline at like 55mph, was going to change the pressure switches and clean the solenoids see if that helps but you made a good write up was thinking of going for it if the basic stuff doesnt work.
08-02-2017, 12:58 AM
#31
Pro

Nice pictures. Doing this type of job really is daunting at first but thats all it is. In reality its just following directions and having the proper tools. Most anyone could properly do this if they were willing to try. Great job to the op.

Thread
Thread Starter
Forum
Replies
Last Post
SidhuSaaB
3G TL Problems & Fixes
18
05-30-2020 12:40 AM