
[DIY] Let's Add Some Class: Footwell LED Lighting
 02-15-2012, 06:51 PM
#1
Race Director
Thread Starter
iTrader: (8)
[DIY] Let's Add Some Class: Footwell LED Lighting
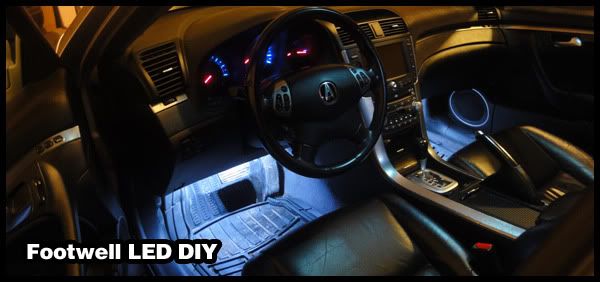
Why are LEDs so awesome?
Well, you can add them pretty much anywhere.
Your computer, your car, your desk, your house, etc.
Today, I'll be teaching you guys how to add them into your car's footwell area!
So how will they function?
I'll be wiring them to the dome supervisor wire, so that means whenever you open your door, they turn just like the domes do, and fade out just like the domes do.
When you're driving and someone turns on the domes, your footwells WILL NOT turn on.
Many cars have these already, and if you've always wanted to know how to add them, read on!
So what's so cool about this mod?
It's CHEAP. My LED strips cost me about 30 dollars, shipped right to Canada.
It would be cheaper for fellow Americans, obviously.
So what's needed?
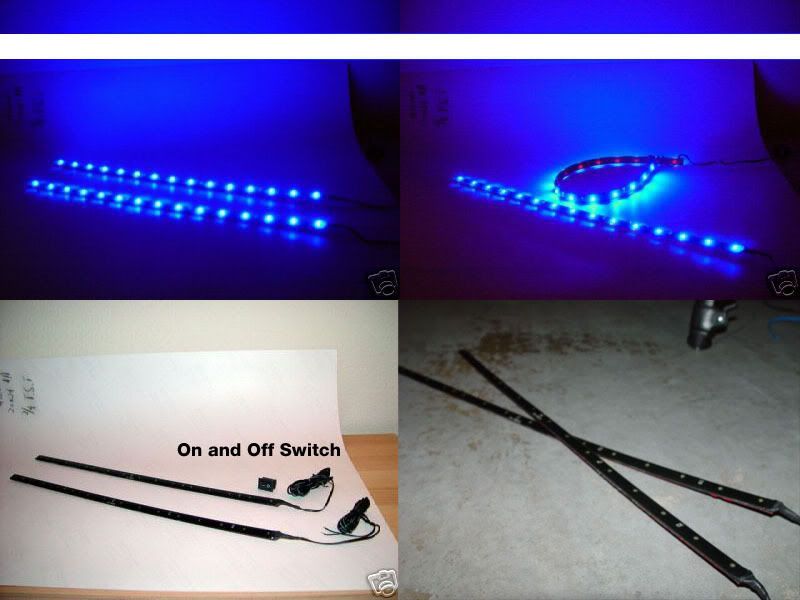
The material list:
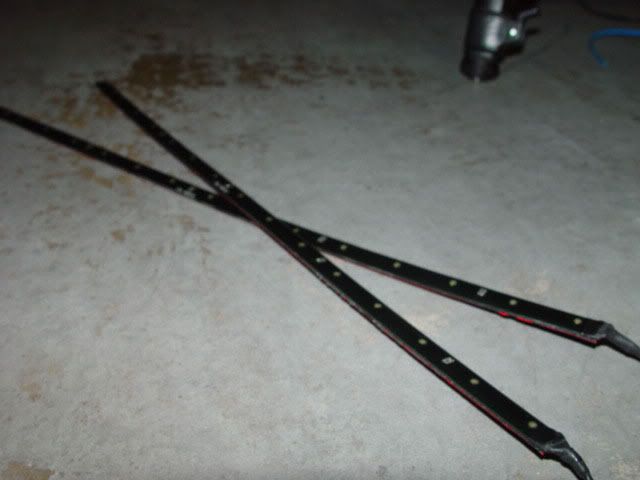
1. 4 LED Strips of your choice and colour - I bought 6" 5 LED white LED strips.
I didn't want mine too bright so that's why I bought 6" instead of 12".
If you think LED strips are overkill, use 2 LEDs if you want and solder them together (MORE WORK!).
2. T-Tap connectors or Splice Connectors.
I ended up using around 7 of them.
3. Primary wire aka "wire".
I recommend 18 gauge.
I ended up buying 2 spools.
4. Butt connectors.
I ended up using 8 of them.
You'll want to buy 18-22 gauge butt connectors.
5. Add-a-Fuse with 3A fuse.
5. Straightened clothes hanger
6. Electric Tape
7. Wire stripper + crimper
8. Mounting Tape
Okay so lets get started!
We'll be wiring everything first.
Then mount after.
Wiring:
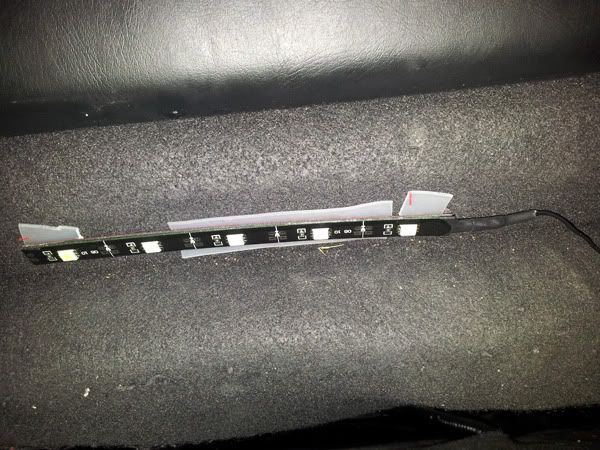
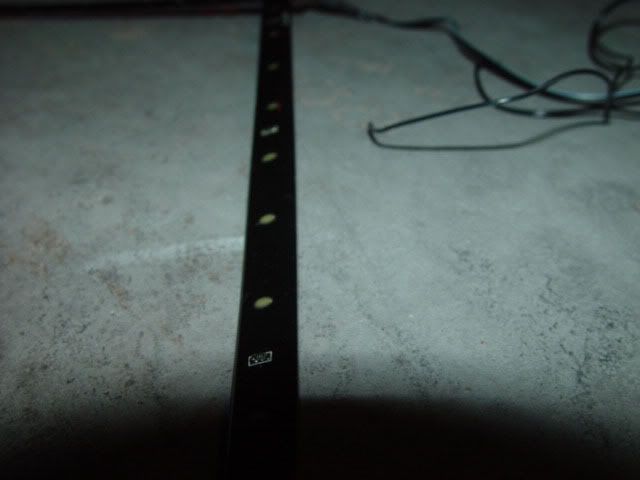
1. Lay out your LED strips.
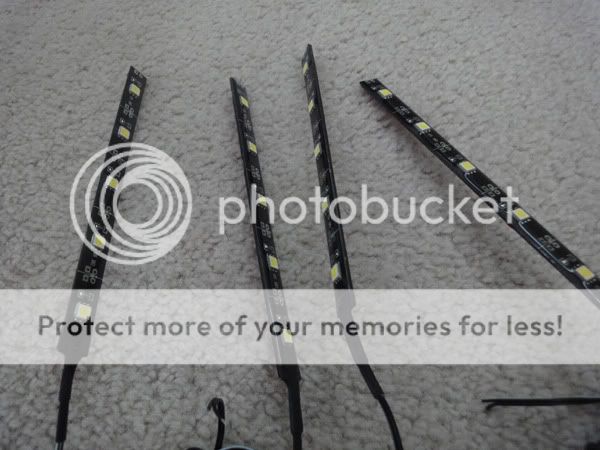
2. Each LED strip should have 2 wires coming out from it.

One wire is a positive wire, and one wire is a negative wire.
Red is usually positive and black is usually negative.
For me, the black and white stripe wire was positive and the black wire was negative.
3. Grab your stuff and head out to your car
4. Disconnect to negative terminal on your car.
Wiring your first LED strip:
I'll be starting on the driver side, and I assume you want to too!
Preparing the positive wire:
1. Grab your Add-A-Fuse and stick the 3A fuse in the slot for the accessory (our LEDs).
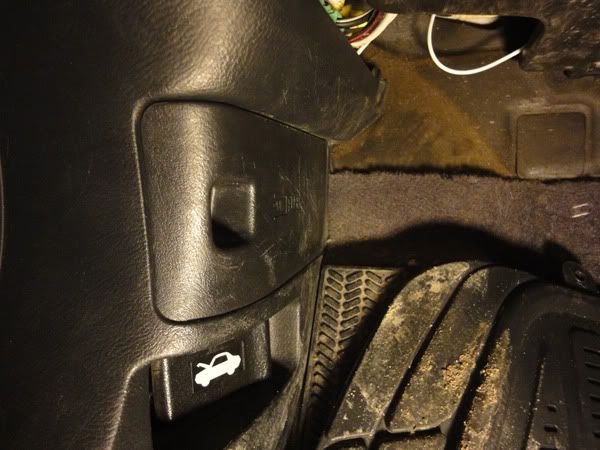
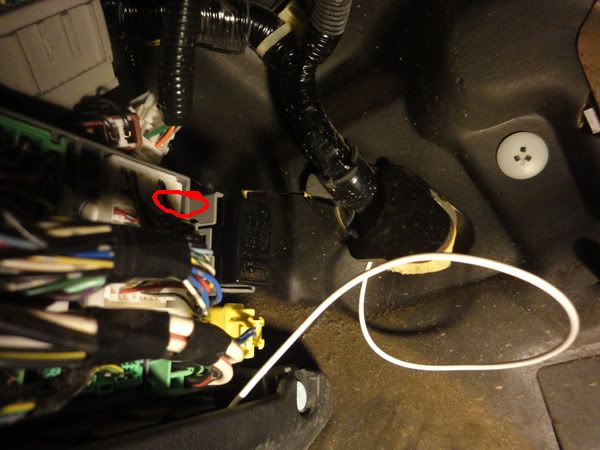
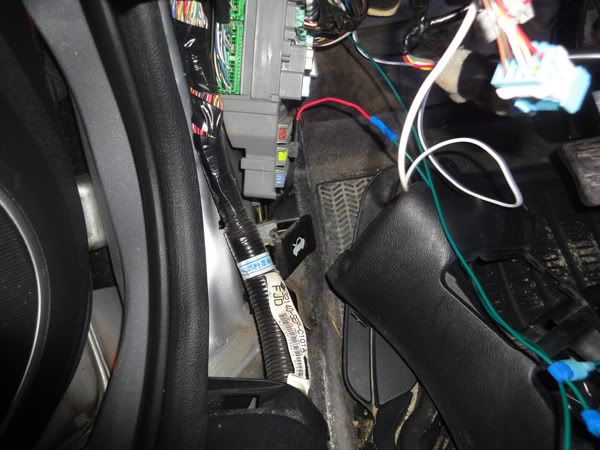
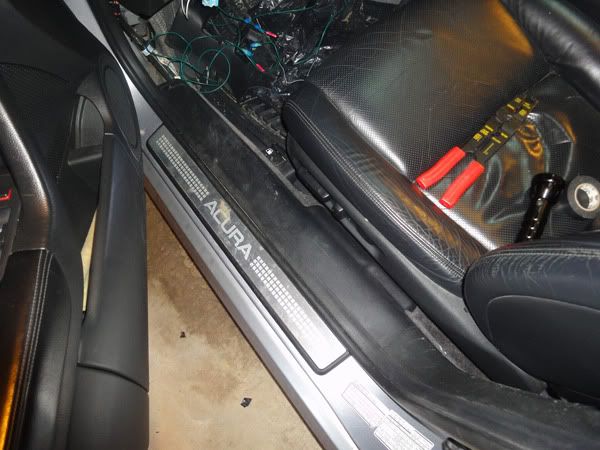
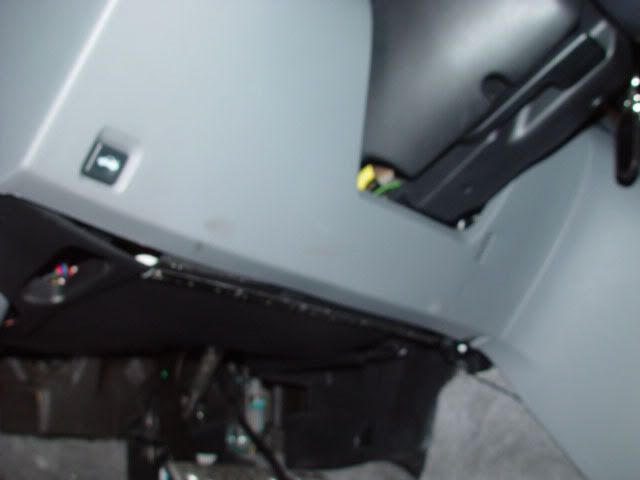
2. Slide open your driver fuse box cover, and look for the fuse that is labeled "Power Seat Slide".
I forgot what fuse # it is but it's the one in this picture:
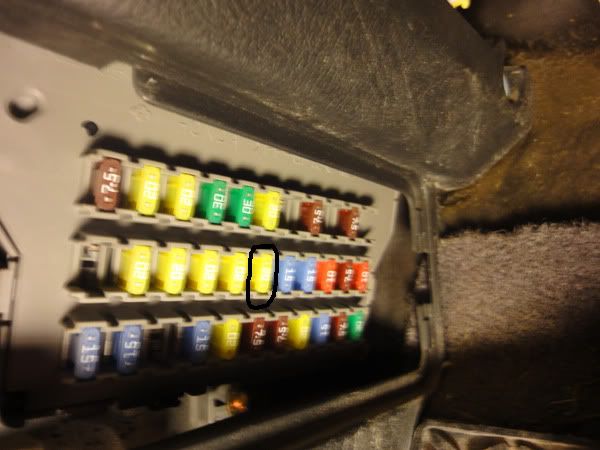
3. Pull that fuse out and put it in the slot for the Add-A-Fuse.
4. Take your primary wire and cut a foot of it.
5. Strip back one end, and crimp it down to the wire on the Add-A-Fuse.
4. Now stick your add-a-fuse in that now empty "Power Seat Slide" fuse.
6. At the end of your primary wire that's attached to the add-a-fuse, strip it back, and use a butt connector to connect it to the positive wire (red wire, or black and white stripe in my case) on your LED strip.
7. Wiring your positive is now done! Easy? I love the Add-A-Fuse device lol.
To complete the wiring, we need to hook up the negative wire now:
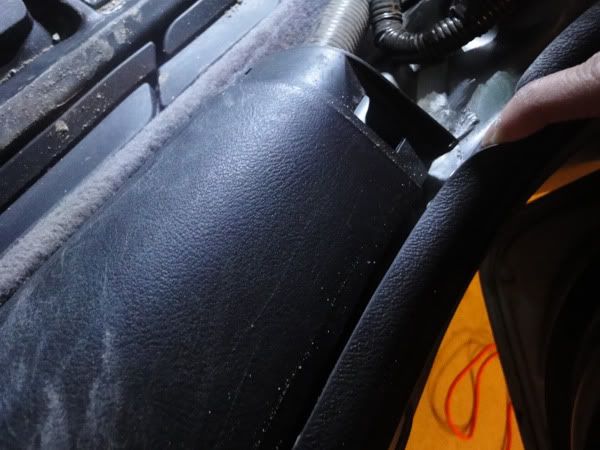
1. Remove the lower dash panel.
There's just one screw you remove.
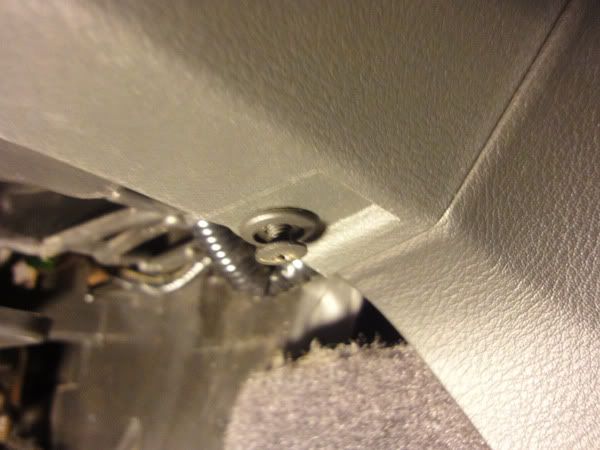
Then pull the panel which disengages the clips.
2. I ended up having to remove the lower dash panel, too.
All there is are clips, again.
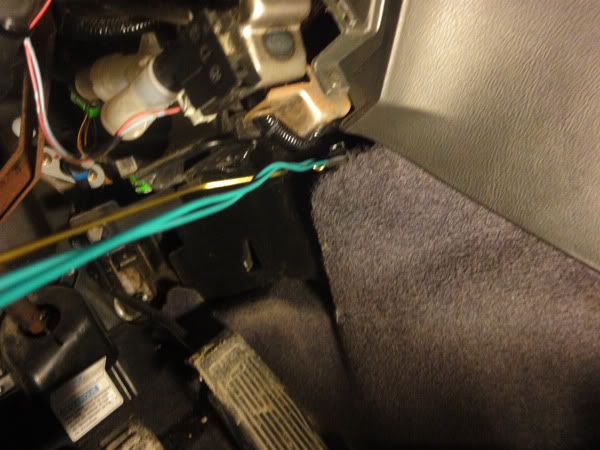
3. We now have full access to the fuse box.
This is what you should see:
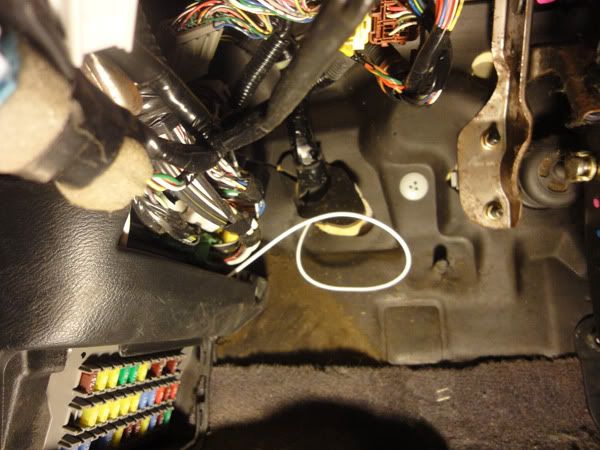
That white wire you don't have because it's for my accord fogs lol
4. Disconnect the 5-pin harness connector behind the fuse box.
The connector is located behind the turn signal relay at the very top right of behind the fuse box.
You can definitely feel it. You can feel each wire and count 5 of them if you want too lol
The tab is at the top and you push it down and pull out.
It was difficult for me, since it was behind the fuse box.
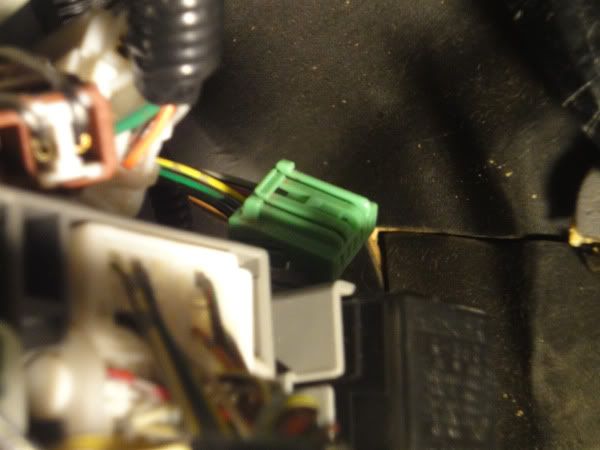
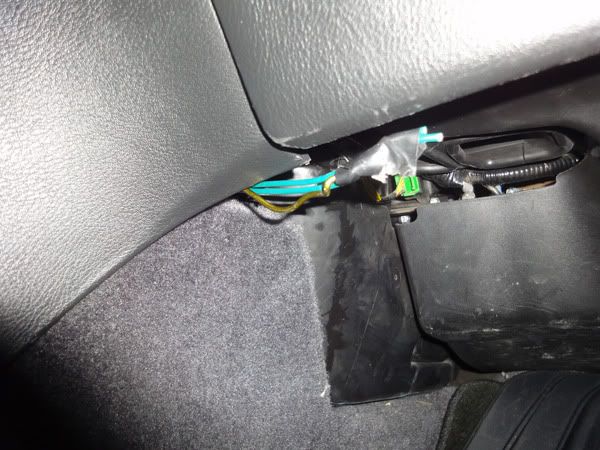
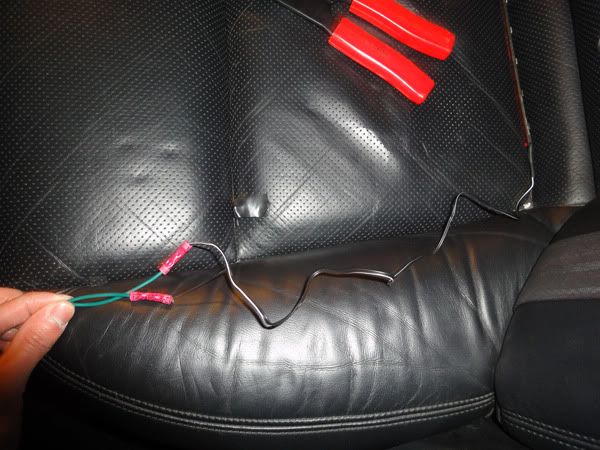
5. You should see a green with red stripe wire on that 5 pin connector.
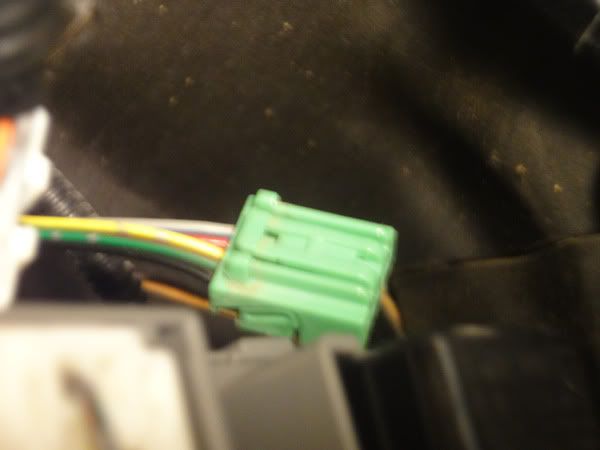
That's the dome super visor wire.
6. Cut a foot of wire using your primary wire.
You won't need to strip it if you're using "self-stripping" connectors.
7. With the foot of primary wire, tap into the dome supervisor wire with a splice connector or T-Tap connector.
8. Now at the end of this primary wire, strip it back and use a butt connector to crimp it to the negative wire of your LED strip.
YAY ALL DONE!
You can now go and test it out!
Hook your negative terminal back in, and open the door.
If the LED strip turns on, you're ready to add the other LED strips!
If not, make sure your connections are making contact.
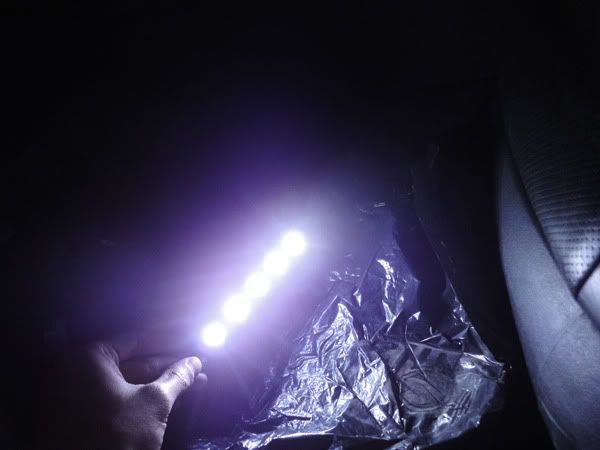
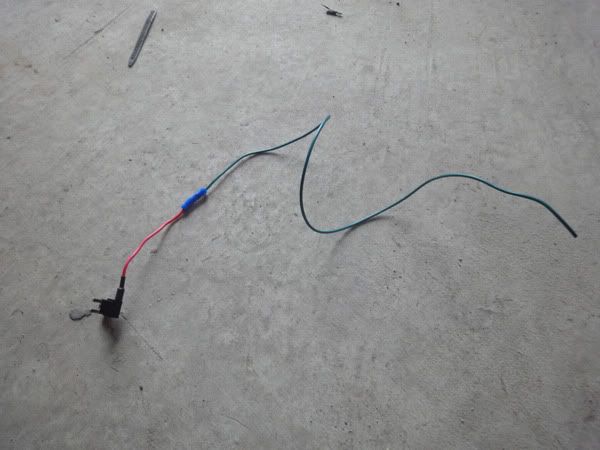
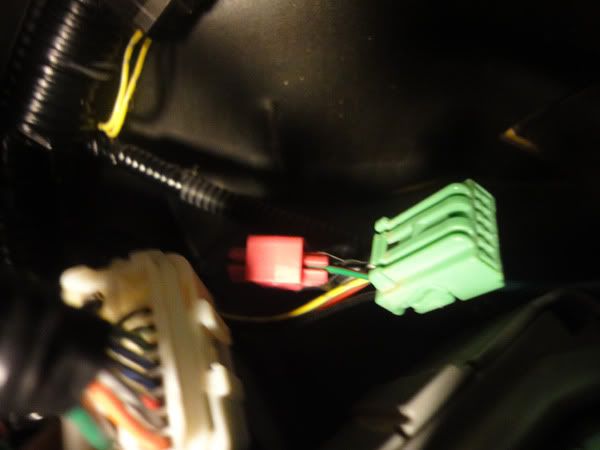
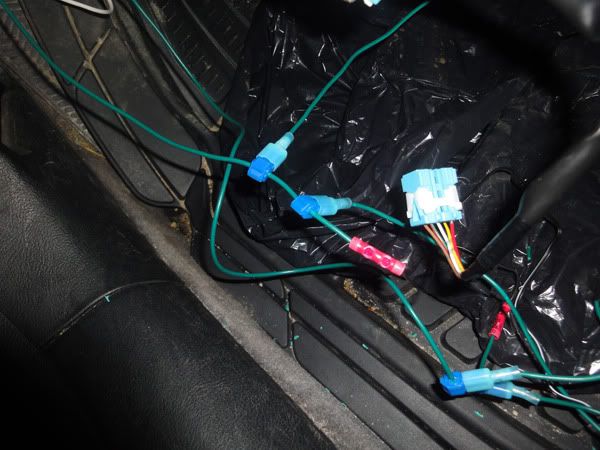
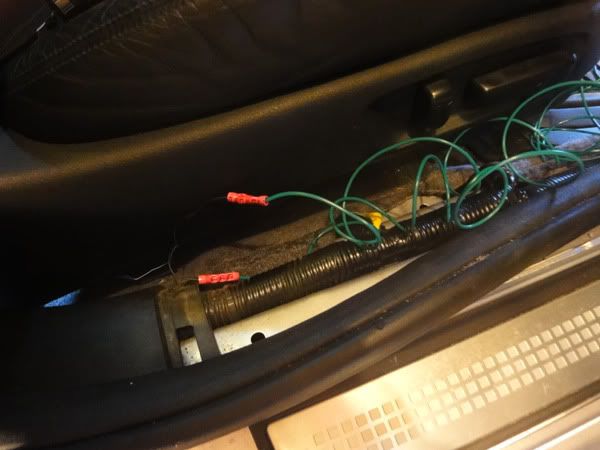
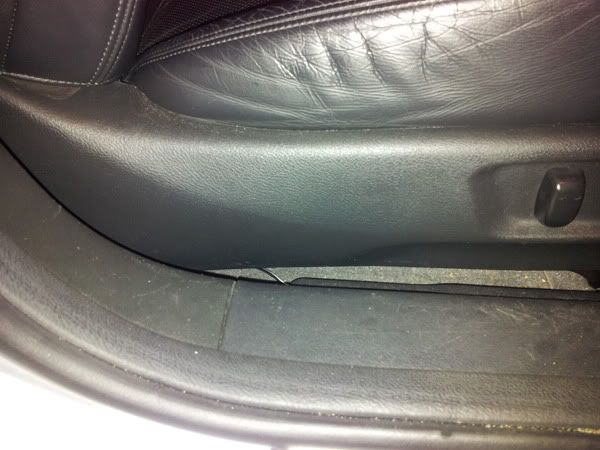
Here's what you your setup should look like:
If it lights up, the HARDEST part is over!
Now all you have to do is tap the + and - wires from the other LED strips!
Lets move on to the passenger footwell!
1. Unplug your negative terminal on your battery if you havn't already.
2. Cut 2 wires that can reach from your driver footwell to your passenger side footwell.
I didn't measure. Maybe 4 feet each wire? IDK. Just make sure it spans enough to reach.
3. Get your straightened clothes hanger, and electric tape the two wires onto the end of the clothes hanger.
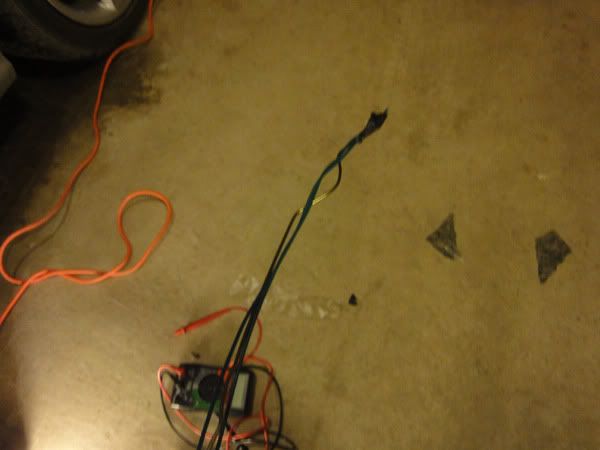
4. Using the provided "gap" behind the center console, push the clothes hanger GENTLY through so it comes through the other side.
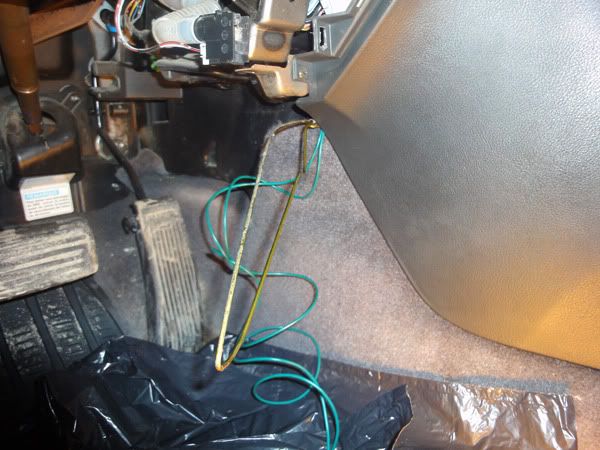
5. Remove the electric tape, and pull out the clothes hanger.
6. Wire one wire to the negative (black) of your LED strip using a butt connector.
7. Wire the other wire to the positive (red) of your LED strip using a butt connector.
8. Now head over to the driver side again, and see which one is the negative wire.
You can pull a wire from the passenger side and see which one moved.
Say you held onto the positive wire of the LED strip on the passenger side, and tugged it. The wire that moves on the driver side is your positive wire.
I think a little kid could figure it out LOL
Just don't wire your positive to negative haha
9. When you determine which wire is which, positive or negative, use a splice connector or T-Tap and tap it into its corresponding PRIMARY wire (don't tap into the LED strip wiring).
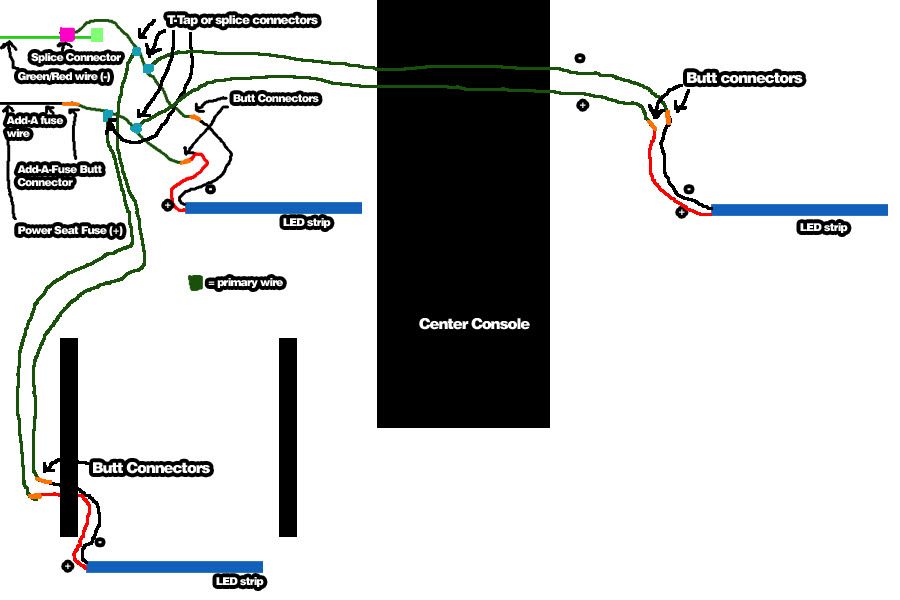
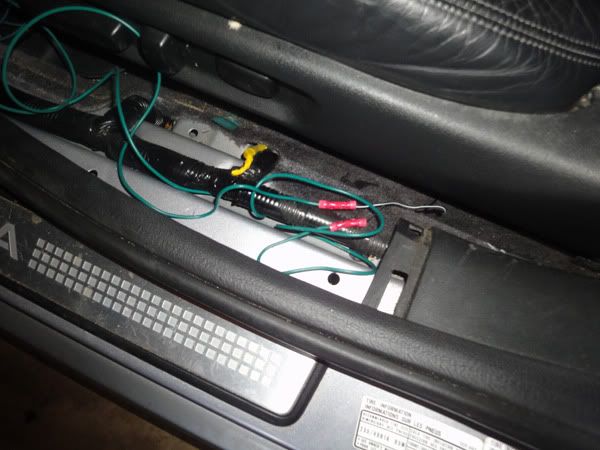
This is what you should have...
Test it out!
See if it lights up by plugging in the negative terminal and opening the doors.
If it works, time to do the rears!
Unplug the negative terminal again on your battery.
I did the driver rear first.
1. Cut two wires from your primary wire spool that can run from the fuse box to behind the driver seat.
Again, I didn't measure.
2. Connect one wire to the LED strip's positive using a butt connector
3. Connect the other wire to the LED strip's negative wire using the butt connector.
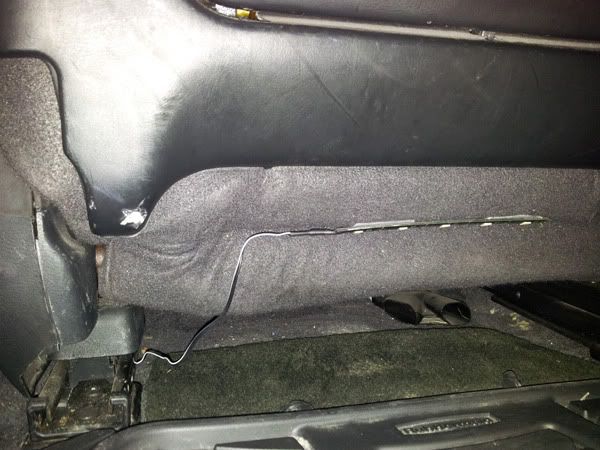
4. Feed the wire through under the seat mount/bracket.
5. Move up to the driver area now, and figure out which wire is positive and which is negative.
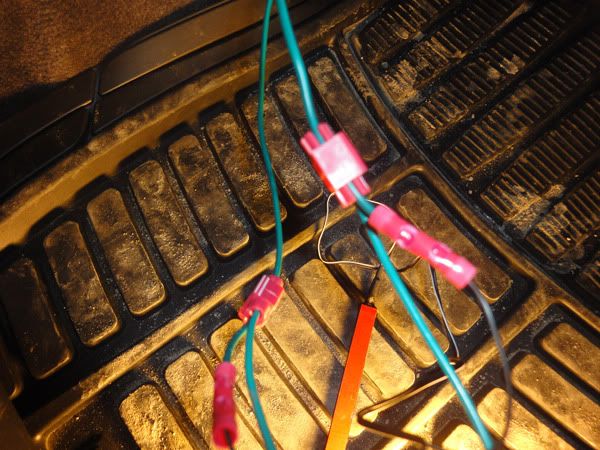
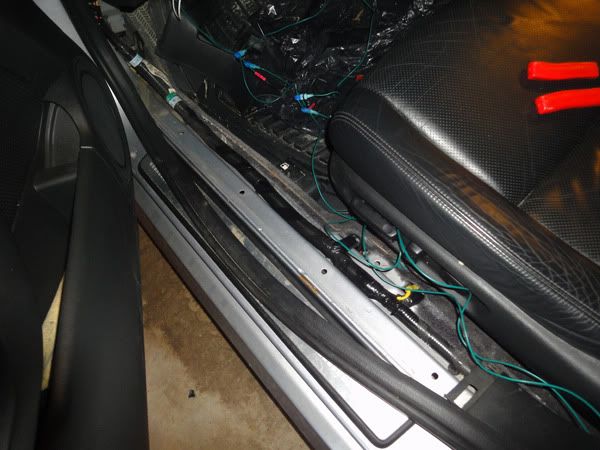
All similar to what we did for the passenger footwell:
6. Tap (using a splice connector or T-Tap) the rear's positive primary wire to the primary wire that's positive used to power the driver footwell.
7. Tap (using a splice connector or T-Tap) the rear's negative primary wire to the primary wire that's negative used to power the driver footwell.
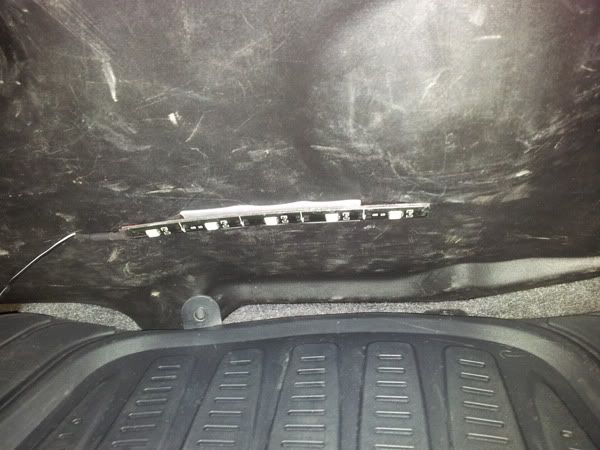
You should have the same setup:
You can test it out if you want now.
Now for the last footwell!
The rear passenger:
1. Unplug the negative terminal on your battery if you havn't already.
Same concept as the driver rear footwell, but this time you're tapping the wires to the passenger footwell's primary wire.
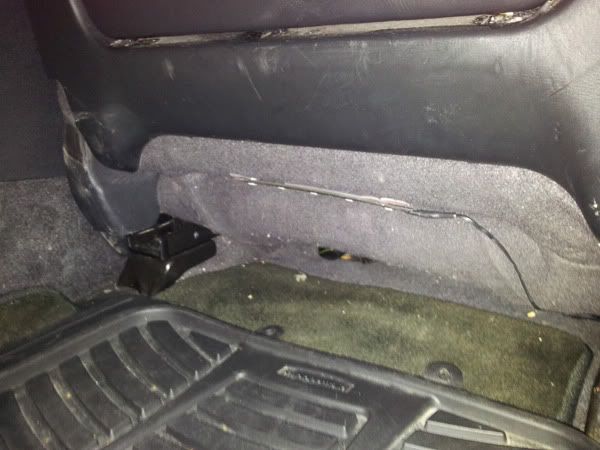
2. Cut two wires that can reach and span from your passenger footwell to behind the passenger seat.
3. Connect one of the wires to the positive wire on the LED strip using a butt connector.
4. Connect the other wire to the negative wire on the LED strip using a butt connector.
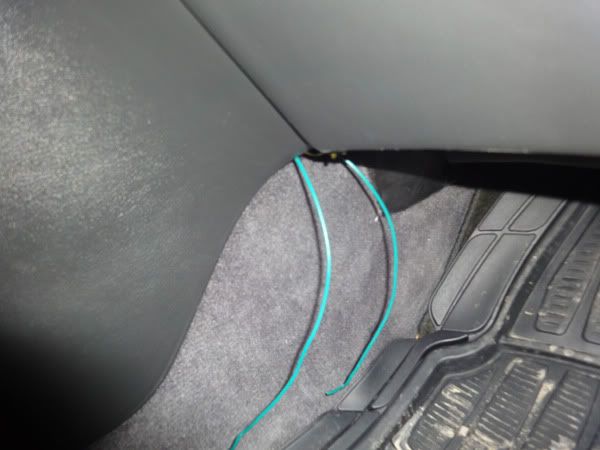
5. Route the wires under the passenger seat bracket and bring it all the way to the passenger area.
6. Now working in the passenger area, figure out which wire is positive and which wire is negative.
7. Using a T-Tap or splice connector, tap the rear's negative wire to the negative primary wire we fed behind the center console to power the passenger LED strip.
8. Using a T-Tap of splice connector, tap the rear's positive wire to the positive primary wire we fed behind the center console to power the passenger LED strip.
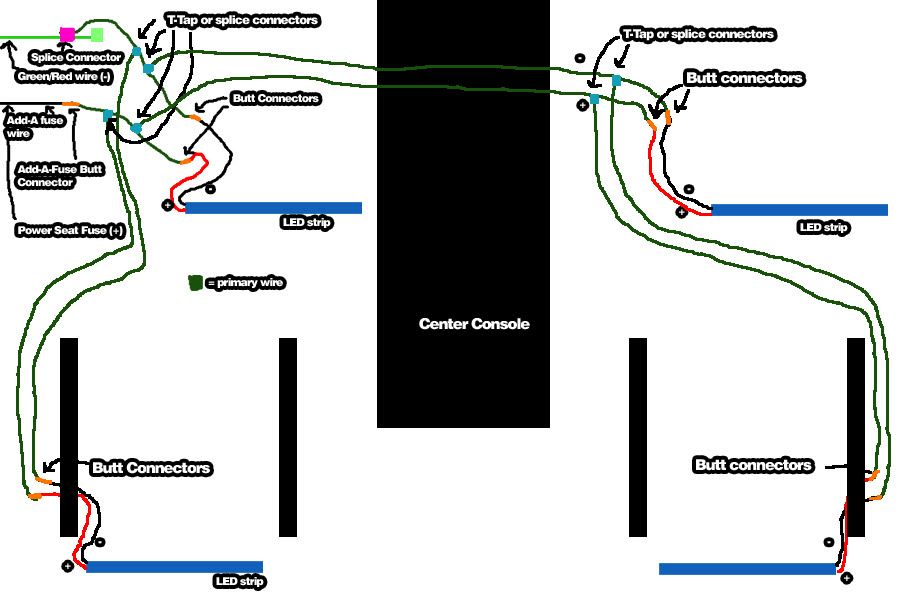
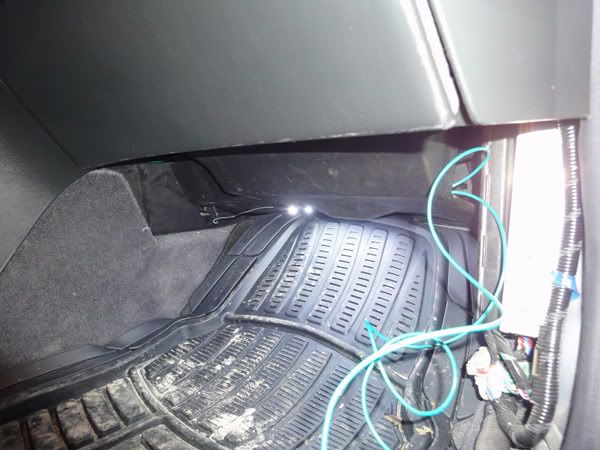
This is what you should have:
ALL DONE!
You can plug your negative battery terminal back in and test all the lights out!!
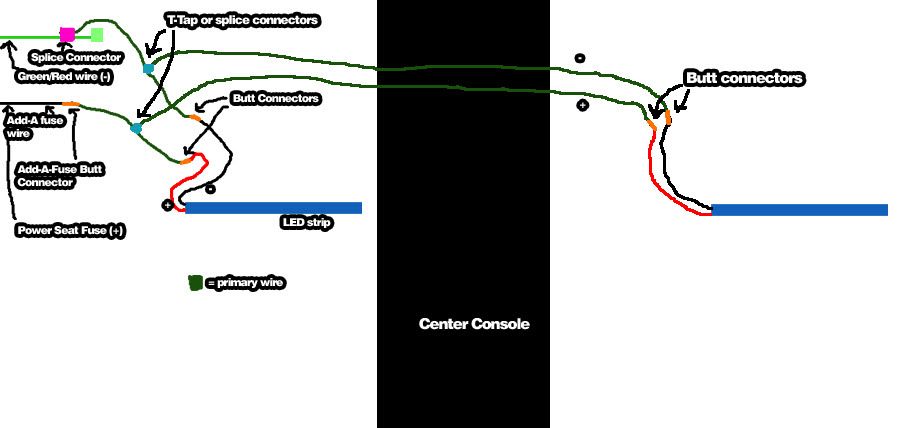
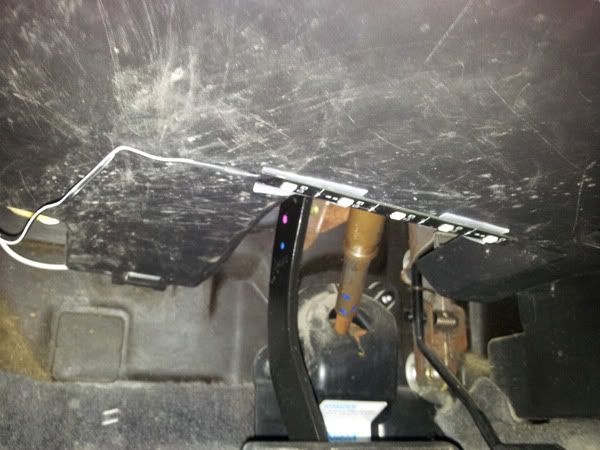
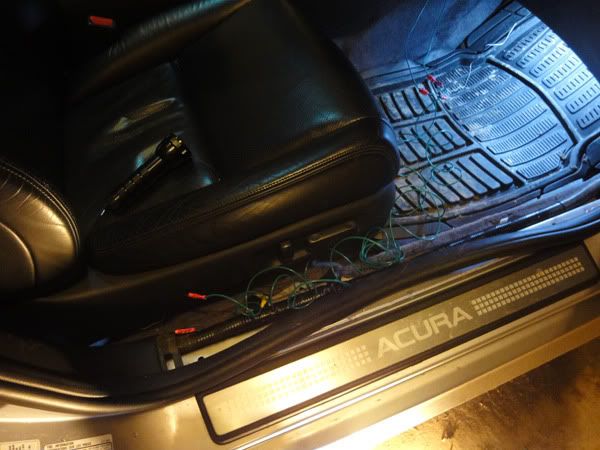
This is what you should have in your driver area:
2 primary wires to power the LED strip 1 (driver)
1 butt connector on the end of each primary wire to power LED strip 1
2 splice connectors or T-tap connectors on each primary wire, for the driver rear and passenger.
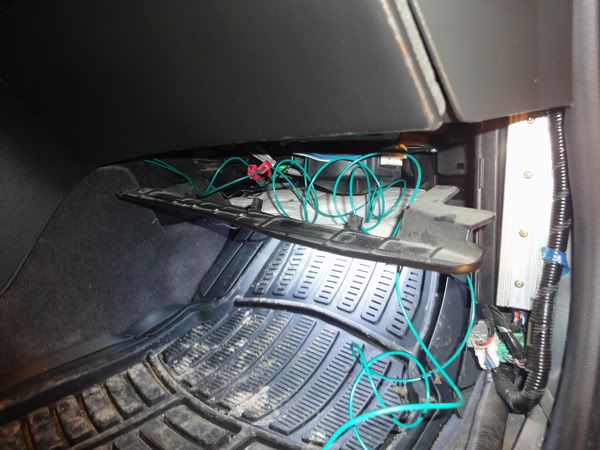
This is what you should have in your passenger area:
2 primary wires coming from the driver side to power the LED strip 2 (passenger)
1 butt connector on the end of each primary wire to power the LED strip 2.
1 splice connector or t-tap connector on each primary wire, to power the rear passenger LED strip.
Cheers!
Mounting is coming up!

The following 8 users liked this post by guitarplayer16:
abracing (02-15-2012),
CrazyEights (04-21-2014),
dschaos (02-15-2012),
jgj925 (03-12-2013),
K.Lindsay (05-07-2014),
and 3 others liked this post.
02-15-2012, 06:51 PM
#2
Race Director
Thread Starter
iTrader: (8)
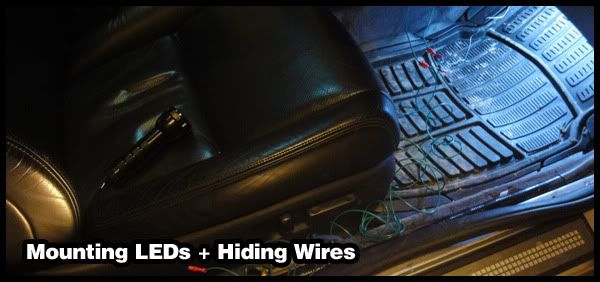
First stage is mounting the LED strips.
Second stage is hiding the wires.
Mounting the LED strips:
Driver side:
1. Take your mounting tape and stick it on the back side of your LED strip.
If your LED strip is preinstalled with an adhesive, remove the protective cover from this adhesive and stick the mounting tape onto the adhesive. OR just use the adhesive tape it came with and not use mounting tape at all.
2. Pick a spot, preferably where the light shines evenly down the center.
I mounted it to the lower dash cover, pretty much above the brake pedal.
3. Remove the mounting tape protective film and stick it on.
Easy.
Passenger side:
Do the same thing.
I mounted mine at the back on the lower dash cover, too.
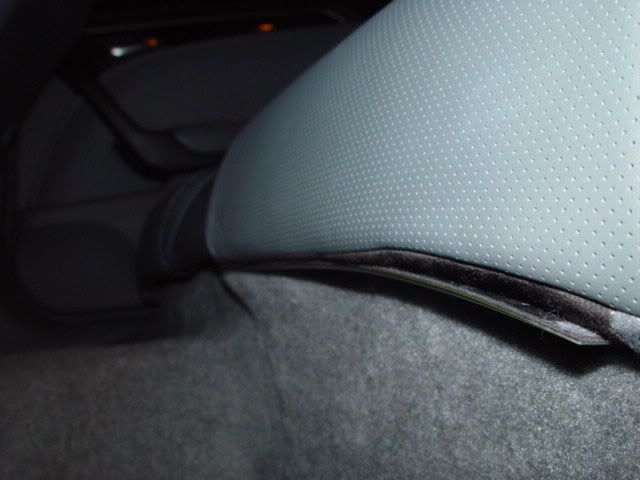
Rears:
Do the same thing.
I mounted mine on the back portion of the front seats.
Hiding the wires:
Passenger side:
1. Remove the first trim cover.
It's just clips that hold it in.
2. Pull the lining that runs along the side channel out.
No tricks.
3. Remove the side trim.
There are just clips that hold it in. Start popping the clips from the front to the back.
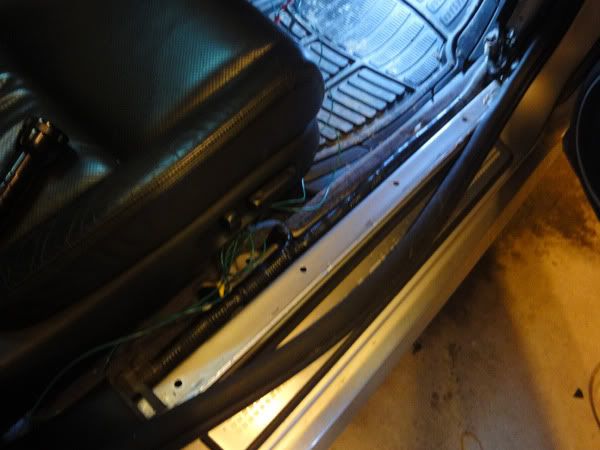
4. Run the primary wires beside the wire loom under the side panel.
5. Put the side trim back on, covering the wires.
6. Push the lining back in.
7. Pull down the lower dash cover, bring all the wires up there to hide them.
Push the lower dash cover back up. All wires hidden.
8. Finish it all off my putting the first trim cover back on.
There you have it. No wires should be visible, except for the short amount of wire for the LED strips.
Driver side:
1. Remove fuse box trim
There are just clips holding it in.
2. Peel back the lining just like you did on the other side
3. Remove the side trim, which are held in by clips.
Again, pop the clips working front to back.
4. Run the primary wires along with the big wire loom.
5. Place the side trim over all of it.
6. Push the lining back in.
7. Place fuse trim piece back in.
At this point, you can put back on the lower dash panel, BUT not the lower dash cover.
8. Just like we did on the passenger side, we're hiding all the wires and connections on top of the lower dash cover.
Last edited by Steven Bell; 02-16-2012 at 07:42 PM.
The following 3 users liked this post by guitarplayer16:
02-15-2012, 06:52 PM
#3
Race Director
Thread Starter
iTrader: (8)
Special thanks to vladkarnafel, dwb993, swoosh, Rockstar143, SharksBreath, Roger555, vietxquangstah, GeeteeDan and others who have helped me make this DIY possible.
Last edited by Steven Bell; 02-15-2012 at 08:37 PM.
The following 19 users liked this post by guitarplayer16:
anagramjones (11-17-2013),
BigJHouse (10-06-2013),
BrownBuck (05-20-2012),
daciss (03-12-2013),
Davidkelly (06-28-2012),
and 14 others liked this post.
The following users liked this post:
guitarplayer16 (02-15-2012)
02-15-2012, 07:03 PM
#5
Race Director
Thread Starter
iTrader: (8)

The following users liked this post:
guitarplayer16 (02-15-2012)
02-15-2012, 07:34 PM
#7
Nicely done! When I did my, my power source was inside the armrest console. There is a small vanity light inside. So I pop it out and ran the wire there. Then ran the wires for the 2 front passenger and driver along the center console. Then for the rear seats, I ran it inside the carpet. I used a cloth hanger to drag the wire. So when my parking light or headlamp is on the front and rear strip lights up.
But you have a very thorough write up! nice
But you have a very thorough write up! nice
Last edited by KB1Spec; 02-15-2012 at 07:44 PM.
The following users liked this post:
guitarplayer16 (02-15-2012)
Trending Topics
The following users liked this post:
guitarplayer16 (02-15-2012)
02-15-2012, 07:47 PM
#9
Race Director
Thread Starter
iTrader: (8)
My Sony WX1 just broke =(
Nicely done! When I did my, my power source was inside the armrest console. There is a small vanity light inside. So I pop it out and ran the wire there. Then ran the wires for the 2 front passenger and driver along the center console. Then for the rear seats, I ran it inside the carpet. I used a cloth hanger to drag the wire. So when my parking light or headlamp is on the front and rear strip lights up.
But you have a very thorough write up! nice
But you have a very thorough write up! nice
I think I'll have a post somewhere down the road that shows different ways of wiring it such as your way (turn on with the parking lights) or CONSTANT on when the key is in.
I'll edit the last post when I upload the "final results" pics.
Thanks again!
GeeteeDan was the one who showed me where to pull the wire through to the passenger side.
The following users liked this post:
GeeteeDan (02-15-2012)
02-15-2012, 08:05 PM
#10
Team Owner
iTrader: (2)
Join Date: Jan 2008
Location: Kansas City, MO (Overland Park, KS)
Posts: 36,545
Received 6,470 Likes
on
5,162 Posts
Nicely done, GP. Good write-up.
The following users liked this post:
guitarplayer16 (02-15-2012)
The following users liked this post:
guitarplayer16 (02-15-2012)
The following users liked this post:
guitarplayer16 (02-15-2012)
02-15-2012, 08:39 PM
#14
Race Director
Thread Starter
iTrader: (8)
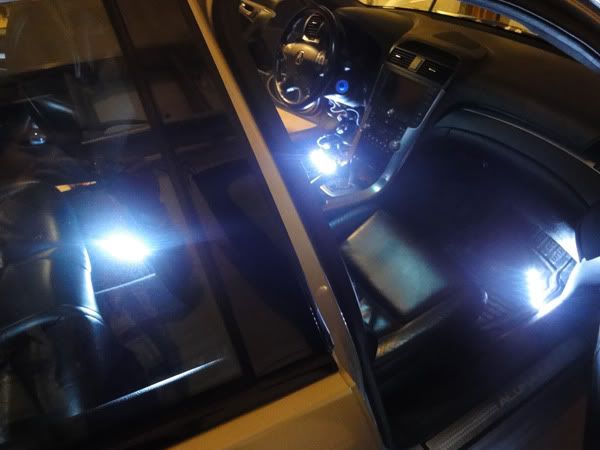
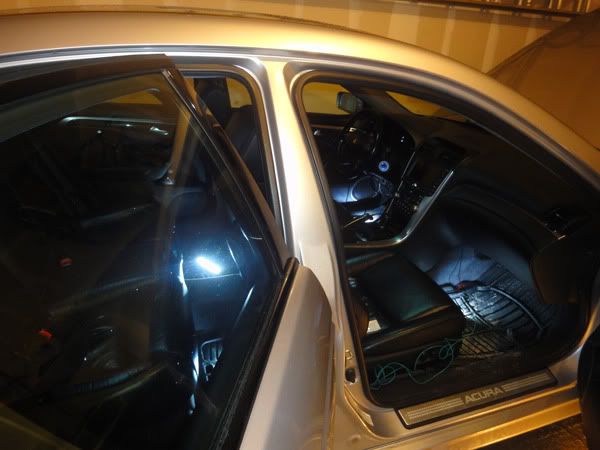
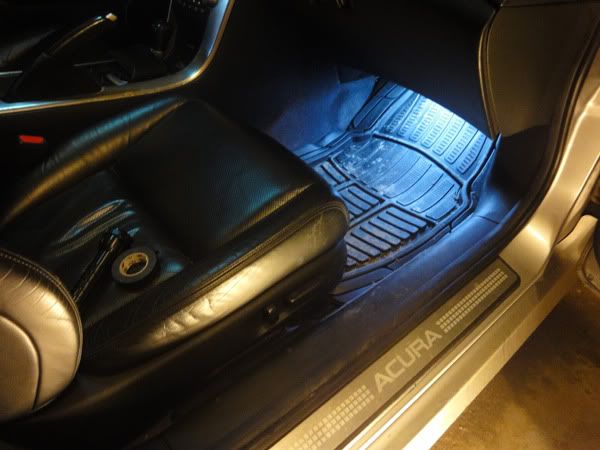
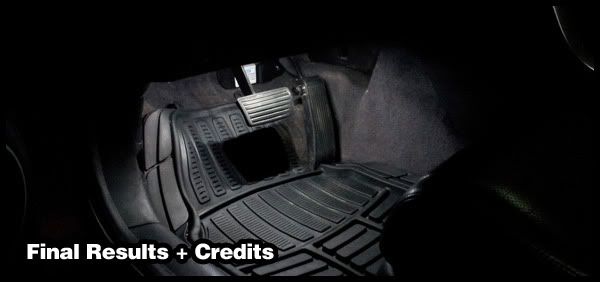
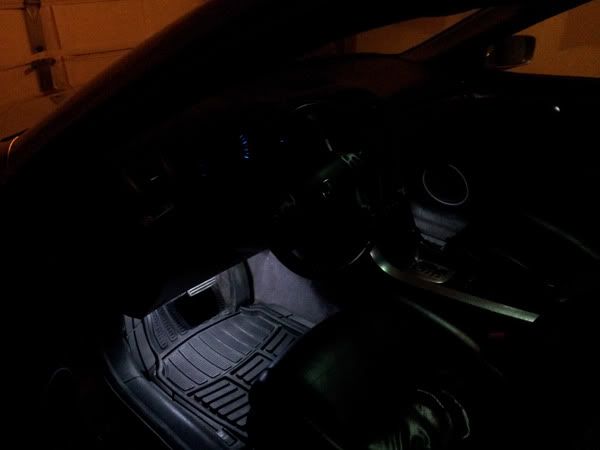
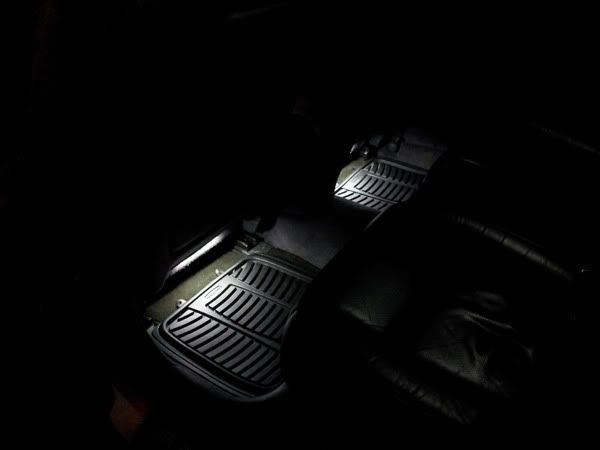
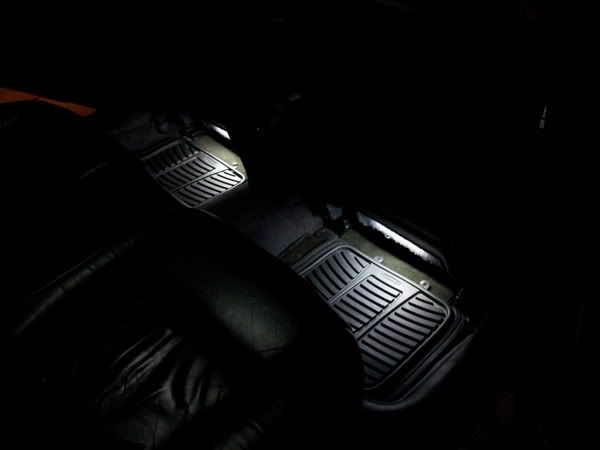
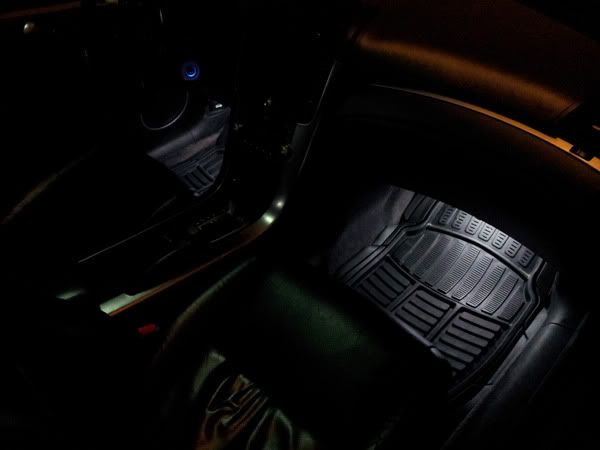
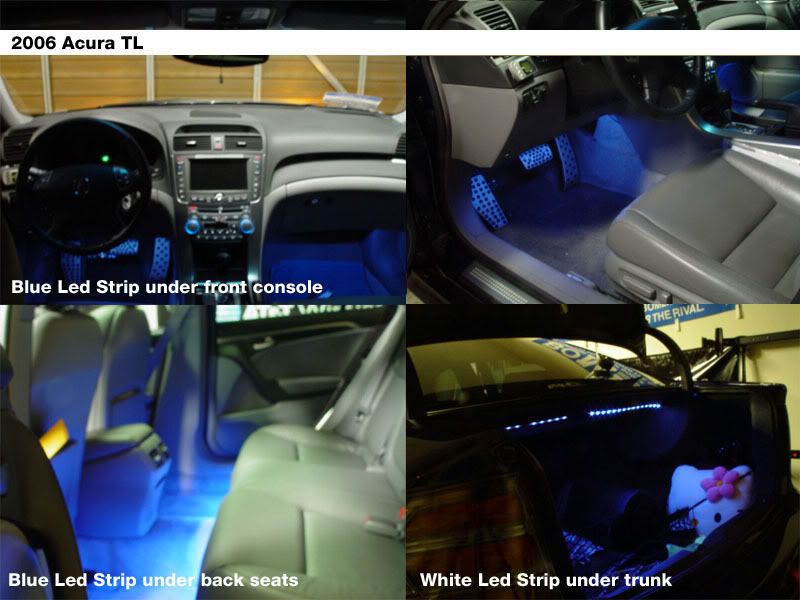
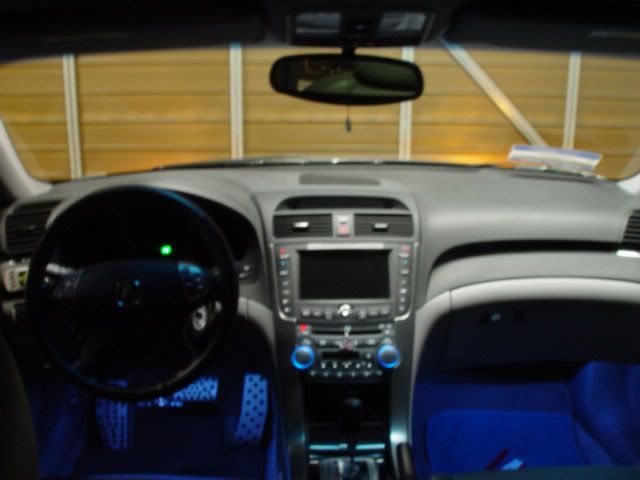
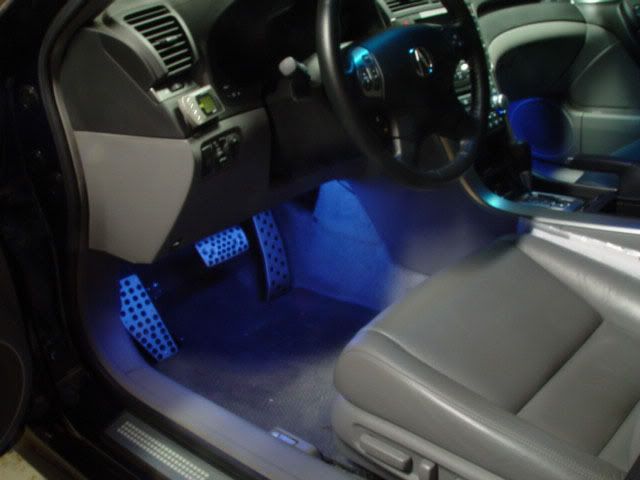
Final Results pictures are up!
Please excuse the picture quality...
My WX1 broke so I used my Galaxy S2 camera.
It doesn't even look like I have dome lights on LOL
I want my WX1 to come back =(
Also please excuse the non OEM all weather mats lol
Special thanks to Steven Bell who updates my threads and posts for you all to see!
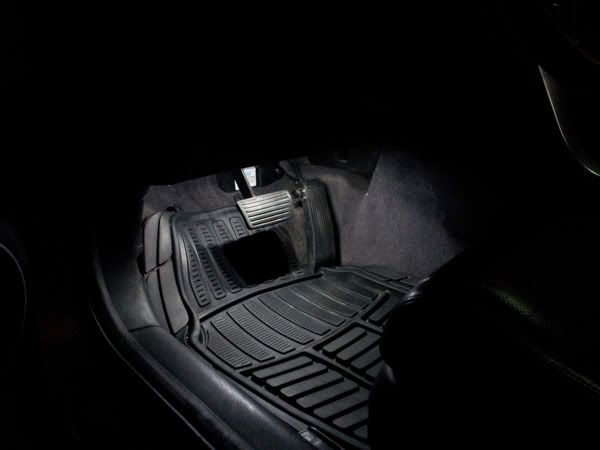
You guys HAVE to do this mod.
I can't imagine how dark it was without footwell lights.
Now I can see everything on the floor LOL
It's so cheap too!
Please excuse the picture quality...
My WX1 broke so I used my Galaxy S2 camera.
It doesn't even look like I have dome lights on LOL
I want my WX1 to come back =(
Also please excuse the non OEM all weather mats lol
Special thanks to Steven Bell who updates my threads and posts for you all to see!
You guys HAVE to do this mod.
I can't imagine how dark it was without footwell lights.
Now I can see everything on the floor LOL
It's so cheap too!
Last edited by guitarplayer16; 02-15-2012 at 08:43 PM.

The following users liked this post:
guitarplayer16 (02-15-2012)
02-15-2012, 08:53 PM
#16
10th Gear
I was considering doing this in blue and making them be on at night while driving, so do I just need to wire up the LEDs to the headlight fuse or do I need to do something different?
02-15-2012, 08:57 PM
#17
Race Director
Thread Starter
iTrader: (8)
02-15-2012, 09:09 PM
#18
Carpe Ominous
Final Results pictures are up!
Please excuse the picture quality...
My WX1 broke so I used my Galaxy S2 camera.
It doesn't even look like I have dome lights on LOL
I want my WX1 to come back =(
Also please excuse the non OEM all weather mats lol
Special thanks to Steven Bell who updates my threads and posts for you all to see!
You guys HAVE to do this mod.
I can't imagine how dark it was without footwell lights.
Now I can see everything on the floor LOL
It's so cheap too!
The following users liked this post:
guitarplayer16 (02-15-2012)
02-15-2012, 09:30 PM
#19
Race Director
Thread Starter
iTrader: (8)
Here's a video taken by my Galaxy S2
Click here for video!
That sound you hear while I was opening or after I was opening my driver door (I can't remember) was me stepping on the clothes hanger lol
Click here for video!
That sound you hear while I was opening or after I was opening my driver door (I can't remember) was me stepping on the clothes hanger lol
Last edited by guitarplayer16; 02-15-2012 at 09:35 PM.
02-15-2012, 10:51 PM
#20
Looks really nice. The only suggestion that I have is to try putting the rear LED strips under the bench seat instead of under the front driver / passenger seats. To me it looks somewhat cleaner and out of the way. Yours still look good regardless though!


Also can you post the link to the eBay listing that you bought your white ones from? Yours actually look 5k white.
The guy that I bought mines from turned out to be more 6k white. I have 5K V-LED interior lighting, and when I compare it to my rear LED strips, my LED strips look white with a hint of blue/feint purple. BLAH! I wanted 5K PURE WHITE
If you look at my WHITE ACURA ILLUMINATED SILLS and look at my rear seats, you can clearly see the difference in the WHITE compared between the two. I wanted something PURE WHITE to match my V-LED interior and my illuminated white sill, and not 6k white :/
Last edited by vietxquangstah; 02-15-2012 at 10:54 PM.
02-15-2012, 10:55 PM
#21
Race Director
Thread Starter
iTrader: (8)
That's always an option =)
I'll keep my rears under the front seat though since I love the light coming at the shoes and not from behind them lol
I'll mention your rear mounting position in my mounting portion of the DIY.
I want your mats!
I'll keep my rears under the front seat though since I love the light coming at the shoes and not from behind them lol
I'll mention your rear mounting position in my mounting portion of the DIY.
I want your mats!
02-16-2012, 12:23 AM
#22
takin care of Business in
iTrader: (5)
Join Date: Jan 2008
Location: Kansas City, MO
Age: 40
Posts: 30,994
Received 4,732 Likes
on
4,064 Posts
GREAT GREAT GREAT DIY GP....you made it look so damn easy 
The following users liked this post:
guitarplayer16 (02-16-2012)
02-16-2012, 06:53 AM
#23
Also can you post the link to the eBay listing that you bought your white ones from? Yours actually look 5k white.
The guy that I bought mines from turned out to be more 6k white. I have 5K V-LED interior lighting, and when I compare it to my rear LED strips, my LED strips look white with a hint of blue/feint purple. BLAH! I wanted 5K PURE WHITE
If you look at my WHITE ACURA ILLUMINATED SILLS and look at my rear seats, you can clearly see the difference in the WHITE compared between the two. I wanted something PURE WHITE to match my V-LED interior and my illuminated white sill, and not 6k white :/
 02-16-2012, 11:06 AM
#25
Intermediate
Like the set up. I always wanted to added this to my car but didn't want to pay someone to do it. I should be planning on doing this in the near future myself due to this DIY.
Thanks
Thanks

 02-16-2012, 12:09 PM
#27
Banned
You might wanna change the title to 04-06 TL's as the 07-08 come with footwell lighting. It's a very soft faint blue. Lights that bright would distract me at night tricking your pupils.
02-16-2012, 01:48 PM
#28
I have a 2008 TL and I also installed these footwell lighting. I call them courtesy lights because they aren't on when driving.
And you didn't read what GP said. How would these distract you at night if they aren't even powered on when you are driving? If you read, he clearly stated that they only come on when you unlock your car and open the door. They turn off once you are inside and stay off until you open the door to exit the vehicle.
Distracting? Not at all.
The following users liked this post:
AyFeltaTL (08-18-2012)
02-16-2012, 02:50 PM
#29
Race Director
Thread Starter
iTrader: (8)
Thanks dude!
I'm thinking in my head that I over explained everything.
My mine are pure white =)
The seller is ichigear.
http://www.ebay.com/itm/6-LED-Strip-...item5199db3fb9
Thanks Bauce!
It's very simple and I'm glad you'll find it useful!
Looks good dude!
Thanks for summing it up vietxquangstah!
I'm thinking in my head that I over explained everything.
Also can you post the link to the eBay listing that you bought your white ones from? Yours actually look 5k white.
The guy that I bought mines from turned out to be more 6k white. I have 5K V-LED interior lighting, and when I compare it to my rear LED strips, my LED strips look white with a hint of blue/feint purple. BLAH! I wanted 5K PURE WHITE
If you look at my WHITE ACURA ILLUMINATED SILLS and look at my rear seats, you can clearly see the difference in the WHITE compared between the two. I wanted something PURE WHITE to match my V-LED interior and my illuminated white sill, and not 6k white :/
The guy that I bought mines from turned out to be more 6k white. I have 5K V-LED interior lighting, and when I compare it to my rear LED strips, my LED strips look white with a hint of blue/feint purple. BLAH! I wanted 5K PURE WHITE
If you look at my WHITE ACURA ILLUMINATED SILLS and look at my rear seats, you can clearly see the difference in the WHITE compared between the two. I wanted something PURE WHITE to match my V-LED interior and my illuminated white sill, and not 6k white :/
The seller is ichigear.
http://www.ebay.com/itm/6-LED-Strip-...item5199db3fb9
Thanks Bauce!
The year of the TL has nothing to do with this thread. This thread is to inform anyone who wants to install footwell lighting into their TLs regardless of year.
I have a 2008 TL and I also installed these footwell lighting. I call them courtesy lights because they aren't on when driving.
And you didn't read what GP said. How would these distract you at night if they aren't even powered on when you are driving? If you read, he clearly stated that they only come on when you unlock your car and open the door. They turn off once you are inside and stay off until you open the door to exit the vehicle.
Distracting? Not at all.
 02-16-2012, 03:41 PM
#32
2007 Acura TL
Excellent Excellent write-up. I never gave much thought about doing this before. After reading your DIY I now have some ambition to do it. I think I will do my front footwell's in the spring. Undecided if I want to do the rear seats.
02-16-2012, 05:26 PM
#33
Race Director
Thread Starter
iTrader: (8)
No probs =)
It's really simple and cheap lol.
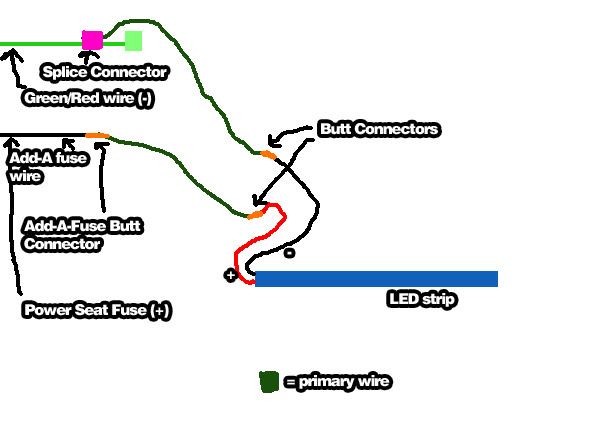
If I wanted, I could have simply just post the wiring diagrams that I made it; explains everything LOL
Mounting portion coming tonight!
02-16-2012, 07:58 PM
#35
Race Director
Thread Starter
iTrader: (8)
02-16-2012, 08:50 PM
#36
takin care of Business in
iTrader: (5)
Join Date: Jan 2008
Location: Kansas City, MO
Age: 40
Posts: 30,994
Received 4,732 Likes
on
4,064 Posts
^^^ clean your interior bro LOL....
02-16-2012, 10:13 PM
#38
Race Director
Thread Starter
iTrader: (8)
Man I know but its winter and gets dirty the next day lol
02-17-2012, 06:51 AM
#40

IM sure you could add some sort of capacitor inline or something. So when its on the CAP is charging and when you turn it off the L.E.D will drain the CAP giving it the dim effect, which is how factory does it. I could be wrong , but this was how I taught in lecture as well as in lab exercises when i was in school.